
0
$0
0 items
At SheShed we supply our cabins in either treated or untreated timber (and sometimes both options) – both of which have strong characteristics of durability and stability as they are made from the versatile Nordic Spruce Wood (See blog: What is Nordic Spruce). This is a denser timber that comes from the same family as pine, fir, and cedar. But what is the difference between untreated and treated timber and how can this affect you when you are buying and maintaining your own SheShed? This all depends on your budget, what you will be using your SheShed for, and what your personal preference is for the finished look and feel of your cabin.

Untreated timber has a beautiful finish and reflects the rustic aesthetic of wood straight from nature. It is just as strong as pressure treated timber and is easy to cut, drill and glue. Many people prefer its finish on the inside of sheds and buildings, as its light and natural feel has not been altered by chemical substances. It is also an inexpensive material to use as it has not gone through the treated process. Untreated timber is great in places where it is well protected so that there will be no risk to decay – such as internal walls. However, it can also be used externally, as long as it's finished with at least one coat of good primer and two coats of paint. Click here to learn about our recommendations for painting your SheShed.
Our untreated timber is all kiln dried by 14% - 16% in drying chambers, removing much of the natural moisture and sap, which helps to stop the wood from deforming, and gives it a higher resistance to insects and fungal risks compared to regular untreated timber. The kiln drying process ensures that the timber dries to a point where it reaches an equilibrium moisture content – meaning it can be stable in an indoor environment and will not easily absorb more moisture from the atmosphere. As weather conditions naturally expand and contracts the wood, we make sure that our building systems are developed in a way to make sure that the timber has enough room to contract and expand once your SheShed is built. However, you must thoroughly paint your untreated timber shed so that you get the maximum longevity from your cabin. The painting process ensures that untreated timber is protected and sealed against the weather and remains covered by our manufacturer’s warranty. As a finished product, untreated timber takes stain and paint more easily which makes it a great choice for those who want a smart polish or varnish coated floor on the inside of their SheShed - as the wood will more easily achieve the desired finish that you're after.
Once again, to maintain untreated wood in an outside environment, products such as polyurethane, natural wood treatments, shellac and wax products can all be used to protect the timber from everyday elements, but many of these have a more limited lifespan with more regular maintenance needed, which is why only a 3-coat paint system is required for our 5-year warranty to apply. Once your SheShed is built, the first primer/sealer undercoat will need to be applied to the outside right away as any exposure of water directly on the untreated timber may cause staining, warping, or even damage to the wood itself.
Our treated timber starts with the same kiln drying process as the untreated timber, but it then goes through a computer-controlled pressure treatment process. The premanufactured Nordic spruce timber is placed in a large pressure vessel where the air is sucked out, so the wood becomes enclosed in a vacuum. The vacuum chamber is then filled with the non-toxic chemical impregnating agent, and the pressure in the vessel is gradually increased so that the wood absorbs the agent to an H3.2 treatment level. This process ultimately changes the colour of the timber to be darker than the natural wood, but it has many benefits as the treatment protects the wood against rot, decay, insects and presents better resistance to any internal mould or fungus.
While it is more beneficial to use pressure treated timber, like any timber product it still needs care and maintenance, so we still recommend all our SheShed cabins get painted to maintain their longevity, and ensures your cabin remains under our warranty. If it does not get sealed with paint, treated timber can absorb moisture over time and is still subject to the effects of the sun drying and potentially cracking the timber. Pressure treatment is not a waterproofing solution on its own – so a quality painting system for your cabin is essential to protect your SheShed against the elements and significantly reduce its risks to damage. Our windows and doors do not go through the pressure treatment process and are instead spray-treated, but they must in the same way be regularly maintained to protect them from the sun and rain.
Overall, pressure treated wood is a very versatile product that can still be easily worked and maintained like its untreated counterpart, so the biggest benefit is simply that treated timber is more forgiving towards occasional neglect in its ongoing maintenance.
In conclusion, we try to provide our customers options for both types because both untreated and treated timber have their benefits; both must be protected from the weather elements, and both make great materials for building and enjoying your SheShed for potentially decades to come. The biggest difference is simply that treated timber is more forgiving towards any occasional neglect in its ongoing maintenance, (because any potential gaps in the painting that may open over time won't have the same level of risk for insects or decay).
In the end it comes down to your personal preference, so if you take care to properly maintain your wooden shed, just like you would for a timber house – you know you will have a great and solid cabin to enjoy for many years to come.
(SheShed receives no commission or affiliate/referral fee if you choose to purchase from the links in this article.)
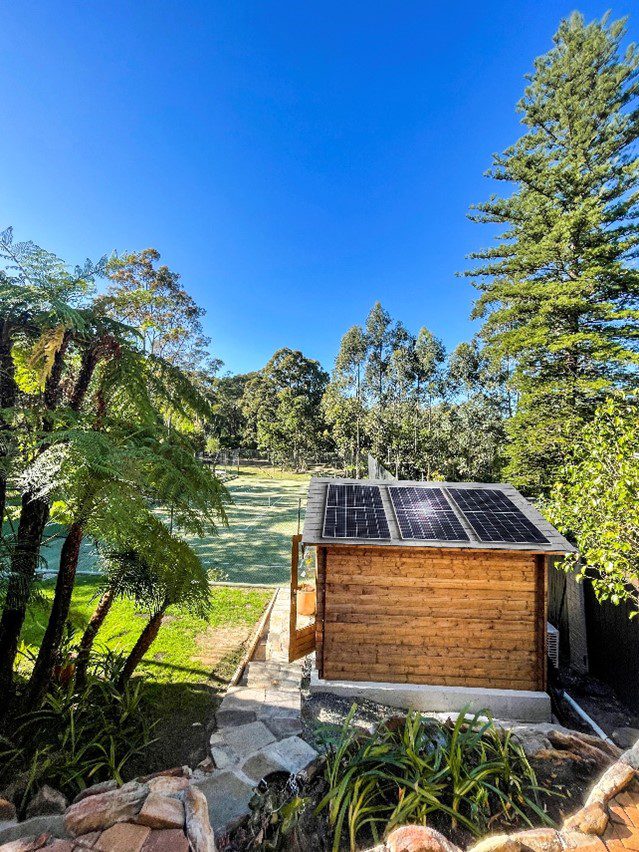
Adding solar power to your SheShed is a clever choice for providing low-cost renewable energy to your kitset shed for the next twenty-plus years. Solar is low maintenance, generates no carbon emissions, and saves money on your electricity connection and monthly power bills.
Pricing varies depending on what you want to power and when. If you're only looking to power a few lights and maybe a laptop in a small shed like the Star Cabin, the solar kit could cost as little as $1,500 (excluding installation).
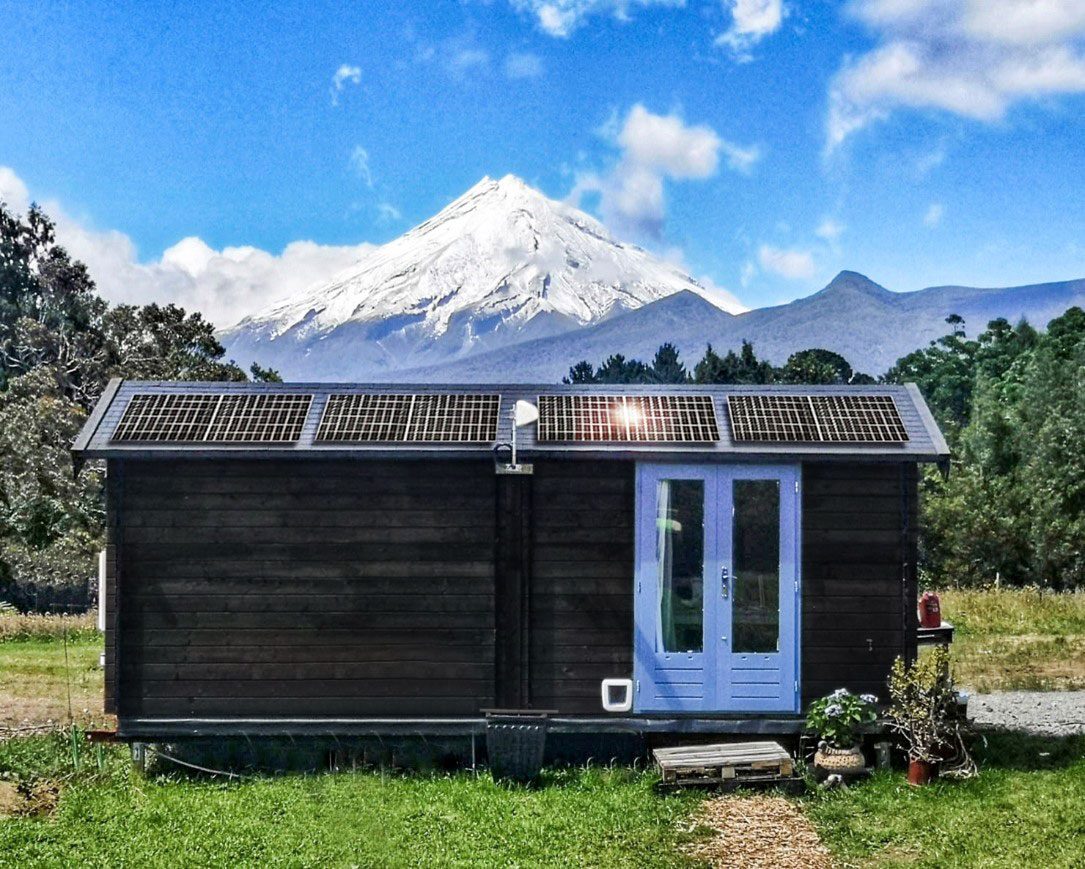
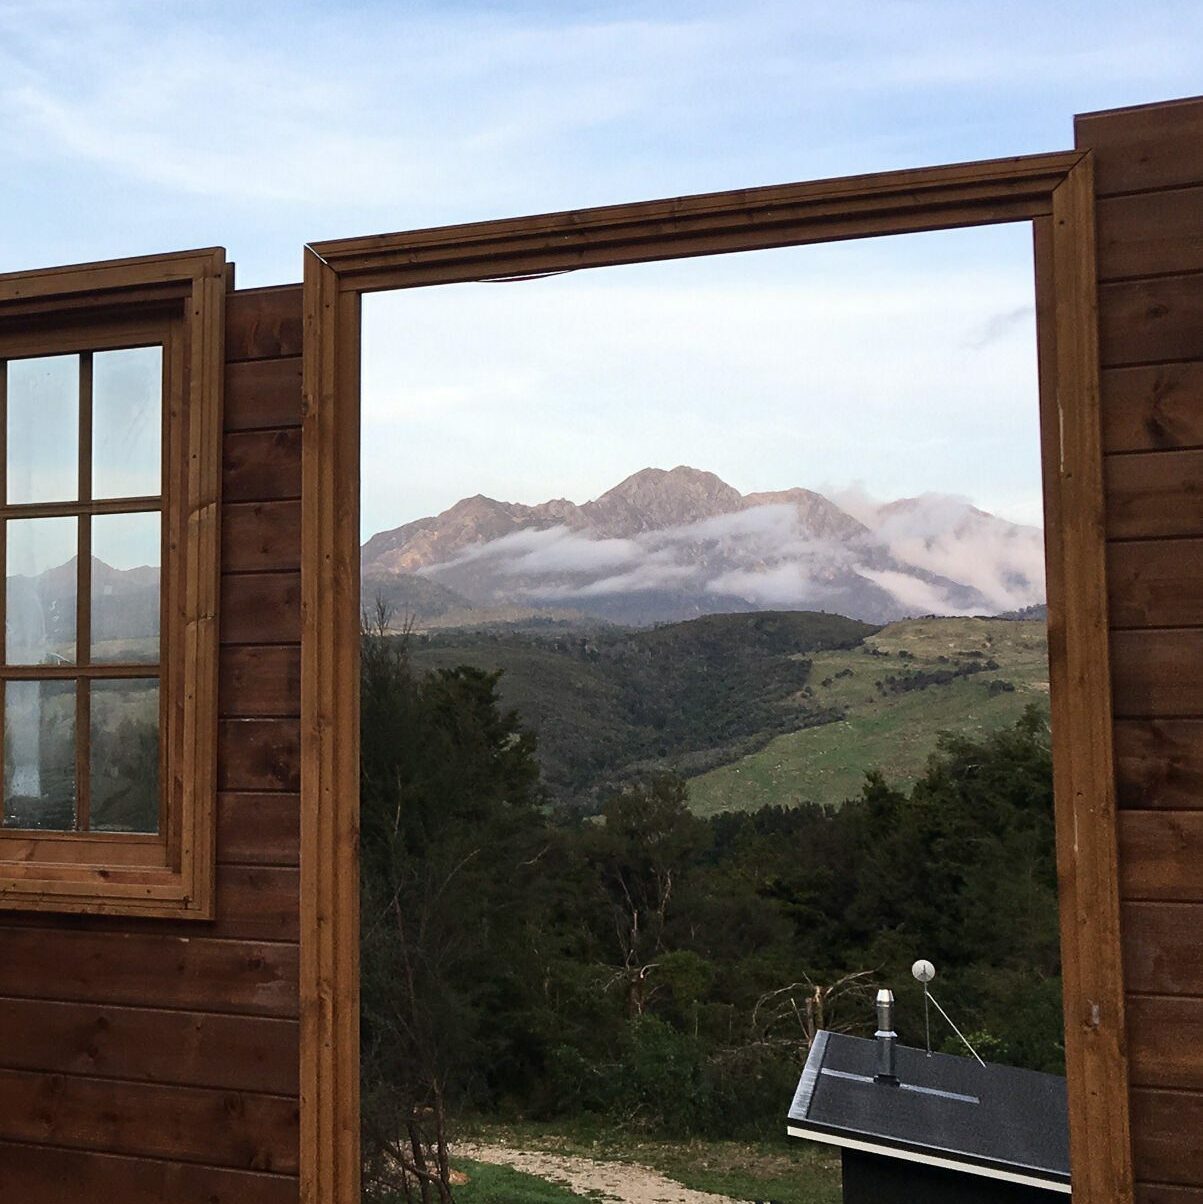
However, if the SheShed is in a remote location and more power is needed like for a Tiny Home, an NZ$11,000 Off-Grid Solar Kitset is likely a great option. For example: The Waihi Kitset from AA Solar NZ (External link. Opens in a new tab), is suitable to power: LED lights, a small under-bench fridge (like an energy-efficient option from Dometic), an energy-efficient TV, a small washing machine and other small appliances with power ratings under 1000W. It even provides a day of backup power for those dark and stormy days with little visible sunlight.
Unsurprisingly, solar electricity is all about access to daylight. Solar panels need unobstructed access to light, without shading from trees and buildings. The ideal configuration is a North-Facing Roof with a 40 to 55-degree pitch (the ideal pitch is impacted by latitude). Still, many different configurations are highly successful as some solar panels are viable on roofs with anything more than a 3-degree pitch. All SheShed kitsets range from 6 to 26-degrees, with our most common sheds in the Star, Cabana, and Ranch all being at least 21-degrees, making them good options for solar panels.
What is less common knowledge, is that with the right setup, solar panels can generate electricity even on dull and rainy days! Overall, to get the most out of your setup, solar works best when combined with gas cooking and hot water, and energy-efficient appliances.
Solar is not a great option if your SheShed is nestled under trees, in a deep valley with limited/reduced daylight exposure, or if it has a purely Southern aspect. The intensity of your power draw requirements also impacts suitability. For example, you would not use solar to power high-draw appliances like a pottery kiln or an induction oven.
There are a variety of different solar installation options available; The simplest and most cost-effective option is to install solar panels on your SheShed roof, keeping in mind that your power generation is limited to the size and number of solar panels that can fit on your roof area. 90% of the time a SheShed roof is excellent, but if you are looking for more power or if your SheShed roof is impacted by shade, the Solar Panels can be installed on a neighbouring roof such as your home or garage, or if there is no suitable roof space, they can be ground mounted.
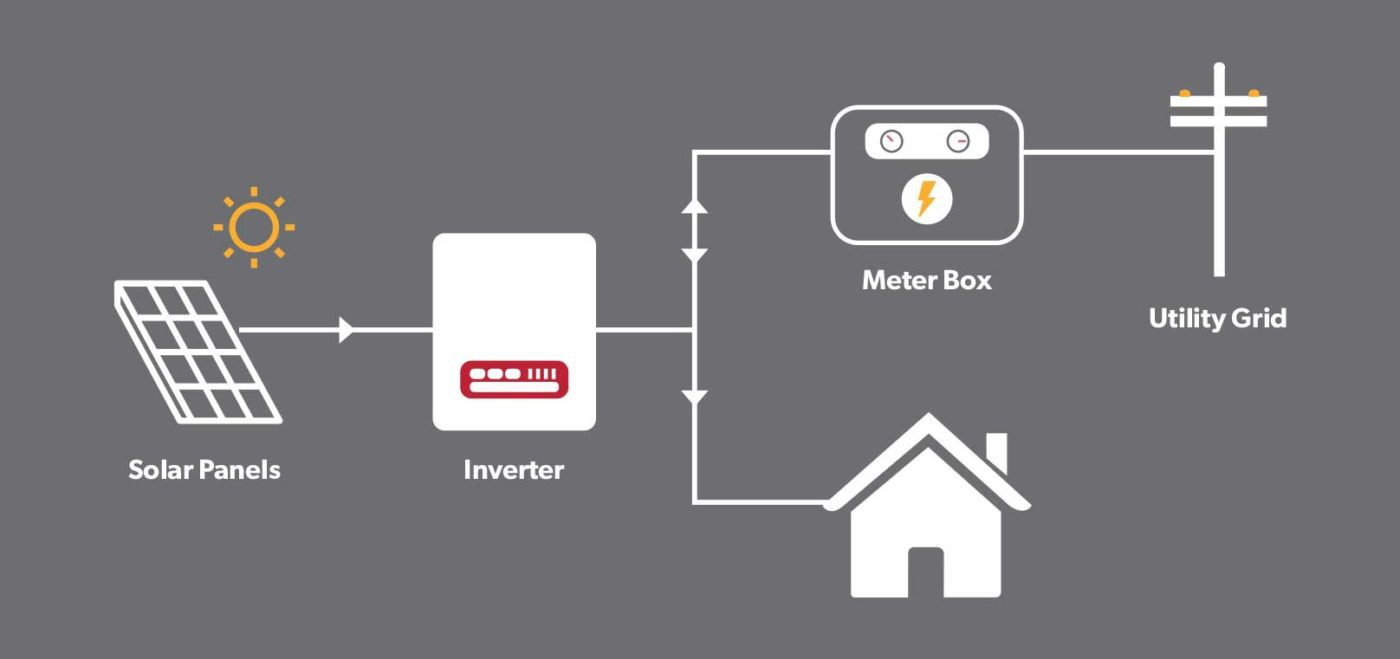
1. Grid-Tied Solar Systems
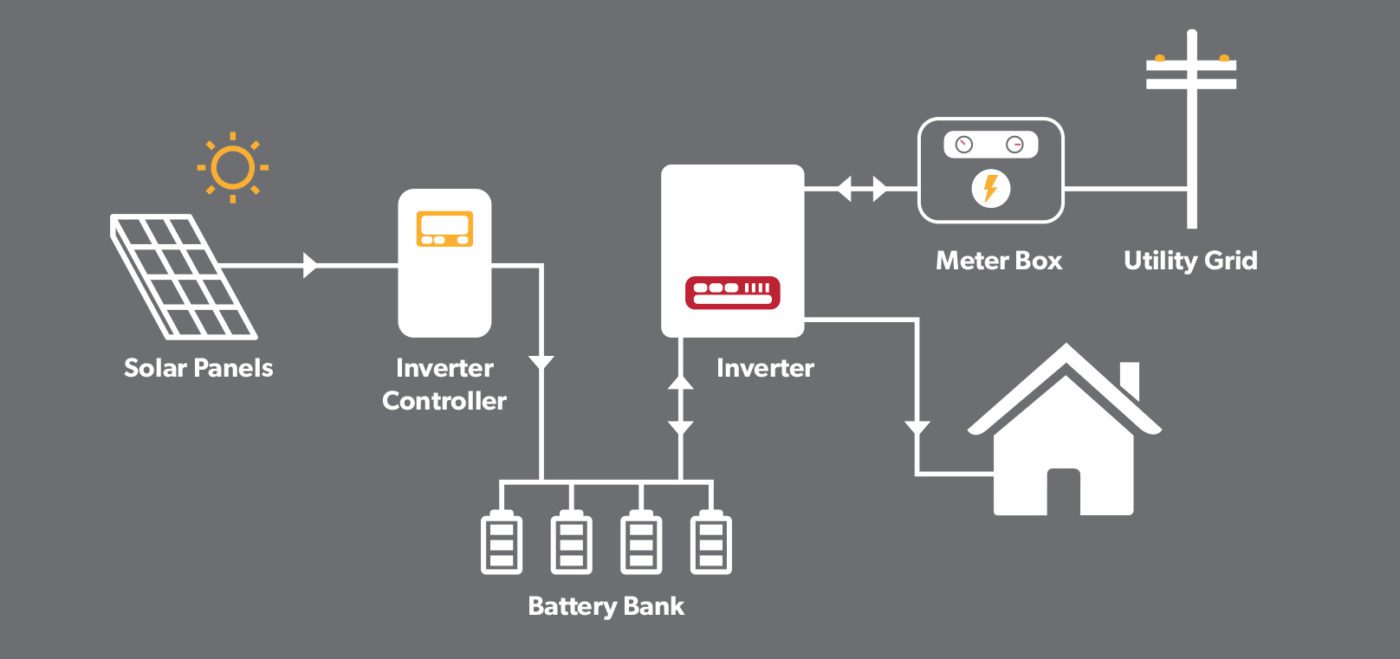
2. Hybrid Solar Systems
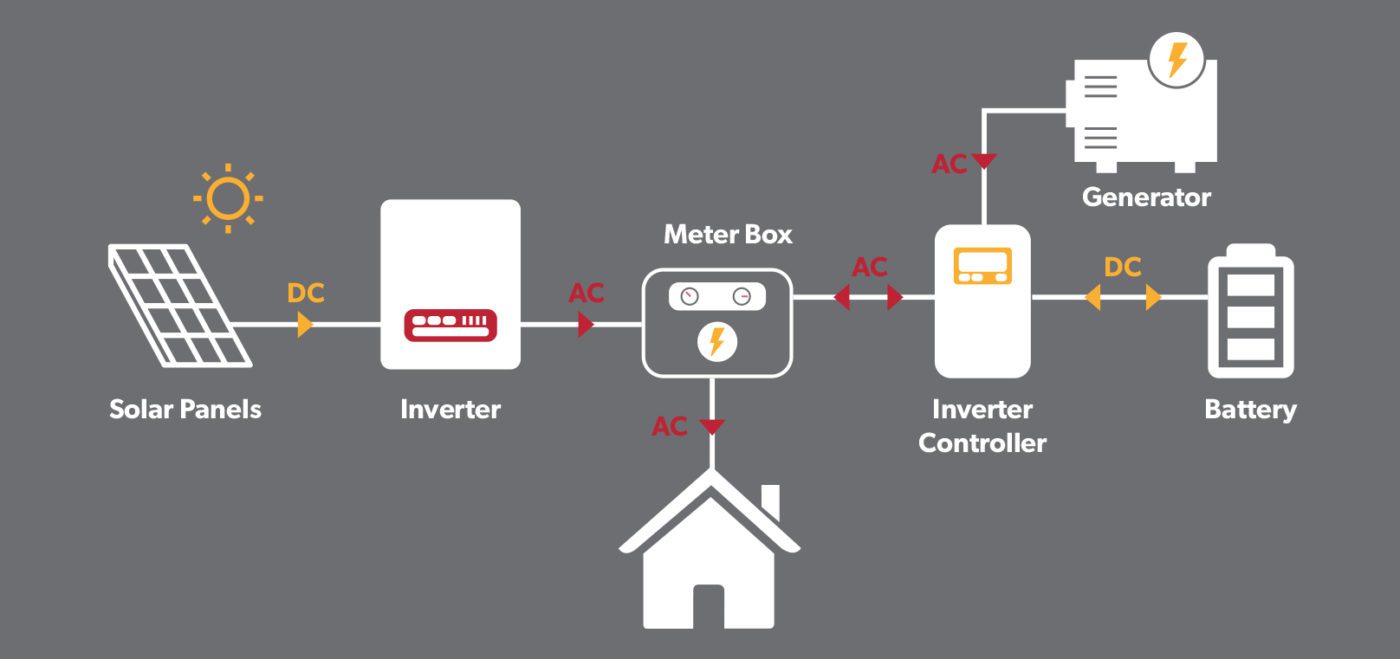
3. Full Off-Grid Systems
Which solar powered option is best for you depends on when and what you use your SheShed for, and on the availability of grid power at your shed location. Let's look at each of these options a little more...
Grid-Tied Solar Systems are the cheapest option because additional electricity is drawn from the Grid instead of batteries when solar energy is insufficient. A Grid-Tied Solar System is an excellent option if you use the SheShed mainly during the day as a home office or art studio and have ready access to Grid Power. However, if you have power outages or want to use the SheShed at night, a Hybrid option is worth considering, particularly if you would like to reduce monthly power bills even further.
Click here for more info about grid-tied solar systems from AASolar.
(External link/Opens in a new browser tab)
Hybrid Solar Systems use a combination of Solar Power, Batteries and Grid Power which means using solar power day and night while having the security of Grid Power when your power needs are high or during prolonged periods of dark stormy weather. The great thing about a Hybrid System is that it can be programmed to provide emergency power when the Grid goes down for a few essential appliances. We often see this option for Granny flats, teenage retreats and home businesses.
Click here for more info about hybrid solar systems from AASolar.
(External link/Opens in a new browser tab)
Off-Grid Systems provide the ultimate freedom where your SheShed location is not constrained by access to the electricity grid. And best of all, you will never get a power bill and will be completely unaffected when the Grid goes down. For anyone planning on living in their SheShed year-round, your Solar Specialist is likely to recommend a Solar System that includes up to 4 days of autonomy using battery power and potentially a backup generator. To ensure you have electricity even during the darkest/stormiest of weather.
Click here for more info about full off-grid solar systems from AA Solar.
(External link/Opens in a new browser tab)
Although the principles of Solar Energy are simple and the ongoing management and maintenance of a system are minimal, it is vitally important to ensure a quality system is specified and installed.
There are many companies who offer solar power sales and instalation in both Australia and NZ, so when it comes to selecting a solar provider, here are four great points to keep in mind when you're talking to a potential provider:
1. Proven Longevity – Check that the company has been in business for a long time. You want a supplier who lasts as long as the product they supply. (A good solar system will last over 20 years!)
2. Solar Specialist – Your local electrician’s experience and training have almost exclusively focused on supporting traditional Grid Power; even if they have installed solar before, their experience is not comparable to a specialist solar company.
(It usually costs no more to go to a dedicated solar company and get the very best advice and solar system within your budget.)
3. Bespoke Solution – A correctly specified system should be designed based on your specific power needs and the location of the SheShed.
Ensure a qualified Solar Engineer creates your system and that you are not buying an off-the-shelf solution that may leave you underpowered.
4. Breadth of Experience – Ask if the Solar Company offers: Grid-tied, Hybrid, and Off-Grid Solar Systems that can be roof or ground-mounted.
By asking about the breadth of their experience, you will know they can recommend a solution that is right for you, (not just the best solution within the options that they sell).
For our New Zealand customers, we suggest having a talk with the team at AA Solar. They are bespoke Solar Specialists who have been specifying and installing solar instalations for over 30 years. If you are looking for more information, you can click here to check out their website or call them at (09) 887 9767.
If you're just starting to build your SheShed cabin kitset or have been using it for a while and want to add power, this blog post is for you. Power is great for helping your home office, studio or guest house, become a functional and beautiful space to use.
In this blog post, we'll go over the different ways you can add power to your timber cabin and what each option has to offer. Whether you're looking to install lighting features, power plugs, or something else entirely. Adding power is a relatively easy task and can be done in just a few steps.
Keep reading for instructions on how to get your SheShed up and running!
Our cabins don’t come with power installed, they come as a kitset structure only, giving you the ability to install lighting & add power in the best location for your layout.
Yes, absolutely! 99% of our clients get power installed in their cabins, we don’t recommend that you attempt this yourself (Unless you’re a qualified electrician). So once you have decided where you would like your lights & power outlets, we recommend engaging a local contractor to carry out your installation. For larger & more complex requirements, you may choose to engage an electrician before or during your construction, to make the installation easier.
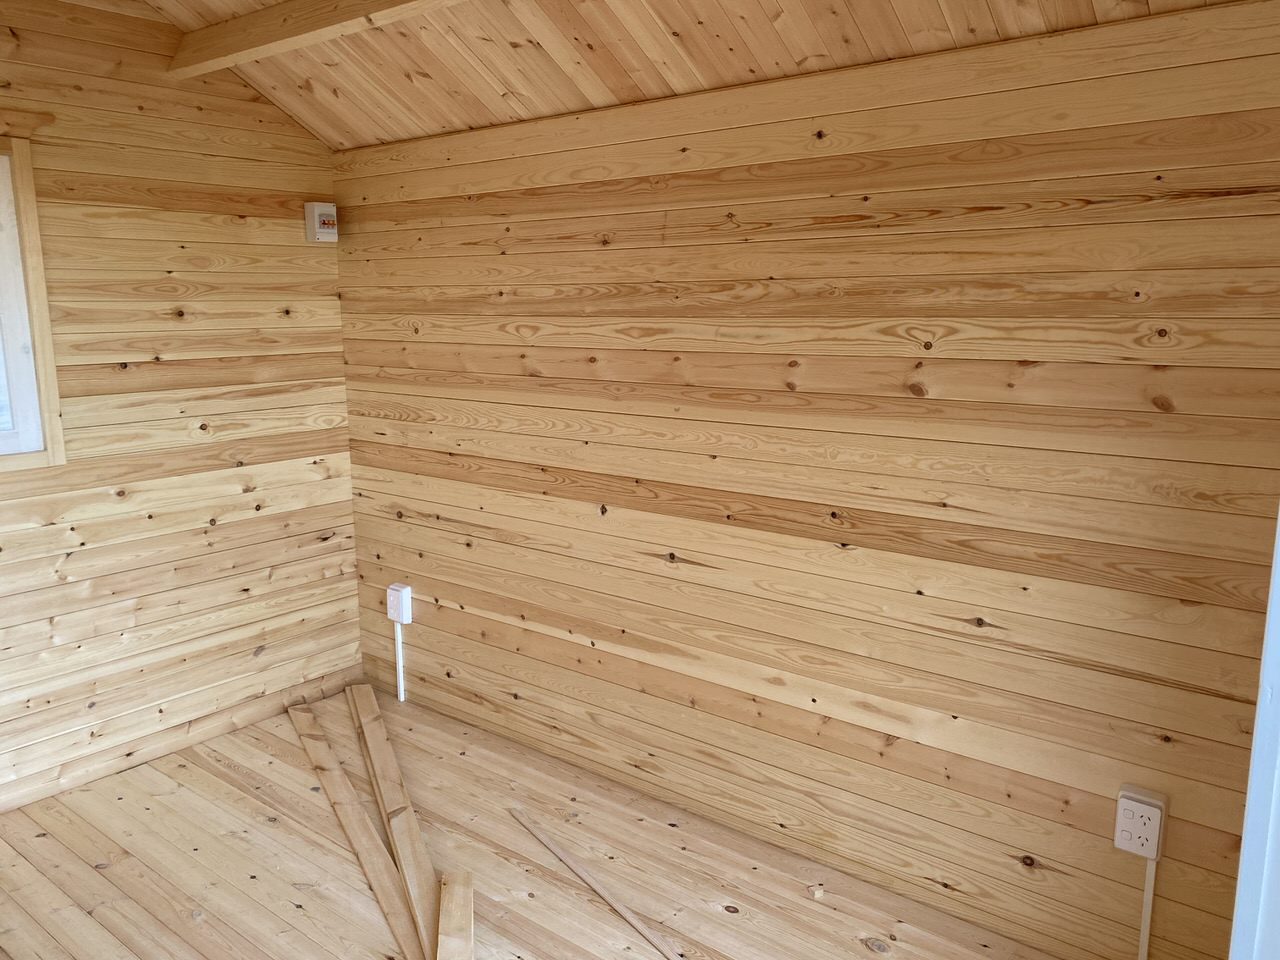
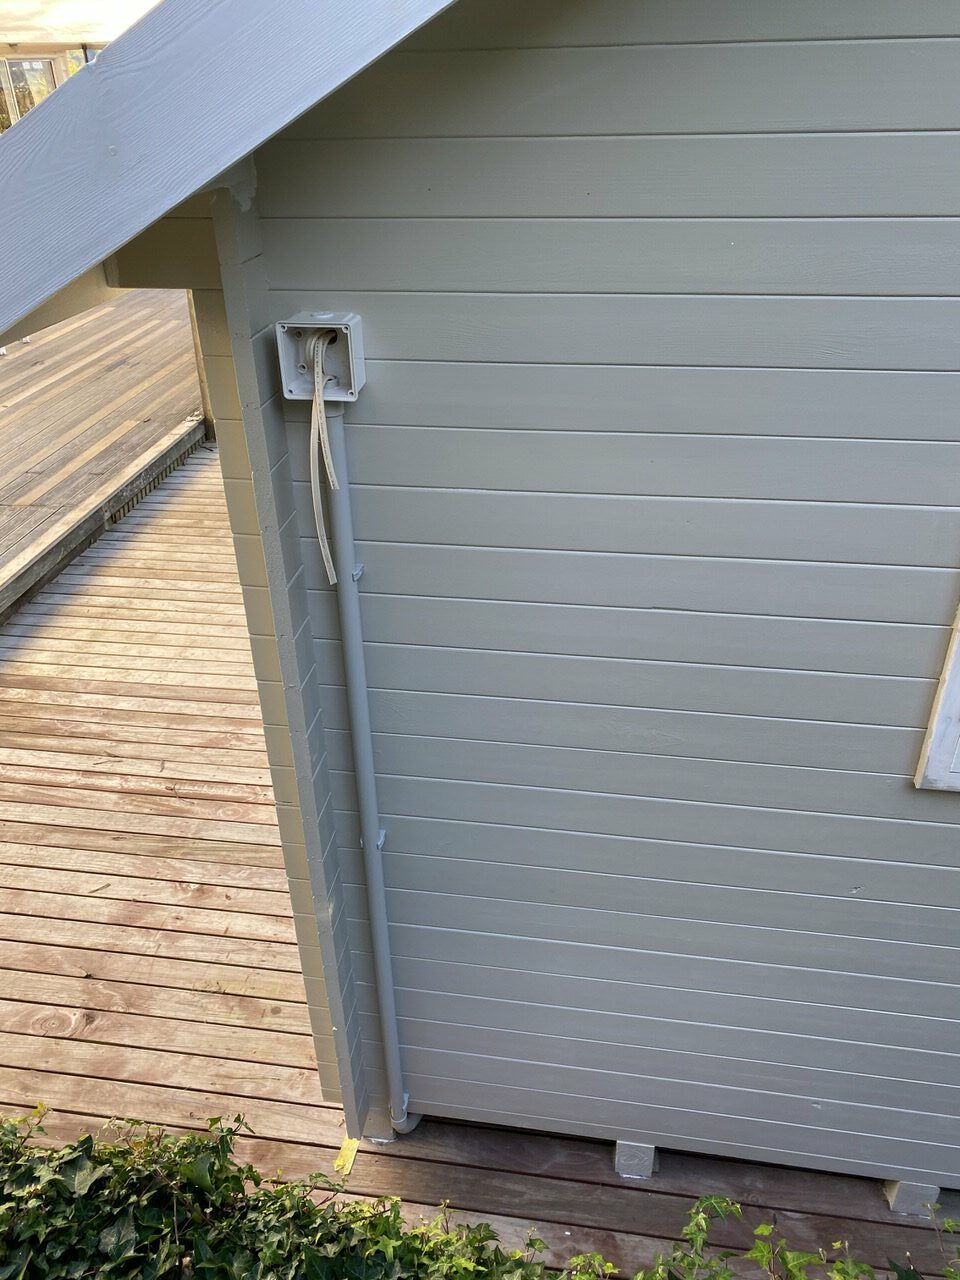
Sheshed cabins unlike your standard house construction don’t typically come with a wall cavity as the wall logs are all made from solid timber, so most of your cabling will need to be installed using conduits installed on either the internal or external of the structure. If your cabin has been built on an elevated platform, most of the cabling can be installed beneath the floor. We also recommend installing the conduits up the wall in the least visible position i.e.. If the back wall or one of the side walls of the shed is tucked away & not visible, this may be the best location to run the conduit for the lighting up the outside of the wall or placing the conduits in the least visible corner of the shed when you first step through the door to keep your cabin looking beautiful.
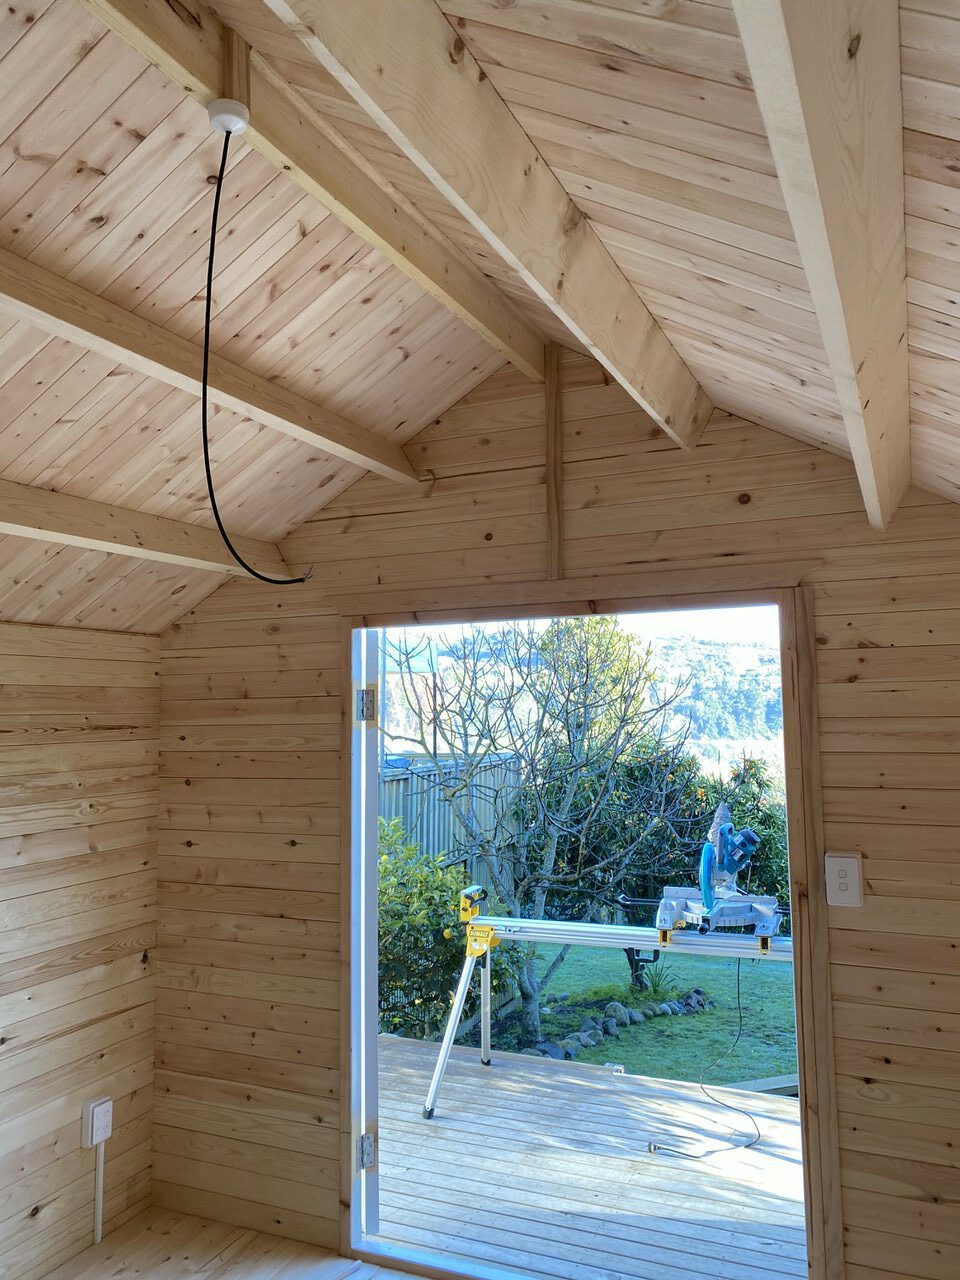
Most of our clients install the power & lighting after the construction of the cabin is completed. For larger & more complex requirements, you may choose to engage an electrician before or during your construction, to make the installation easier.
It’s a great idea to do a sketch of how you plan to set your cabin out once completed, the ideal location for your appliances or lighting requirements & then work together with your electrician to get the finished result just as you had anticipated when you set out on your cabin journey.
If using square trunking conduit, we recommend slotting the holes where the conduit is fastened to the wall to allow for the natural movement of the walls behind or if using saddles to fasten the conduit in place ensure that any saddle clips and are not screwed too tightly preventing movement as required. We always recommend not installing conduit tightly between the ceiling & the floor or between the ceiling beams and the top of the door frame as this can cause unnecessary tension to the conduit or the building components.
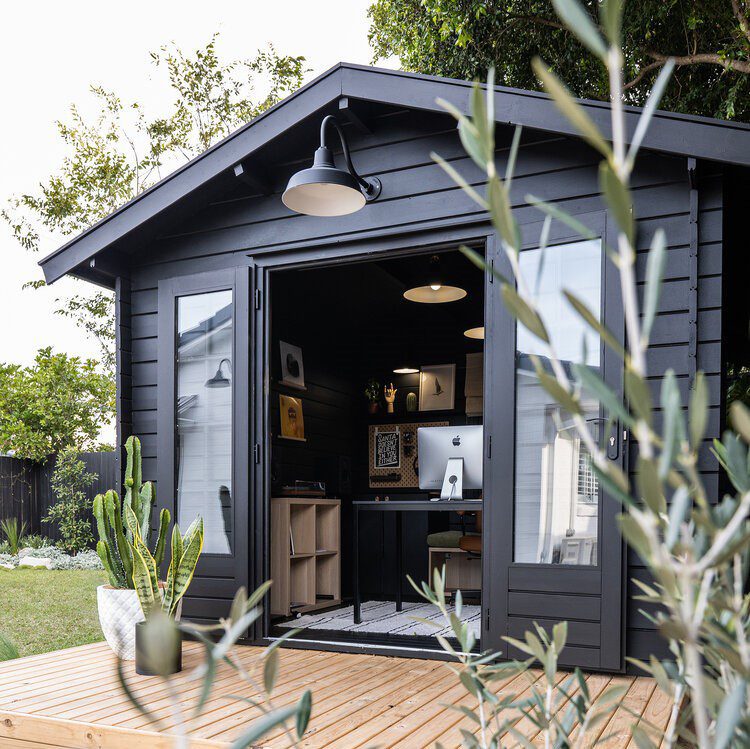
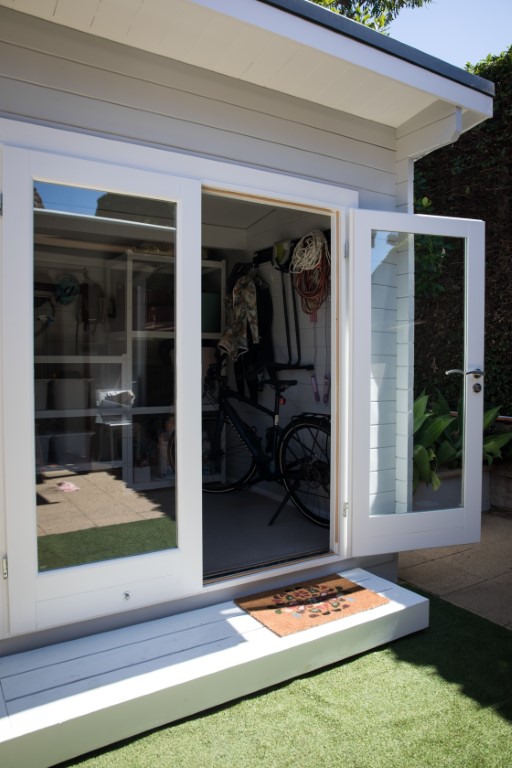
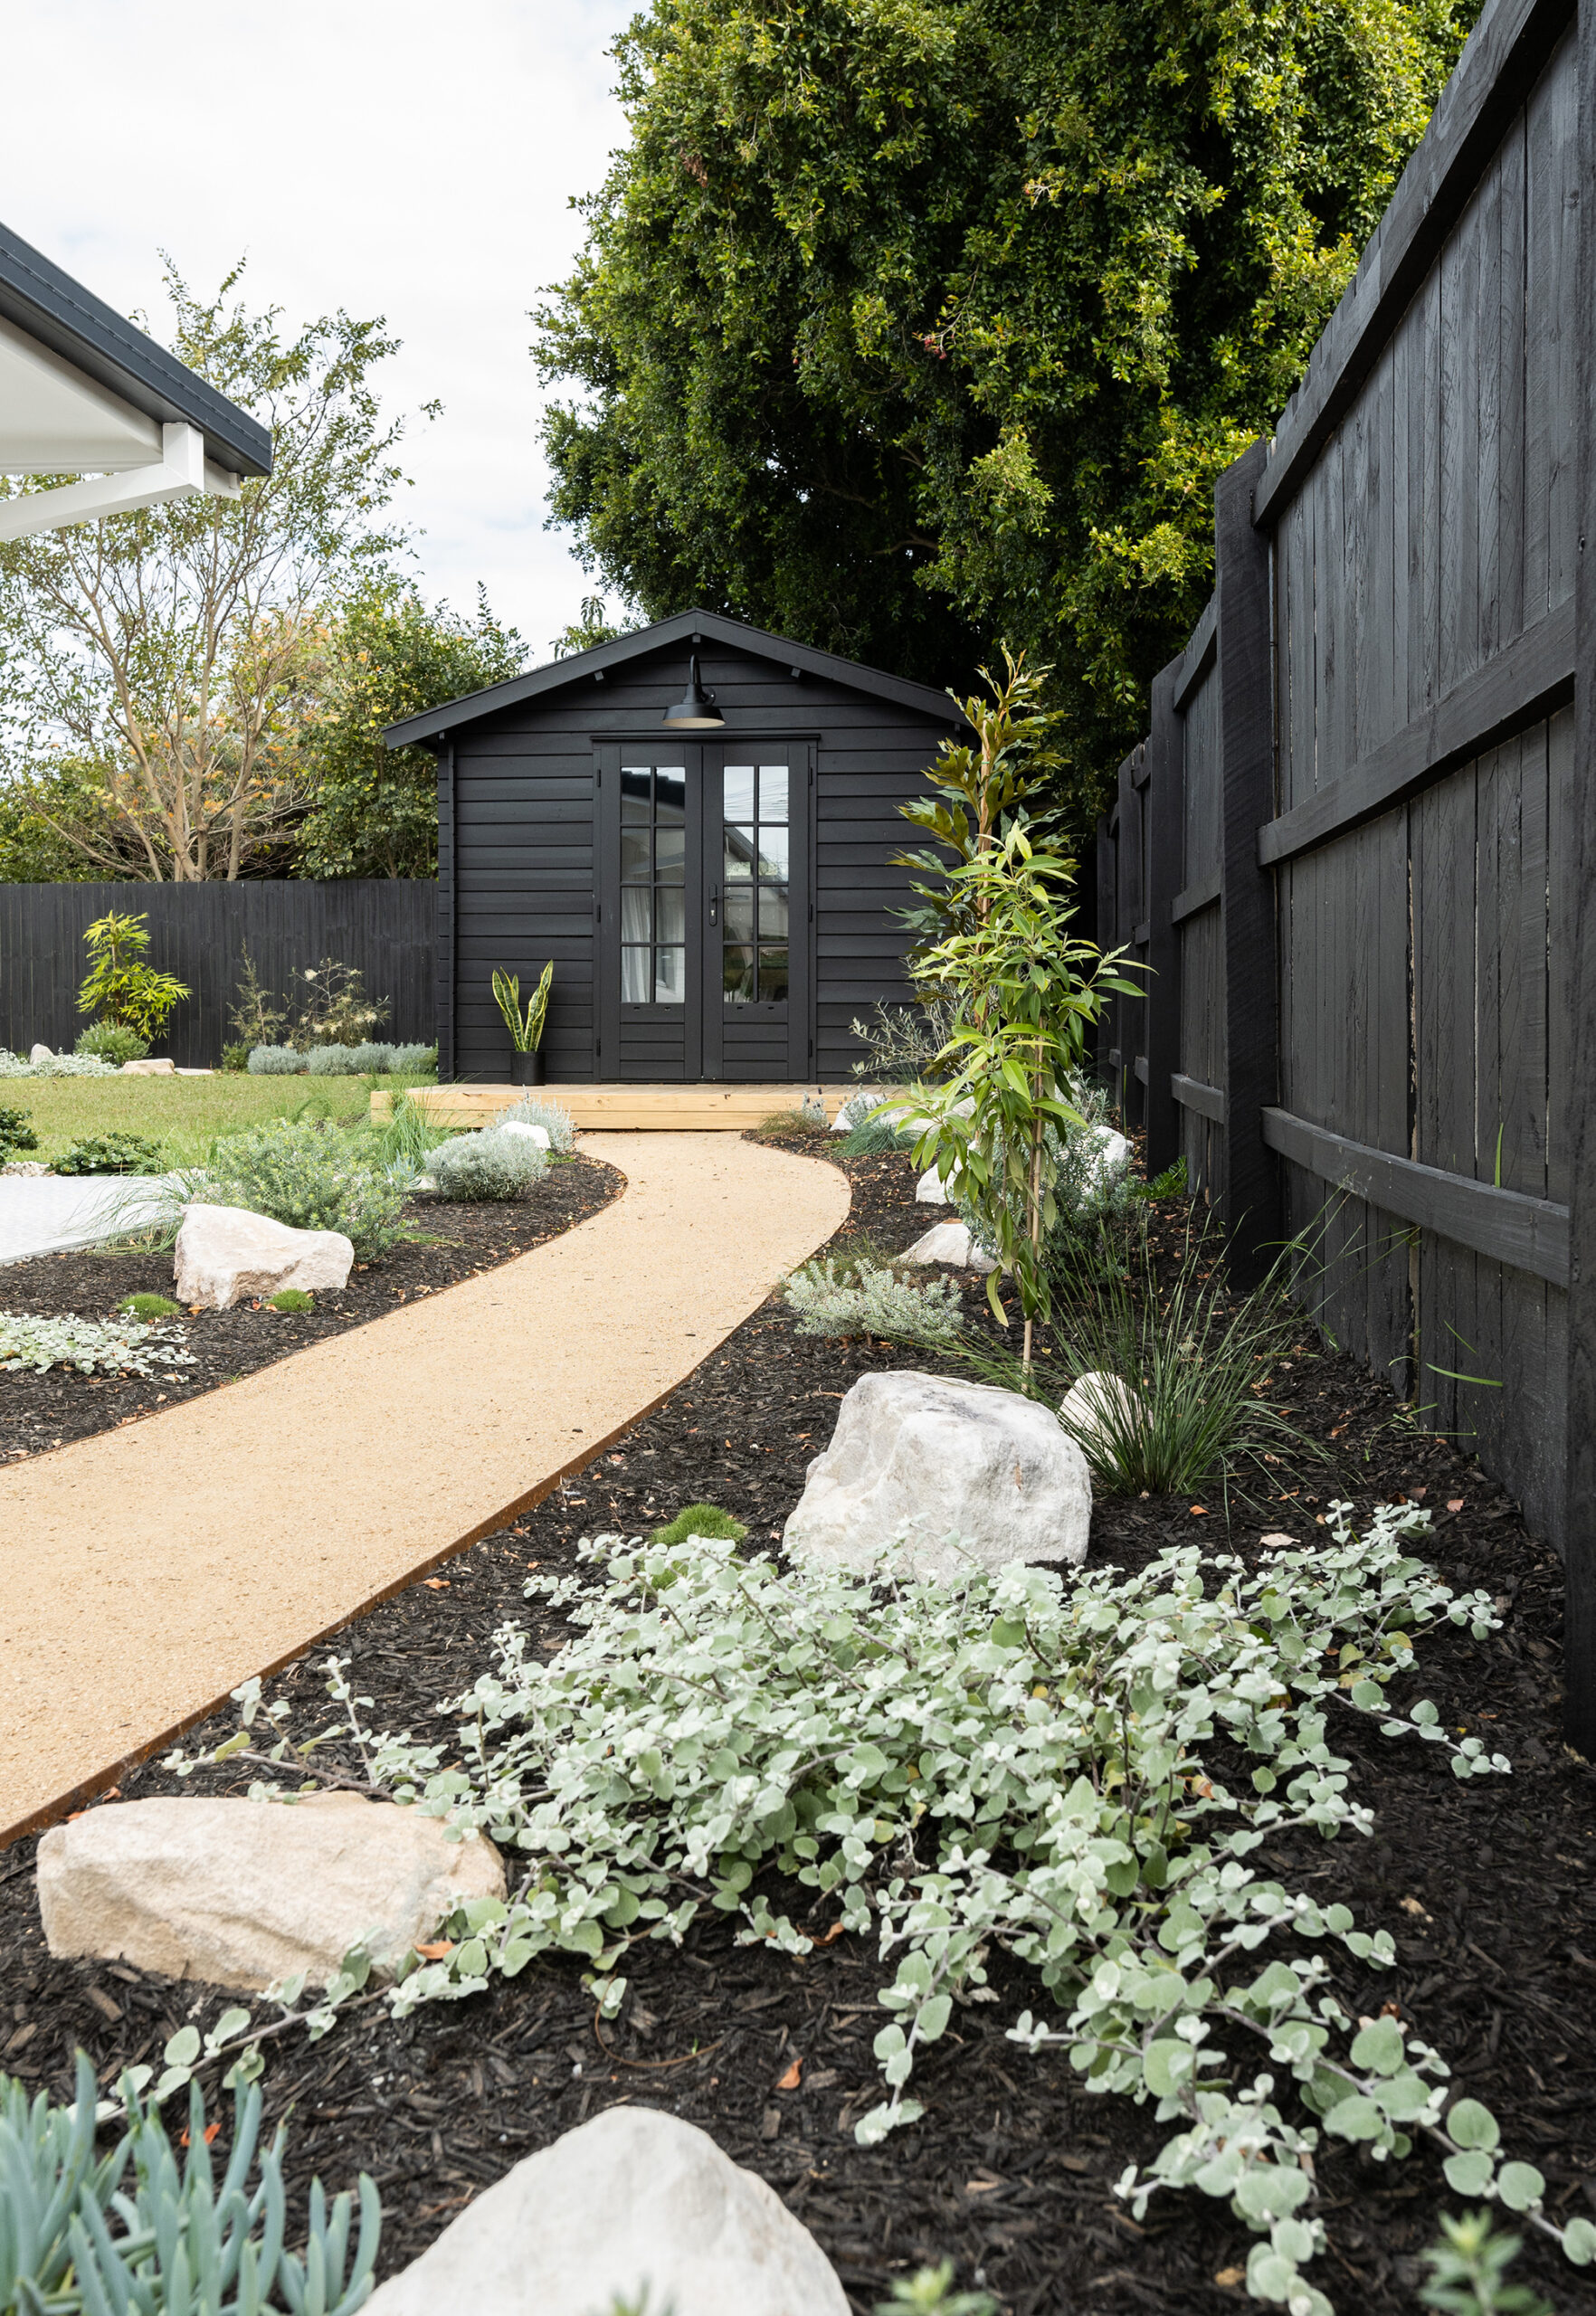
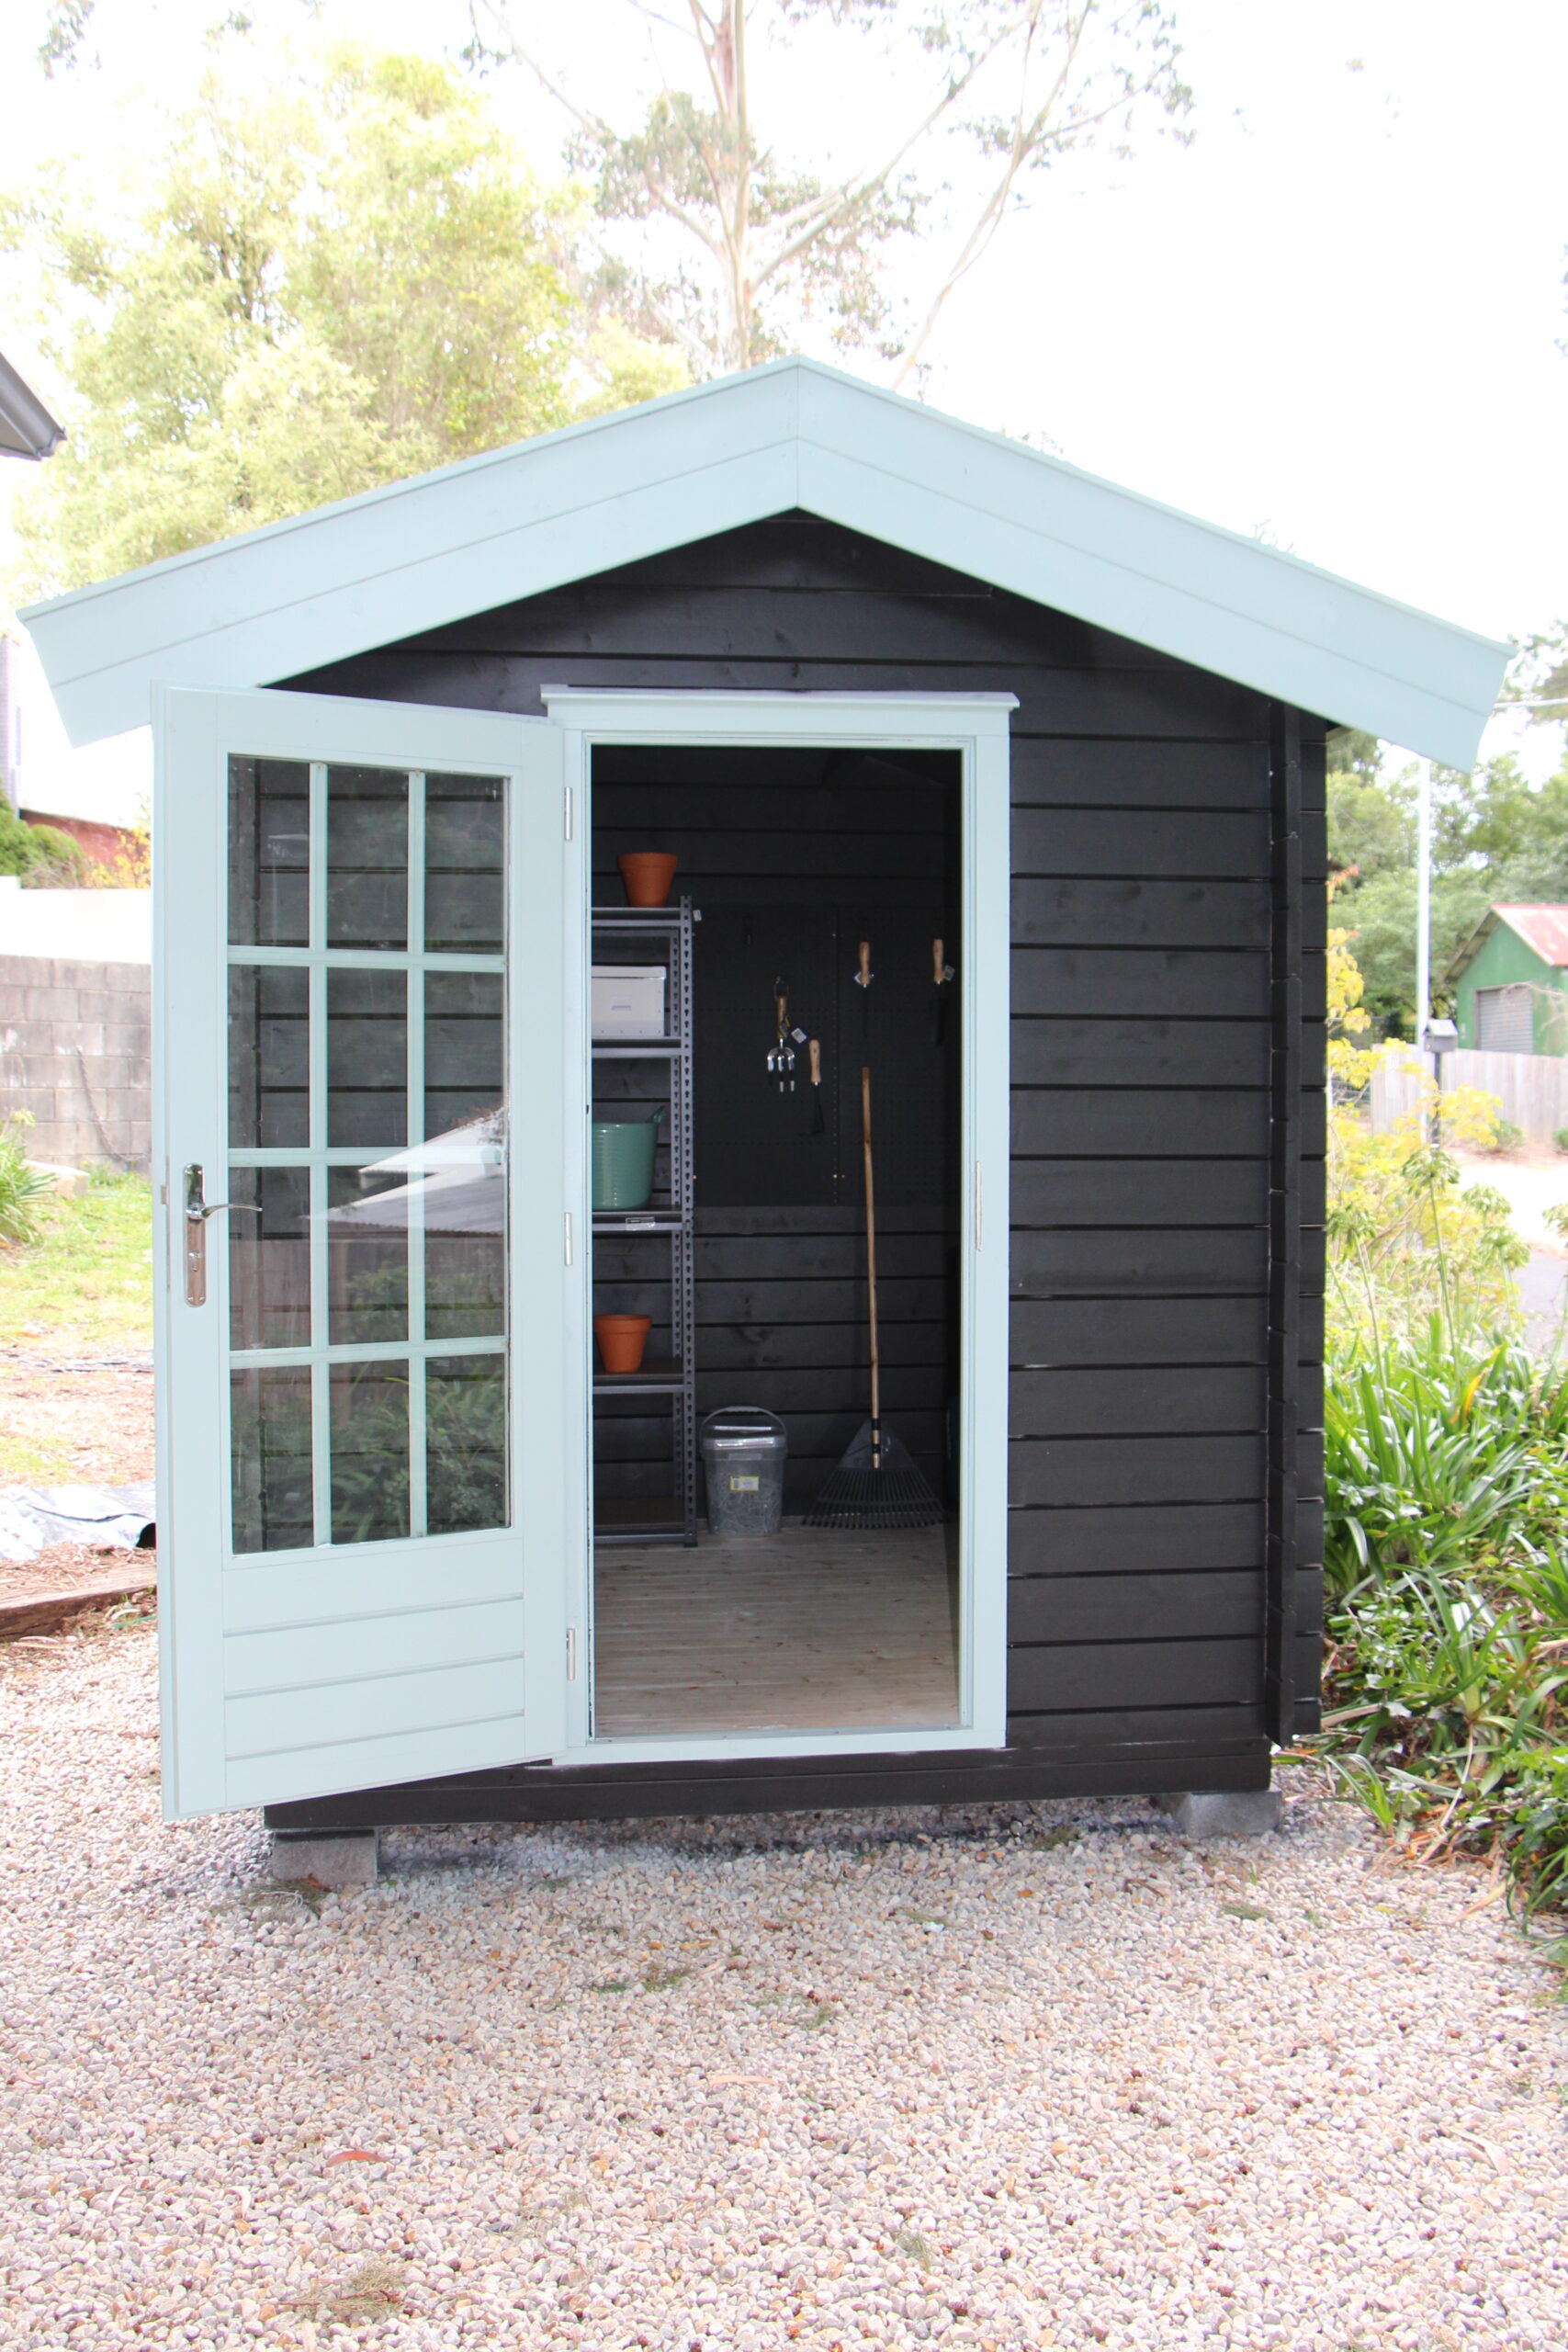
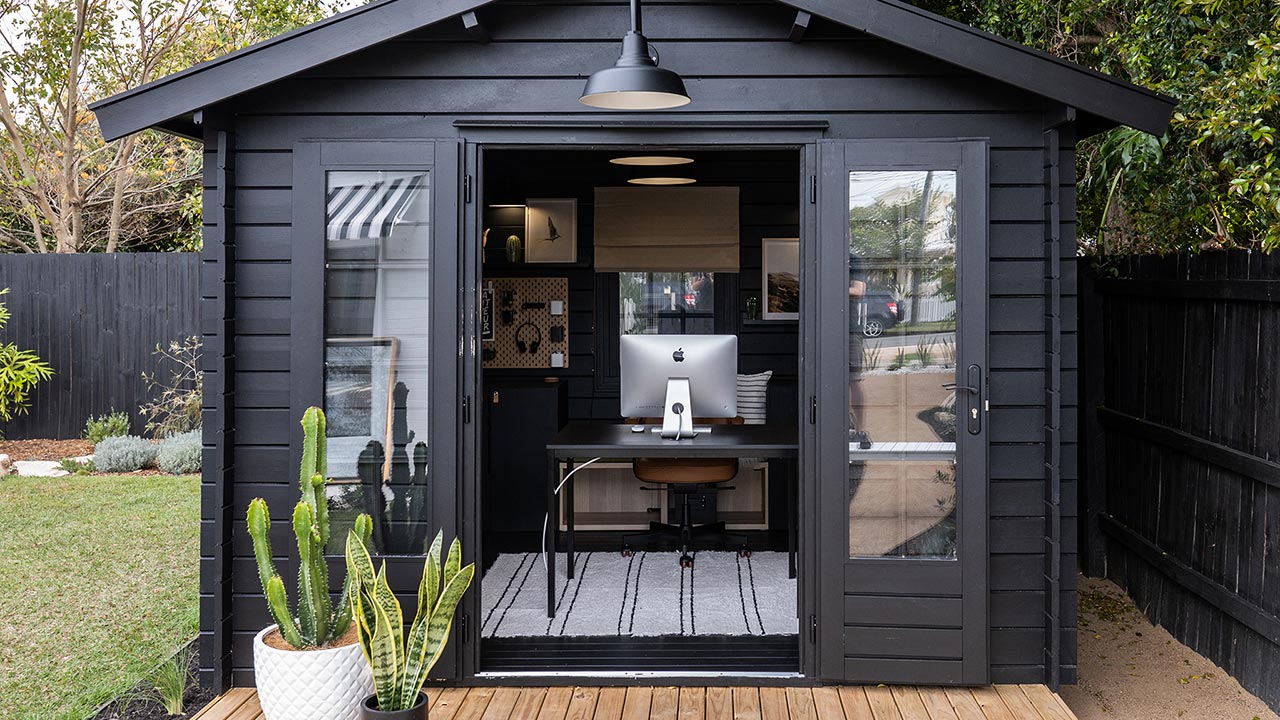
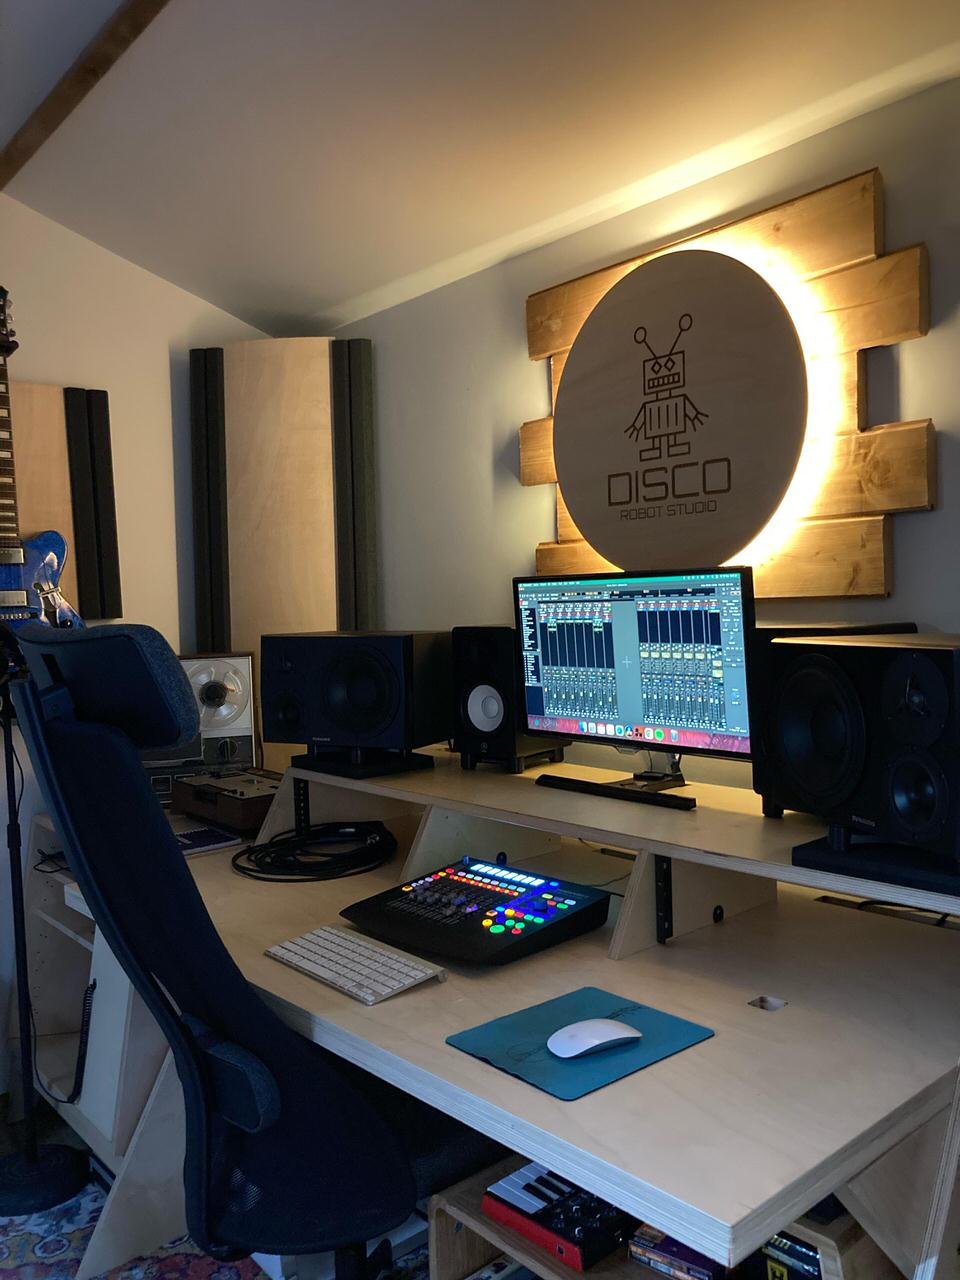
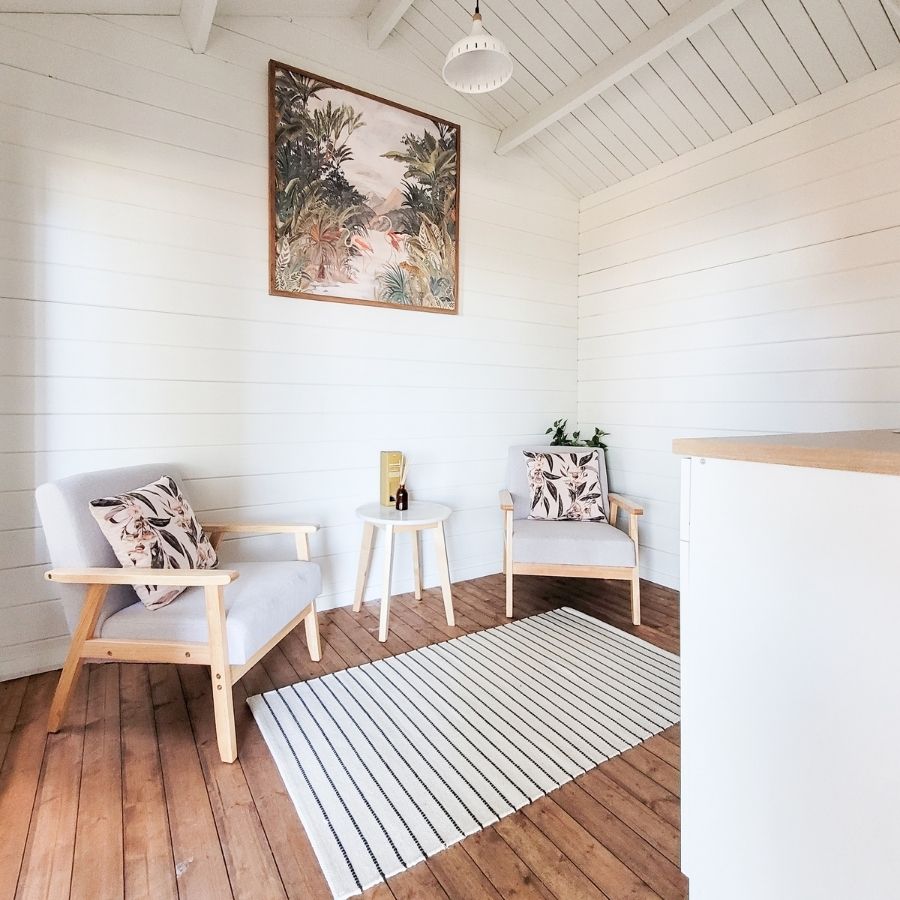
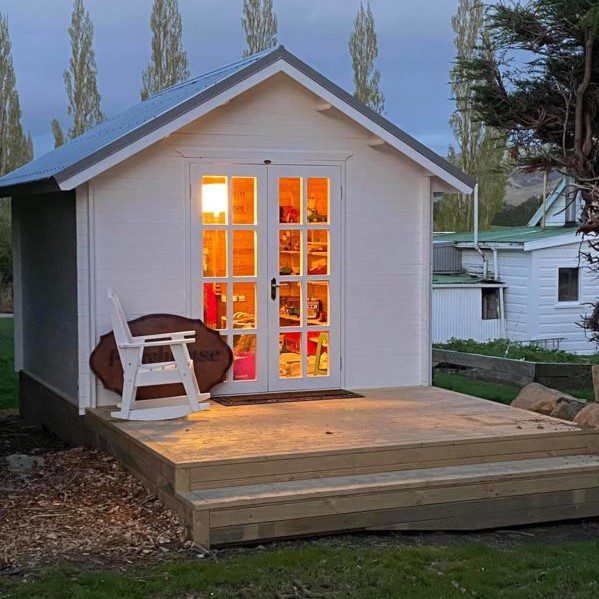
Mark & Loni's Black Barn Home Office, features lighting from Barnlight Australia both on the exterior and interior of their Star Cabin Kitset.
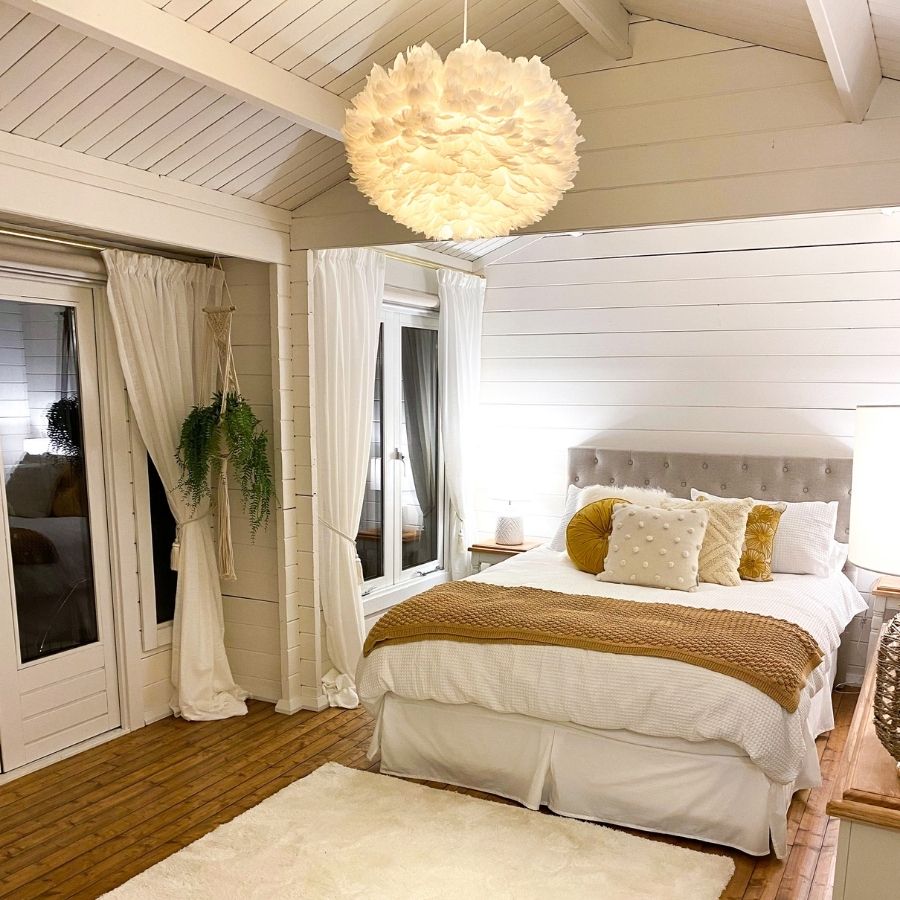
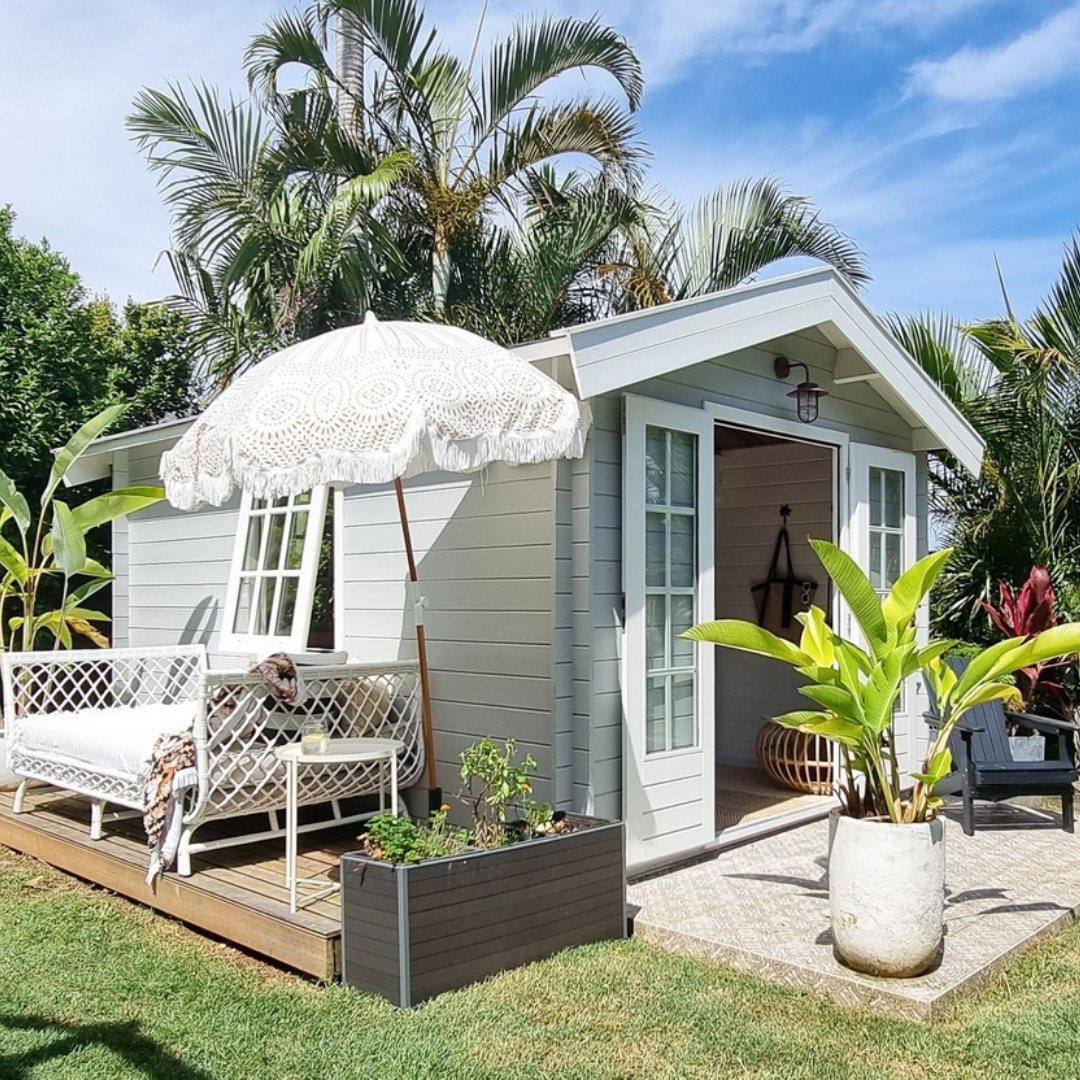
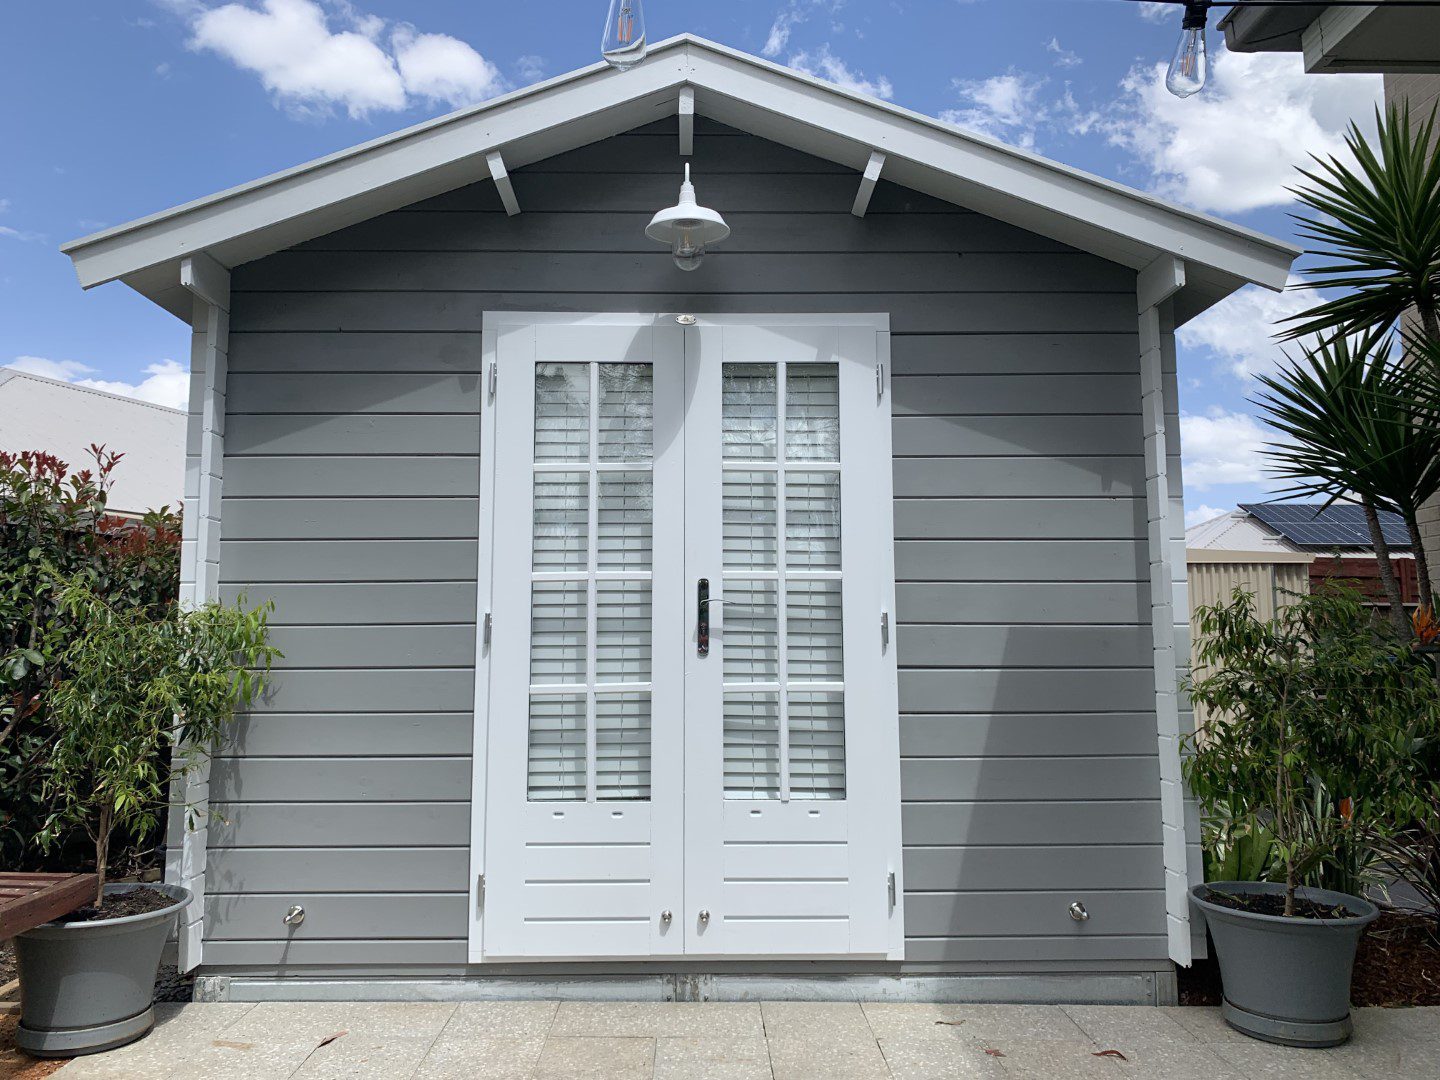
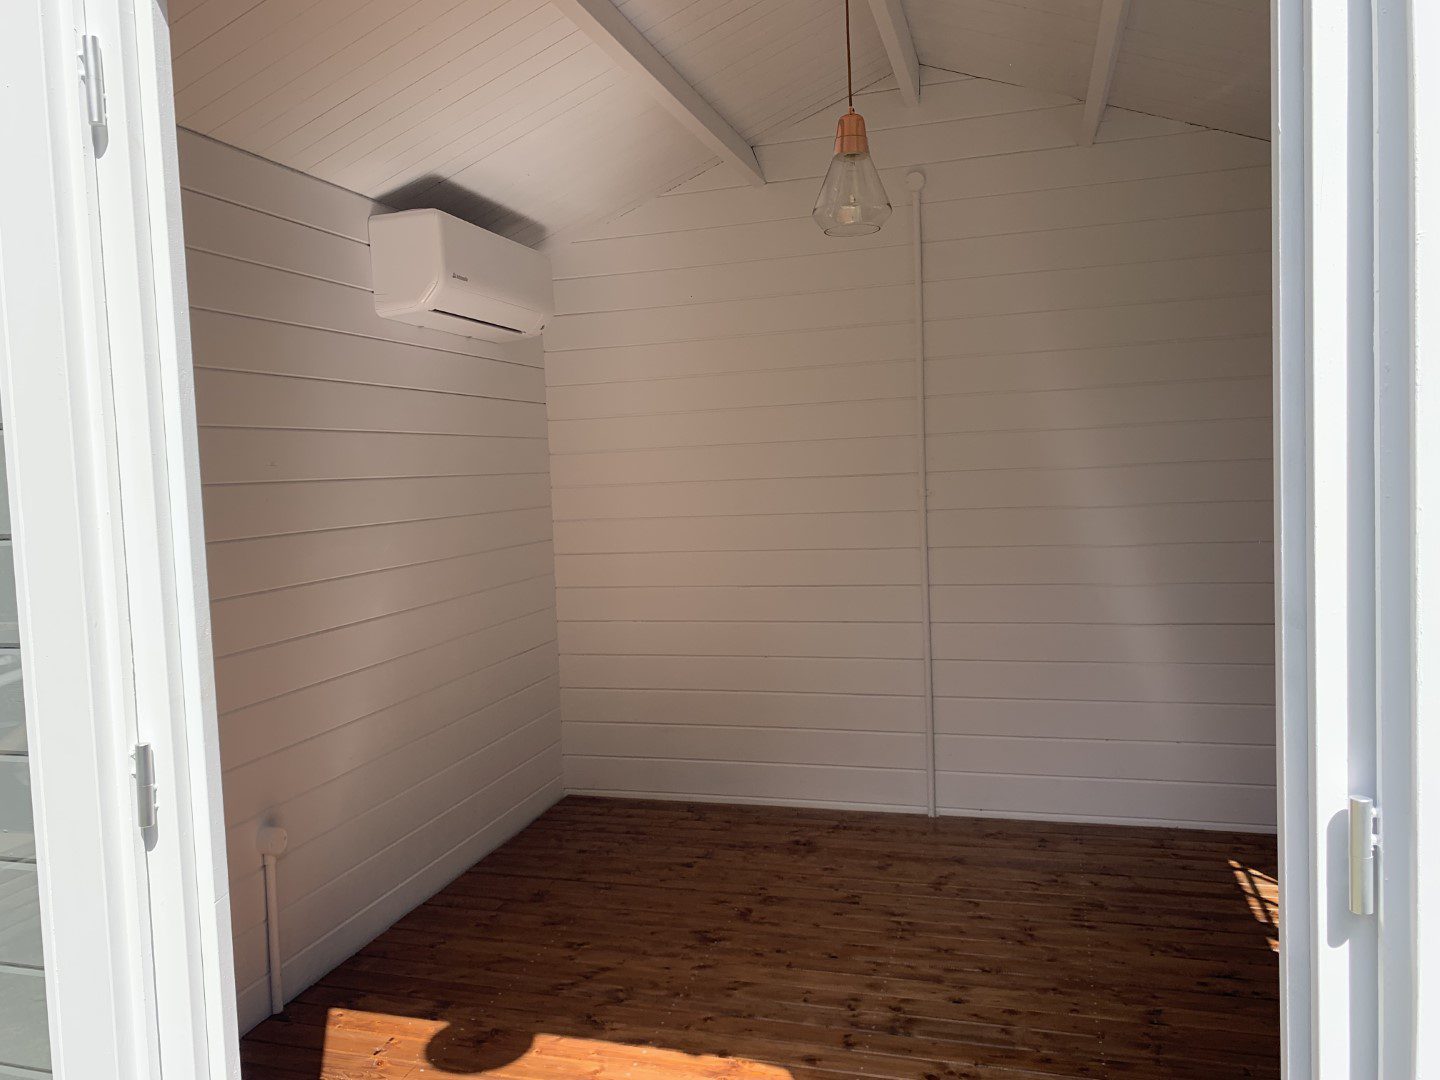
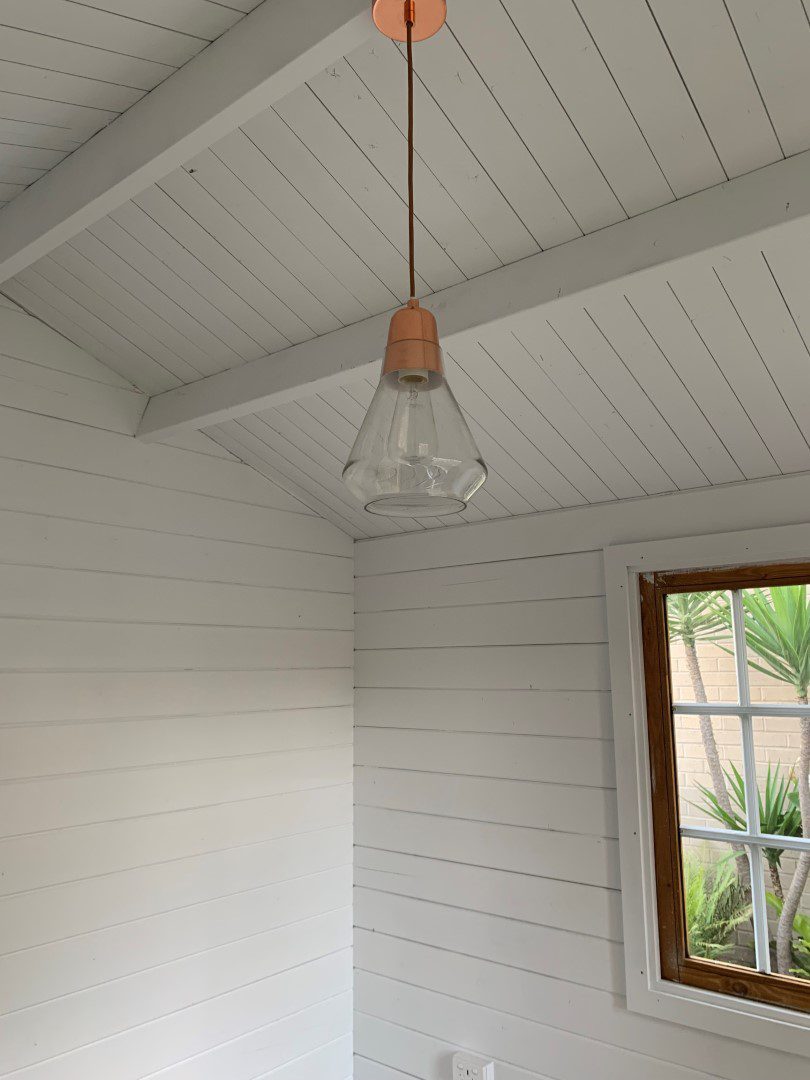
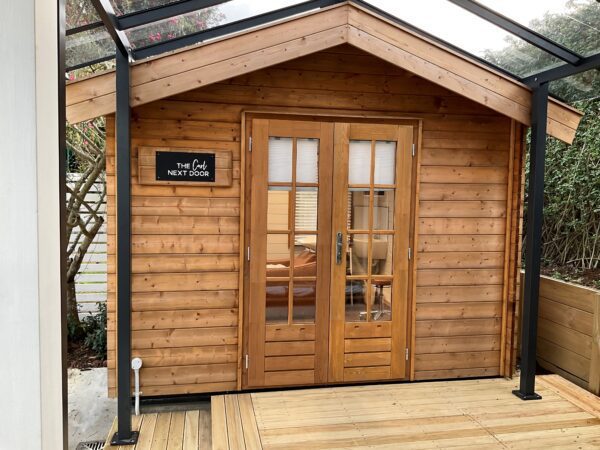
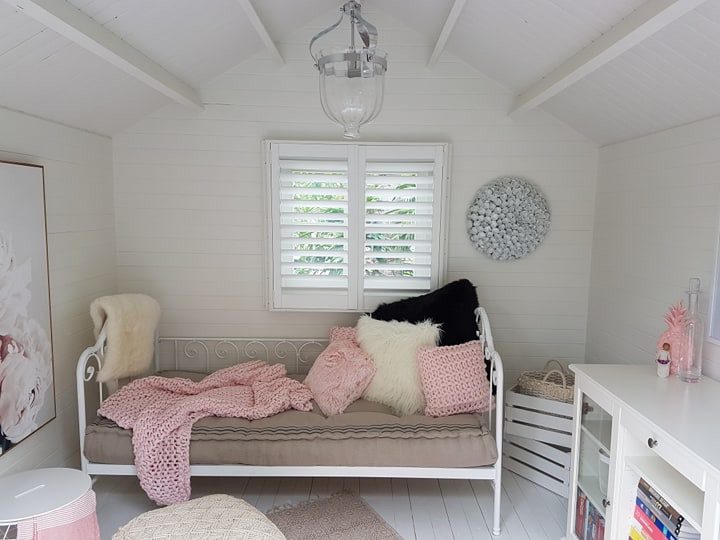
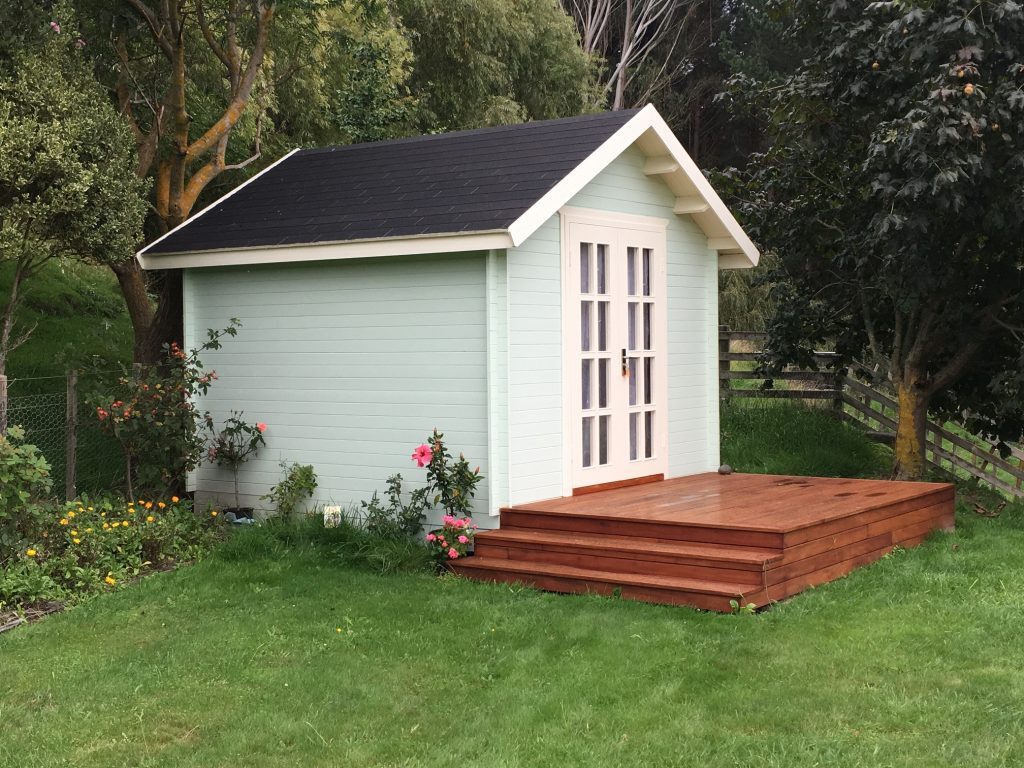
Leanne created a cozy space for guests to stay with soft lighting and a feature pendant for this poolside guest house using a Brook River Cabin Kitset.
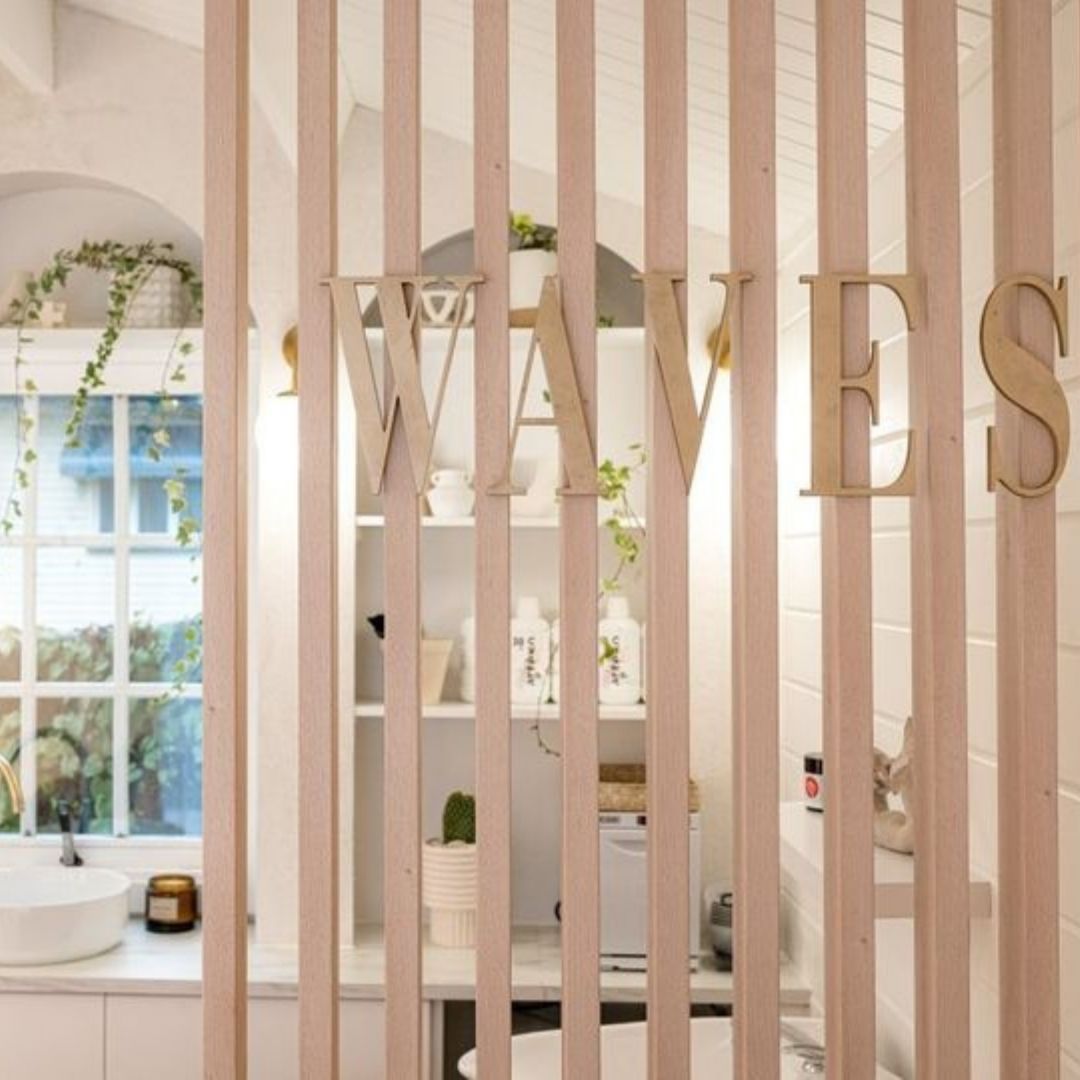
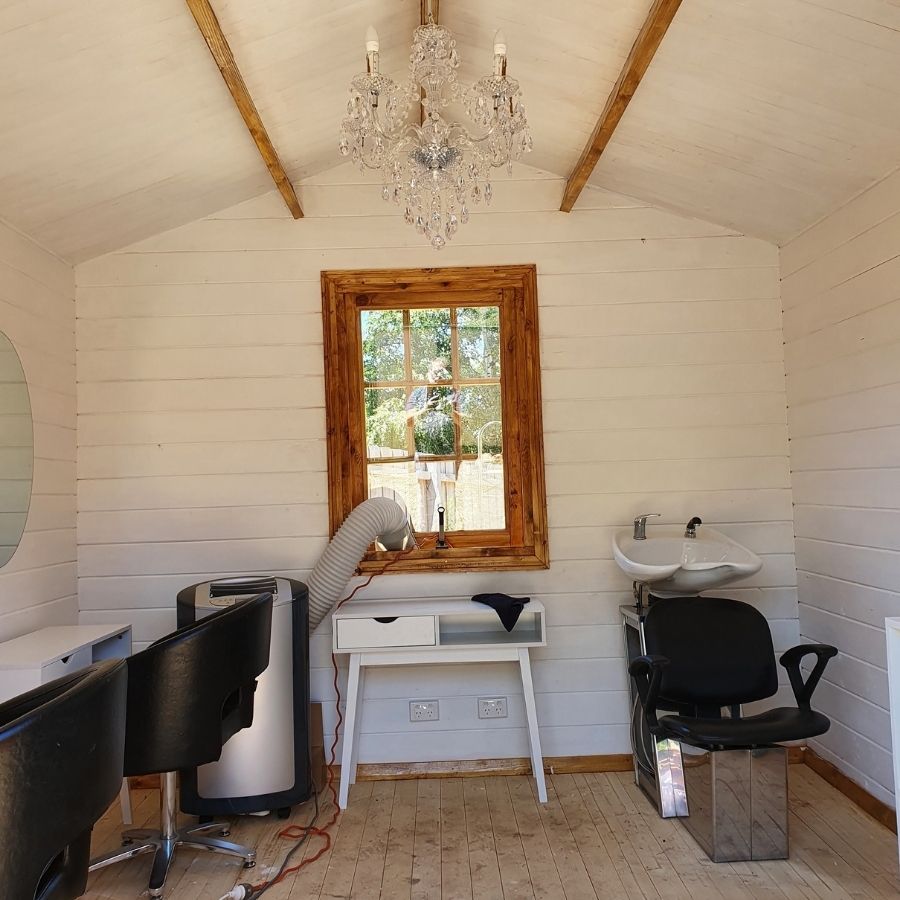
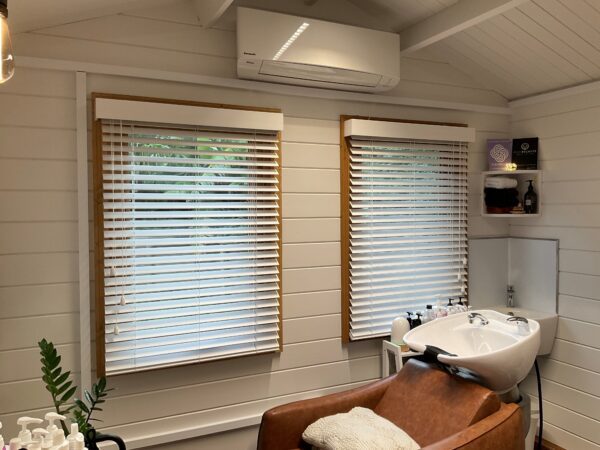
Lisa from Waves Hair Salon in Brisbane compltely transformed her Cabana Cabin kitset in a magical space for her clients with the help of Interior Designer She Creates Co.
SheSheds are the perfect way to add an extra room to your home without having to go through the hassle of building an addition. And, now that you can add power to your cabin, it’s even easier to make your cabin into a functional space for work, recreation or guests. If you have any questions about adding power to your SheShed Cabin, let us know and our friendly team would be happy to help.
If you’ve just built yourself a beautiful timber cabin, the last thing you want is for it to be ruined by the weather… We want your cabin to last for years to come through all of the elements, so in this Learning Hub article we will give you our top tips for weatherproofing your cabin. Whether you have a SheShed or another type of timber cabin, following these tips will help to keep your cabin in good condition for years to come. Read on to find out more!

Many of our SheShed cabins are certified up to a high-wind category throughout New Zealand & some cyclone ratings throughout Australia. Depending on your location, the surrounding terrain & the direction of the prevailing winds, it can sometimes be best to discuss what wind rating will be required for your anticipated site with a local professional before purchasing, so we can offer you the best solution. Different kitset cabins within our range are designed to withstand different wind ratings, and additional bracing kits can also be purchase to increase the level of storm protection on your shed.
Storm brace kits provide additional vertical tiedown bracing to keep your cabin firmly anchored in any storm conditions. These come standard with our traditional style Canopy kits, Brook River & Lake Cabin kits. Our modern Tussock, Coastal & Alpine cabins all come standard with built in metal storm braces to help reinforce anchoring.
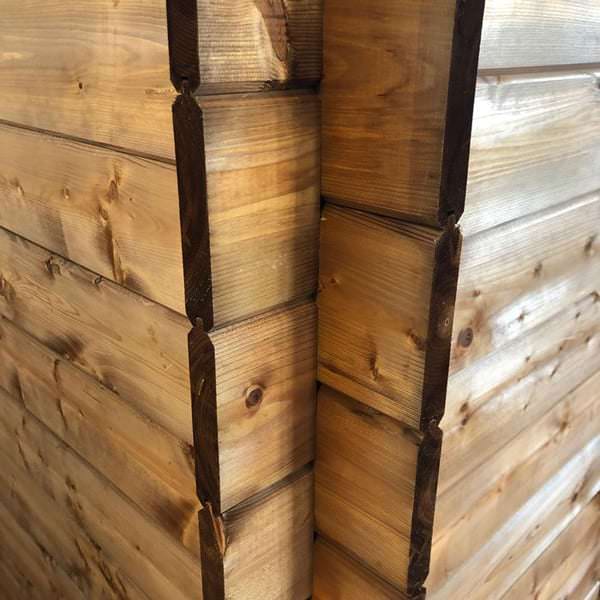
SheShed kitset cabins are designed to be weatherproof, we source sheds manufactured only from high quality slow-grown trees, with CNC machined timber to achieve the snuggest fitting joints, however with the timber being a natural product we can’t guarantee that every board will be free of imperfections or blemishes.
The 4 main typical areas where water penetration can occur on any building is, through the roof, through the floor, windows & doors & wall cladding which is why we recommend sealing knots & blemishes.


Heavy rain, changes in atmospheric pressure, and gusting wind can all cause a difference in atmospheric pressure between the interior of the shed & the exterior. In some cases, the pressure difference can create a wicking effect (absorbing of water by capillary action) where water can be draw through tiny cracks or through the natural woodgrain of the timber, sometimes visible as water droplets or it may be as subtle as a watermark on unpainted timber. Proper sealing & painting of the end grain & knots will help reduce this. Additional sealant can be used around the log notches, if the cabin is in a vulnerable location, however care must be taken to ensure that the sealant doesn’t prevent the natural movement of the timber. It a good idea to install small vents at a high level in the front & rear apex walls of the cabin, this helps to provide suitable cross flow to balance the pressure difference & reduce the effects of the weather on your cabin.
Due to the innovative notched & stacked construction of the log cabins, the performance of the sheds in an earthquake, provide superior protection against erratic movements caused by earthquakes, if built correctly on one of our certified sub-base designs, your shed will be suitable to withstand typical damages caused by earthquakes to traditional style buildings.
Weatherproofing your cabin is essential to keeping it in good condition for years to come. By following the tips we’ve outlined in this article, you can ensure that your cabin will be able to withstand all of the elements Mother Nature throws its way. If you have any questions about weatherproofing or protecting your cabin, don’t hesitate to call our team – we would be happy to help!
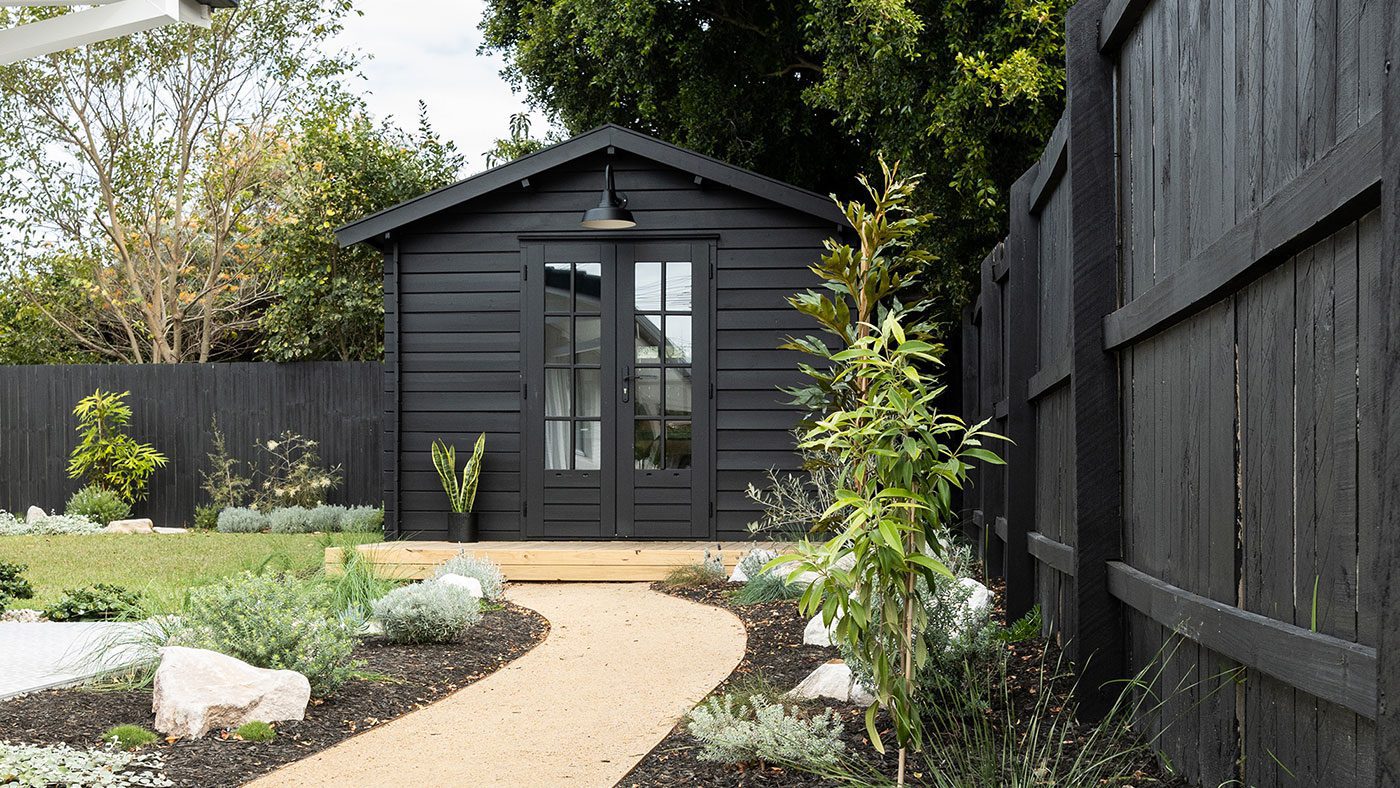
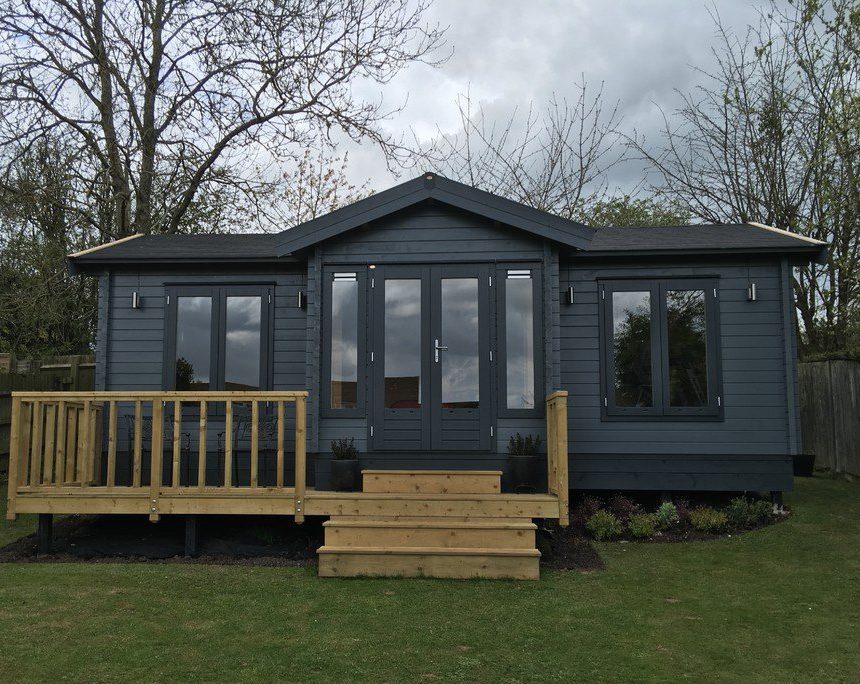
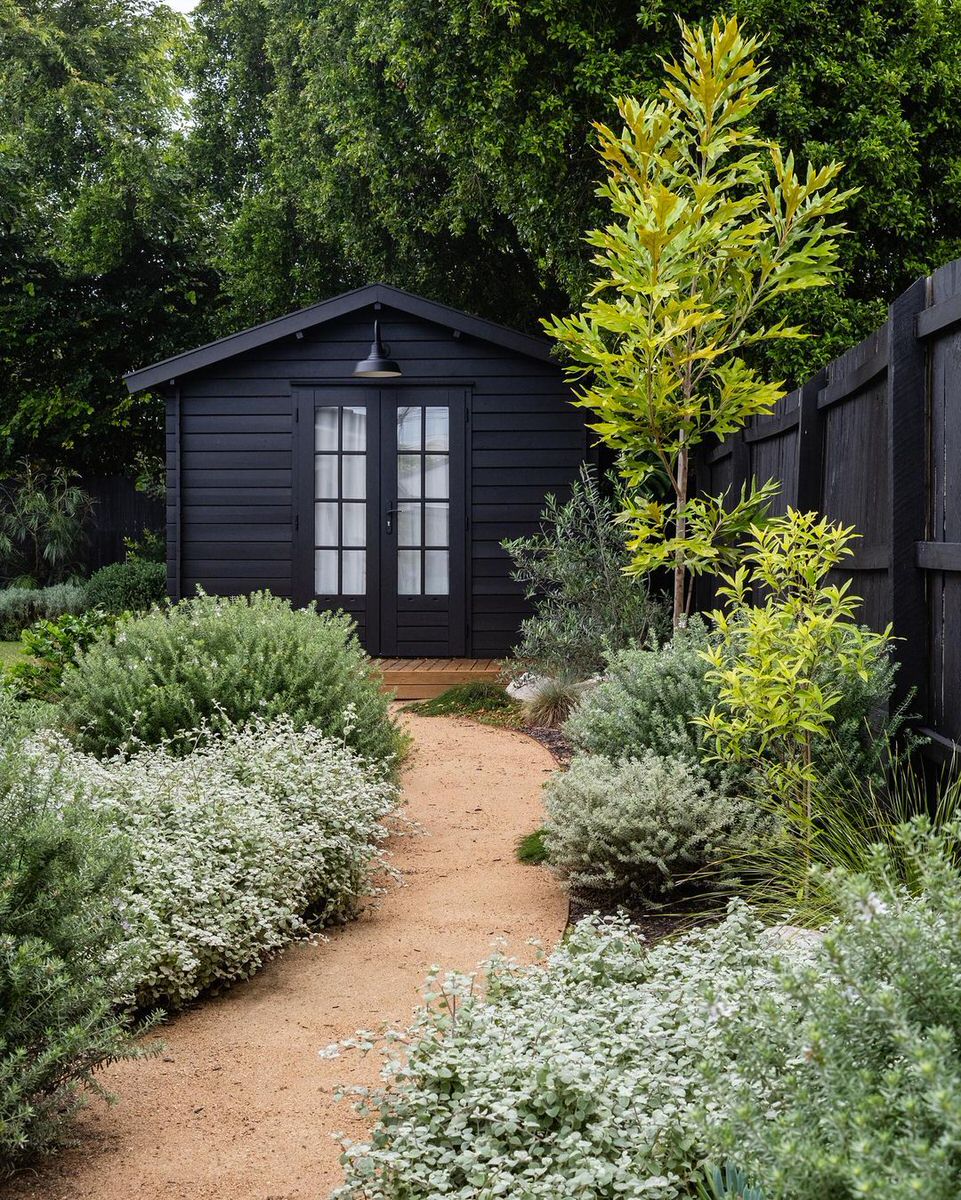
Do you love the modern look of Mark & Loni’s Star Cabin from Adore Magazine, but are not sure how the black paint will hold up over time on your wooden shed? This is a conversation we have been having with many of our customers lately, so we thought we would share a little further information, to help you with choosing the right paint for your climate in order to look after your She Shed, maximising the lifespan of your cabin.
It is generally accepted that it’s not ideal to paint timber weatherboards or wall logs with darker colours and the primary indicator for measuring that is called the Light Reflective Value of the paint that will be used.
The Light Reflectance Value (or LRV), of a colour is an indication (0% to 100%) of the amount of visible light that any given colour will reflect. All paints have an LRV, and if you can’t find it on the tin of paint, make sure to ask your paint retailer for more info. The higher the paint is on the LRV index, (the closer to 100), the more light it will reflect, while the lower the LRV, (closer to 0%) the more likely it will be to cause a timber to crack or warp. So, the paint colour you choose can help minimise the risk of sun damage and prolong the life of your SheShed cabin!
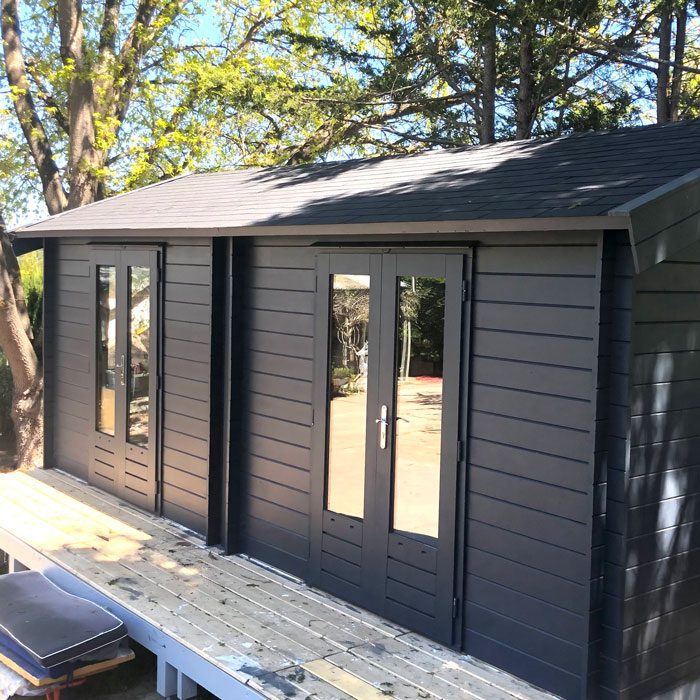
A semi-gloss exterior paint with an LRV of 50-100, is ideal for an external surface like the walls of the shed or the outside of a door. This is because most of the light is bounced off the surface, and not absorbed by it. The colour black has a LRV of approximately 0-5% and will absorb almost all the sunlight; Weatherboards or wall logs in this colour will therefore absorb a large amount of heat, which can manifest itself into problems like warping, cupping, splitting and resin bleed.
In contrast, white paint has a LRV of up to 99% and reflects heat, keeping the surface cooler. Any given colour choice will fit between these extremes and will be given an LRV value. Traditional suppliers of timber weatherboard and wall logs, restrict paint colours to an LRV of 40-45% or greater. This means that mid and darker colours cannot be used under warranty on standard timber weatherboards and wall logs.
So, before you pick up that brush, check with your paint supplier for the LRV of your colour choice as you may not be covered by warranty if the LRV value is too low.
It is important to recognise that in warm climates on a hot day, you may have your air conditioning set at 23 degrees, whilst the outside is 39 degrees. This results in your cabin suffering from temperature variance issues. The front of your cabin or door will be hot and there will be a drawing out of moisture from both the timber and paint, whilst the interior of the cabin or door remains cool and unaffected.
Painting a door black will accelerate this issue, resulting in the door constantly swelling then shrinking with the temperature changes until it cannot take anymore, resulting in cracks and warps. A black paint has a LRV of approximately 0-5%, whilst white has an LRV of around 95, so by making a wise choice with your colours you can A.) prevent your warranty from becoming void, and B.) significantly extend the life of your cabin.
Our Sheshed warranty only covers cabins that have been completely painted, with a minimum 3 coat system (Minimum 1 coat primer/ 2 top coats) on any timber surfaces including, but not limited to, Doors, Windows, Walls, and Facade components. The LRV value of the external paint, varnish or stain must be 40% or higher for the Sheshed warranty to apply*.
Varnishes & stains that don’t repel moisture or UV and don’t have an LRV value of greater than 40% are not suitable for use on Sheshed products.
If you are ever in doubt, is a great idea to chat to your paint specialist about the LRV index and what is best suited to your climate and shed location. When looking for paints for your exteriors, firstly make sure it is a good quality exterior paint and secondly check the LRV index.
*Whilst Sheshed/ Fort Group may advertise Sheshed cabins that have been painted with colours that have a lower LRV value than 40% we take no responsibility for defects than can manifest themselves into problems like warping, cupping, splitting, resin bleed and excessive shrinking/ timber movement, loosening of timber knots etc.
QUALITY TO LAST.
Our Pressure Treatment innovation gives the wood an optimal lifespan whilst retaining the excellent natural properties of the traditional wood benefits. The pressure treatment protects against wood rot/decay, however the timber can still absorb moisture which is why we still recommend using a sealer.
BROWN PRESSURE TREATMENT PROCESS
Pressure treatment is an additional wood preservative, which ensures that all surfaces of your cabin or building are protected against timber degradation and is also wood insect deterrent. It is a process that takes place entirely in a large pressure vessel once the timber has been pre manufactured. The timber is then placed in the pressure vessel, the door closes and the vessel creates a vacuum. The oxygen is then extracted from the wood, after which the pressure vessel is filled with an impregnating agent. When the pressure vessel is filled with the impregnating agent, the pressure is increased, so that the wood absorbs the impregnating agent. Pressure treatment is an entirely computer-controlled process. If you have had the wood of your log cabin impregnated by means of the pressure treatment process, an external sealant is not immediately required to protect the timber, but is still recommended to be applied as quickly a possible to prevent the timber from absorbing excessive moisture. The pressure treatment is a wood preservative treatment not a waterproofing solution, and still requires the timber to be completely sealed externally using a good quality paint system or sealer to prevent the penetration of moisture. The windows and doors are not impregnated with a pressure vessel but are instead spray treated. Spray treatment protects the wood initially, however a good quality paint or sealer is still required to prevent moisture ingress or egress, which if left unsealed, over time can damage the doors.
ADVANTAGES OF PRESSURE TREATMENT:
Pressure treatment is the method that guarantees the longest life of your cabin.

Working from home comes with a number of benefits. You’ll no longer have the high rent of a commercial property, which means reduced overheads, and no more long commutes and sitting in traffic. It’s easier to set your own hours and work earlier or later in the day, and your clients may find parking easier.
With a She Shed you’ll have a dedicated workspace which is comfortable, secure, and a beautiful space to offer to your clients.
“I am a holistic therapist so I need a space that provides a peaceful and beautiful setting for my clients to relax in.”
“Having a She Shed means I literally have my business on my doorstep, but separate from the house.”
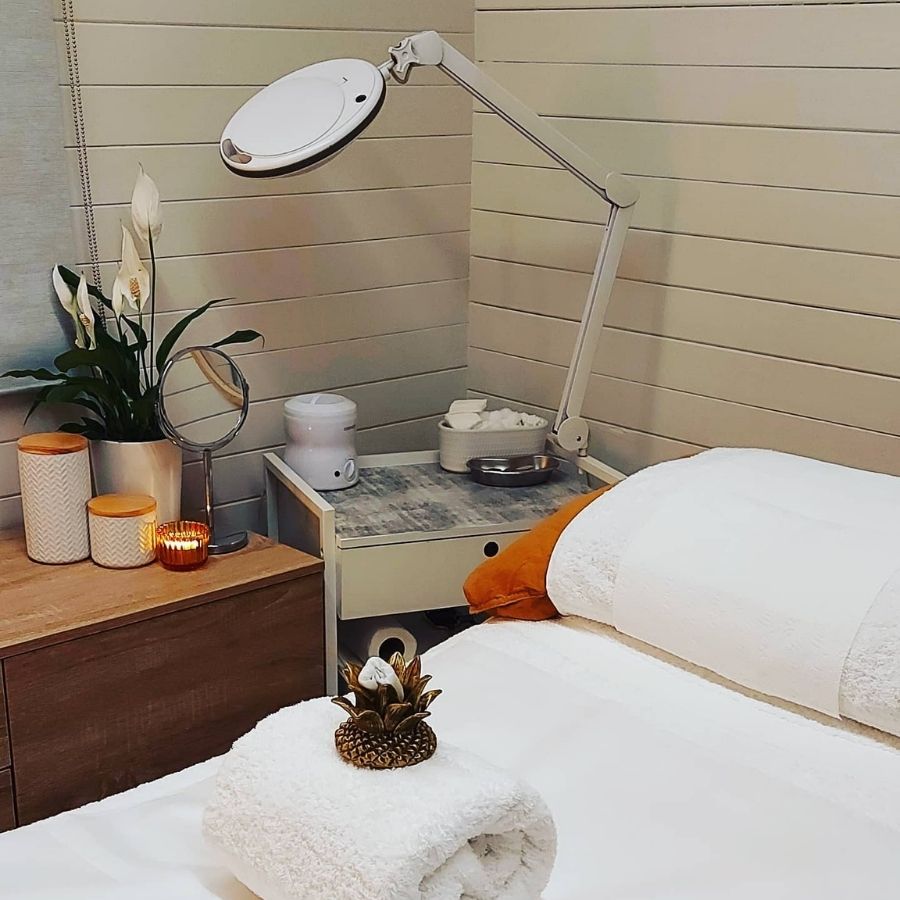
At SheShed we have a range of cabins sizes that are great for a home business space, but the two we recommend are the 9m2 Star Cabin and 12m2 Cabana Cabin. The Star Cabin is our most popular choice for a home business. This cabin is 3m x 3m which gives you plenty of space for a beauty bed, an arm chair and a desk.
The Cabana is 3m x 4m which will give you a metre more space. Great if you need additional shelving or want a sitting area.


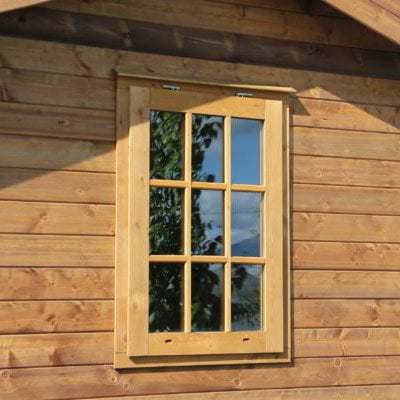
In both the Star Cabin & Cabana Cabin, you decide where you want your window (or you can buy additional windows too!).
This means you can arrange the footprint of your beauty studio/therapy room for what suits you the best.
Whether you’re putting the cabin in a corner and can only put your window on the left side, or you want to put up dividers and create a private space, you can do this by choosing where you want your window.
The Cabana is 3m x 4m, which will give you a metre more space. Great if you need additional shelving or want a sitting area.
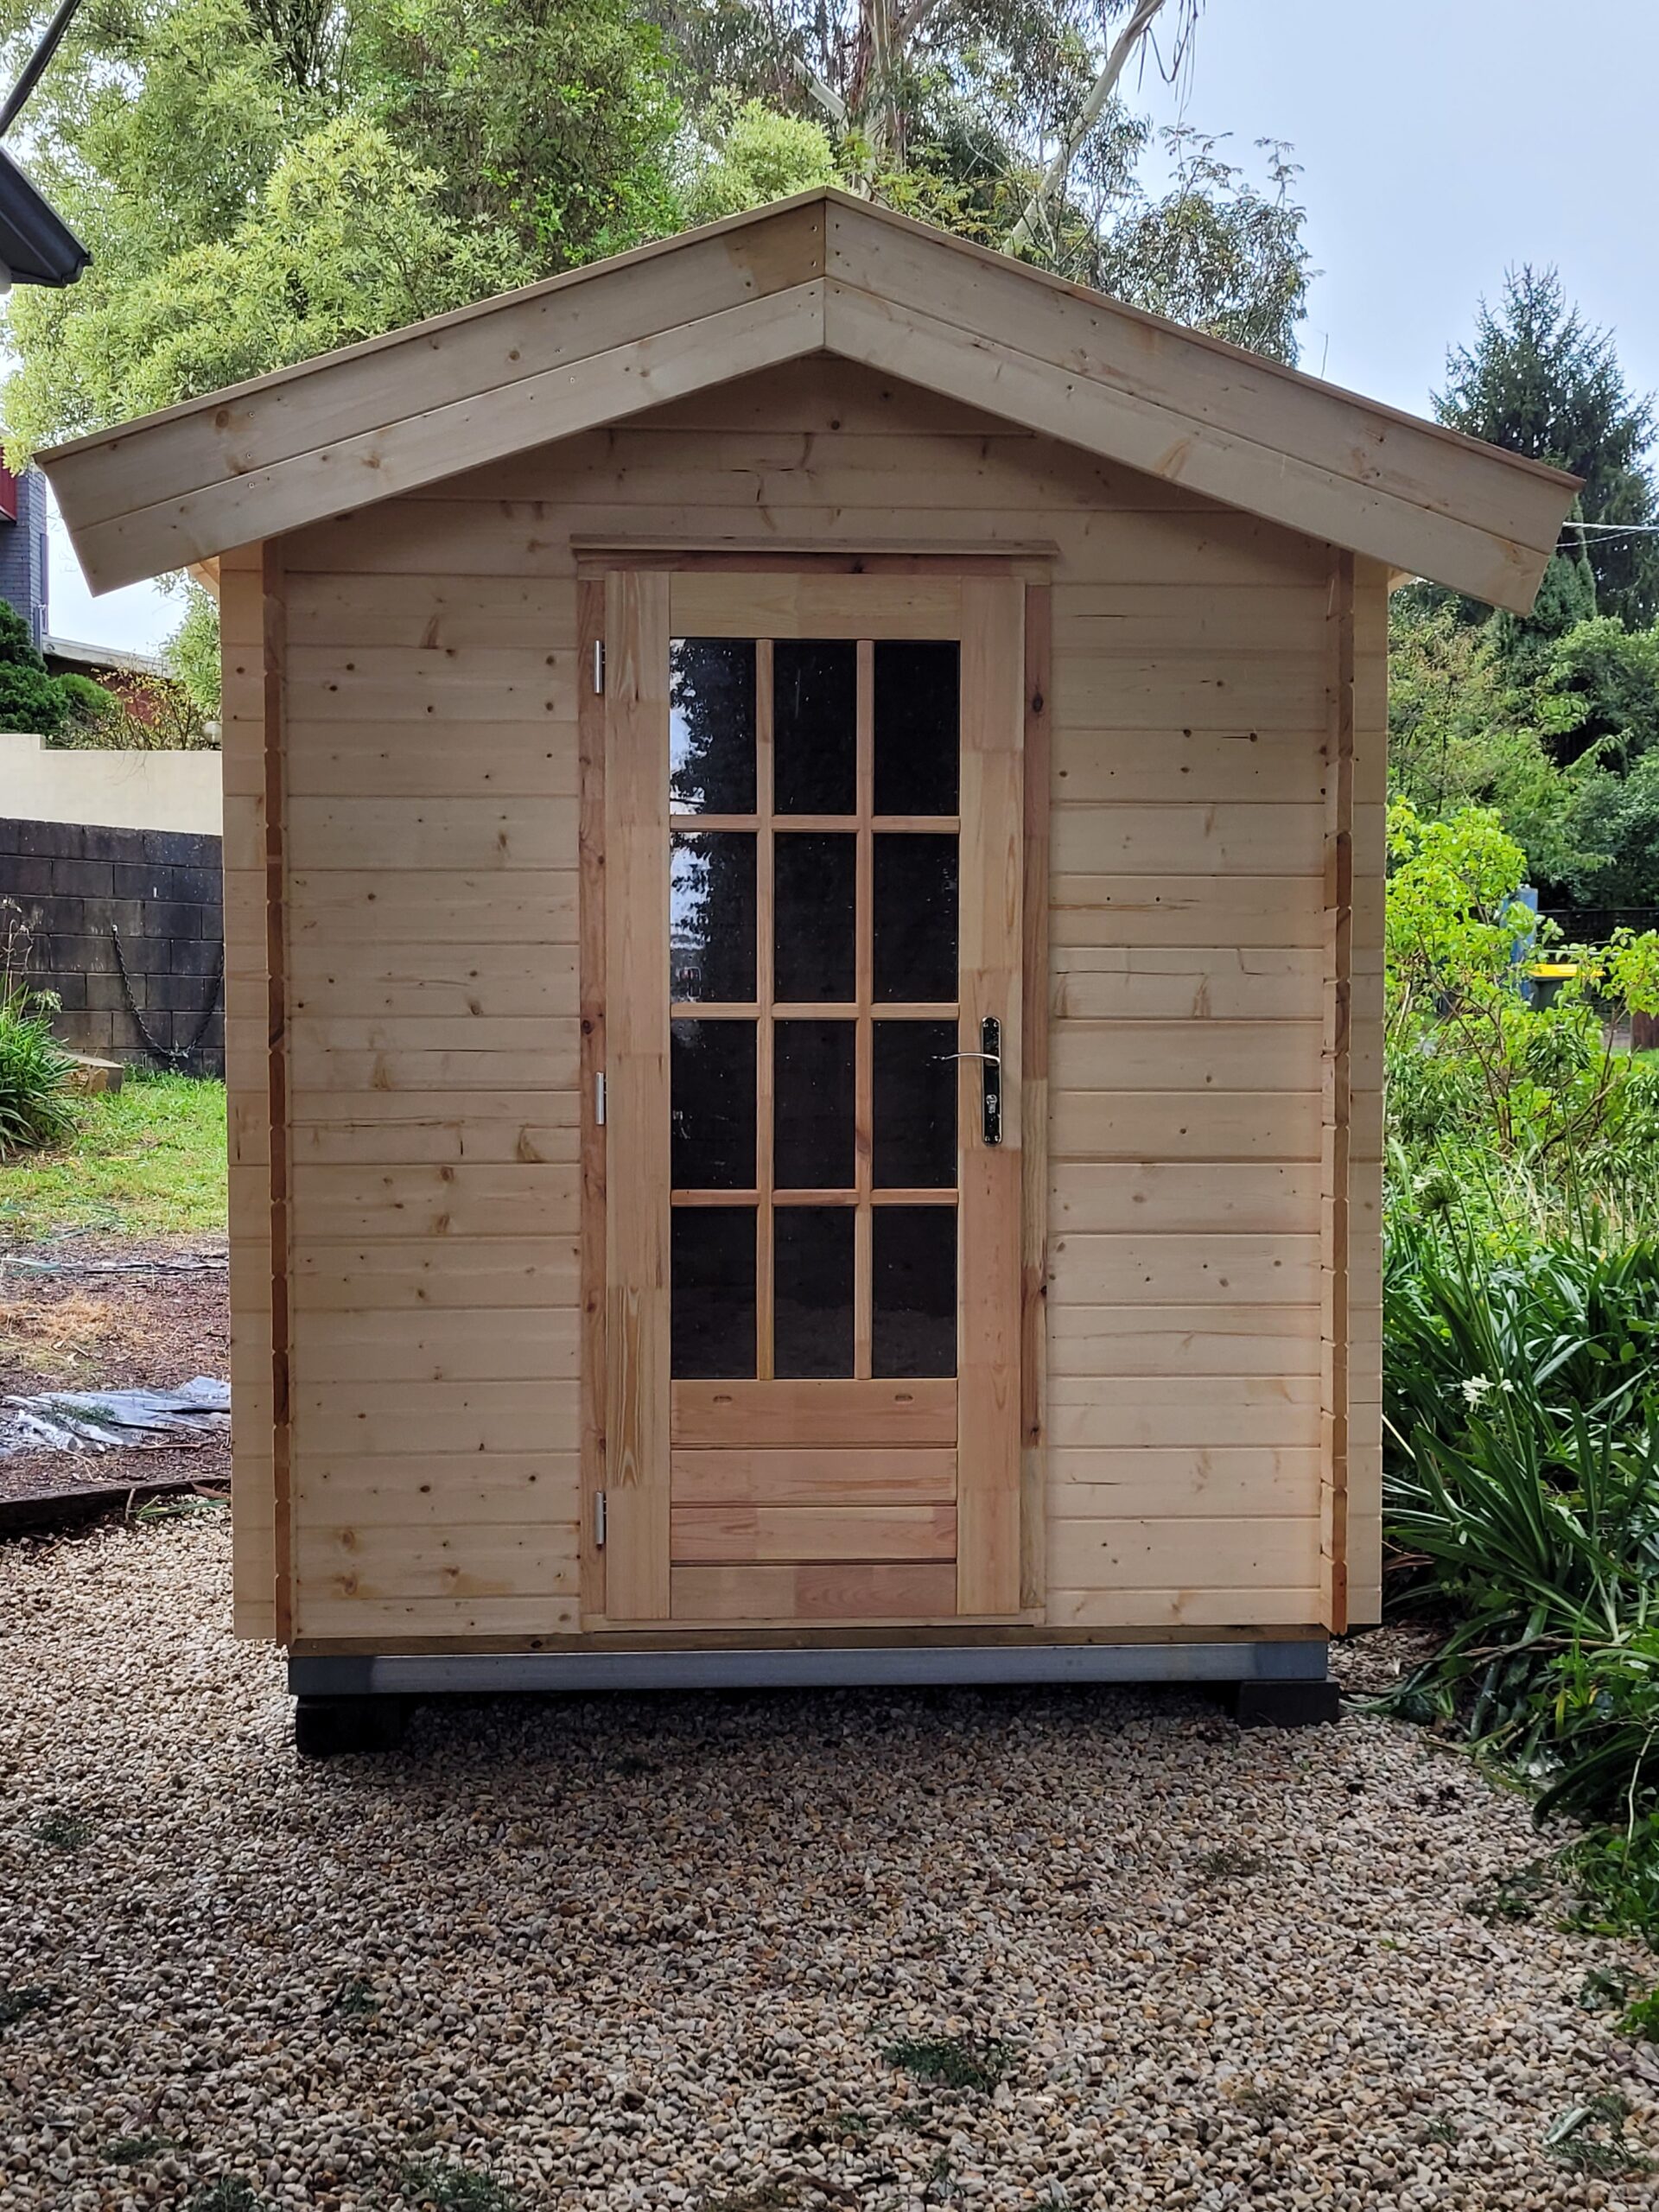
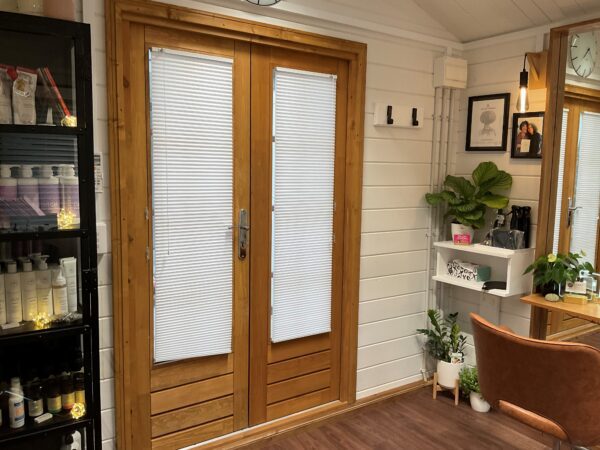
Our She Sheds come as a natural wooden colour. This means that you can match it to your business colours, the same colour as your house, or whatever you feel is calming and relaxing. While our cabins come with a beautiful wooden plank flooring, you can even customize this!
Add beautiful furniture, the tools of your trade, and decor bits & pieces, and you’ll have a space you (and your clients) never want to leave!
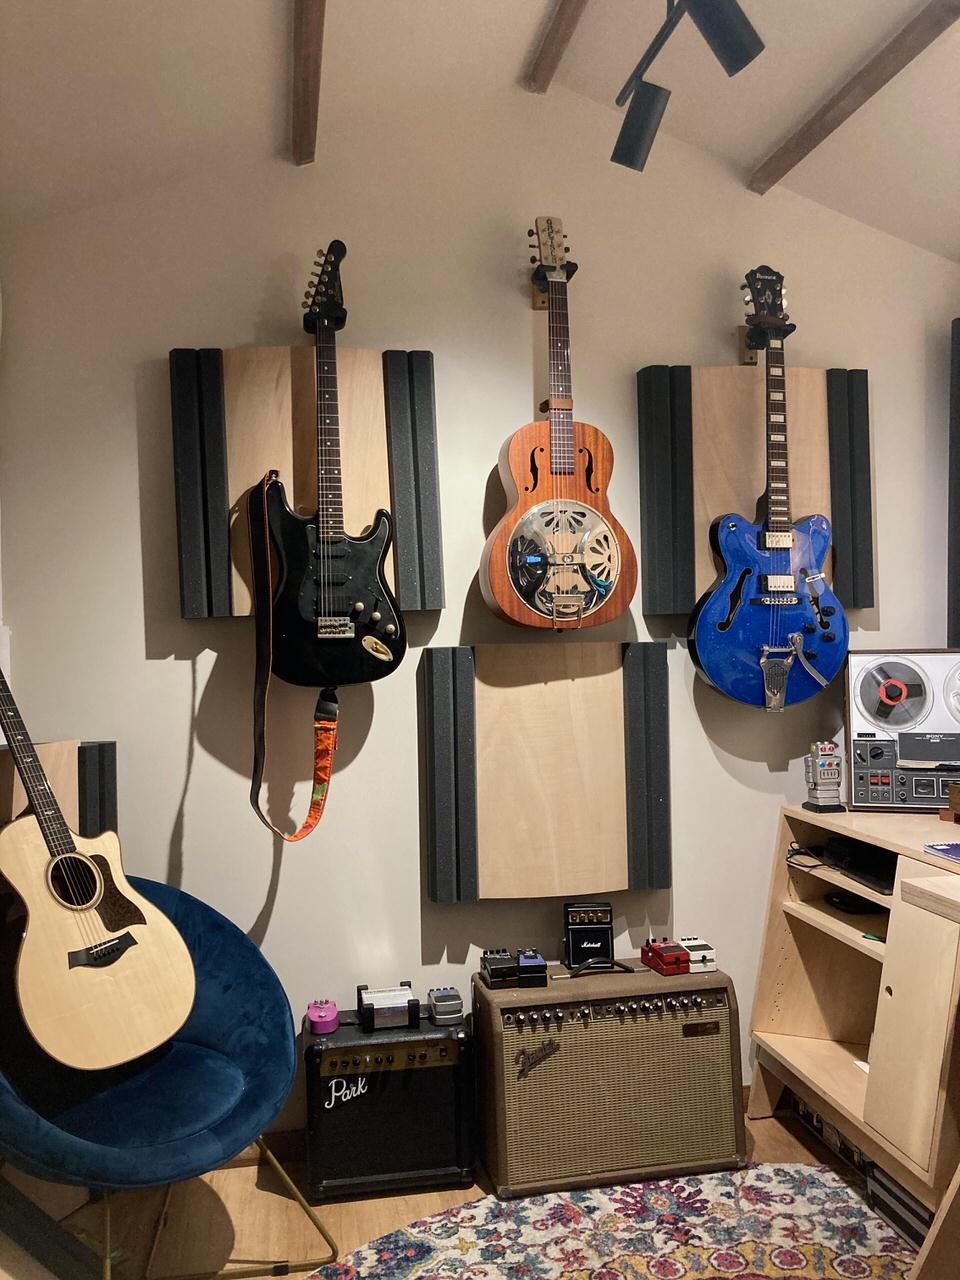
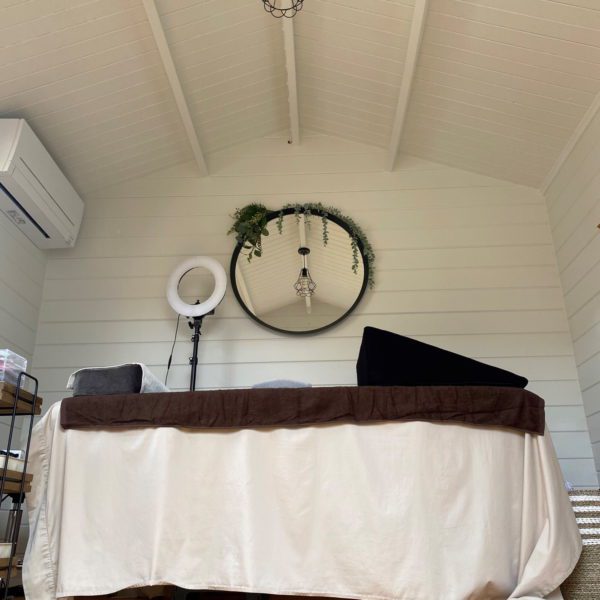
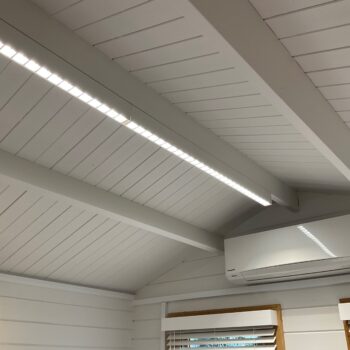
“I wanted a modern, slightly industrial, moody space. We have 2 black feature walls, block out blinds, heat pump, drop pendant lights in the corner and a dimmable LED light fitted to the center beam, with touches of copper and rose gold.”
Of course you can!
Along with choosing where your window goes, you can choose where your electricity points are, which means you can arrange the floorplan of your studio to how it will best work for you. We recommend working with an electrician to decide how to best add electricity to your SheShed.
Add a beautiful pendant light, and many beauty studios choose to add a heatpump too.
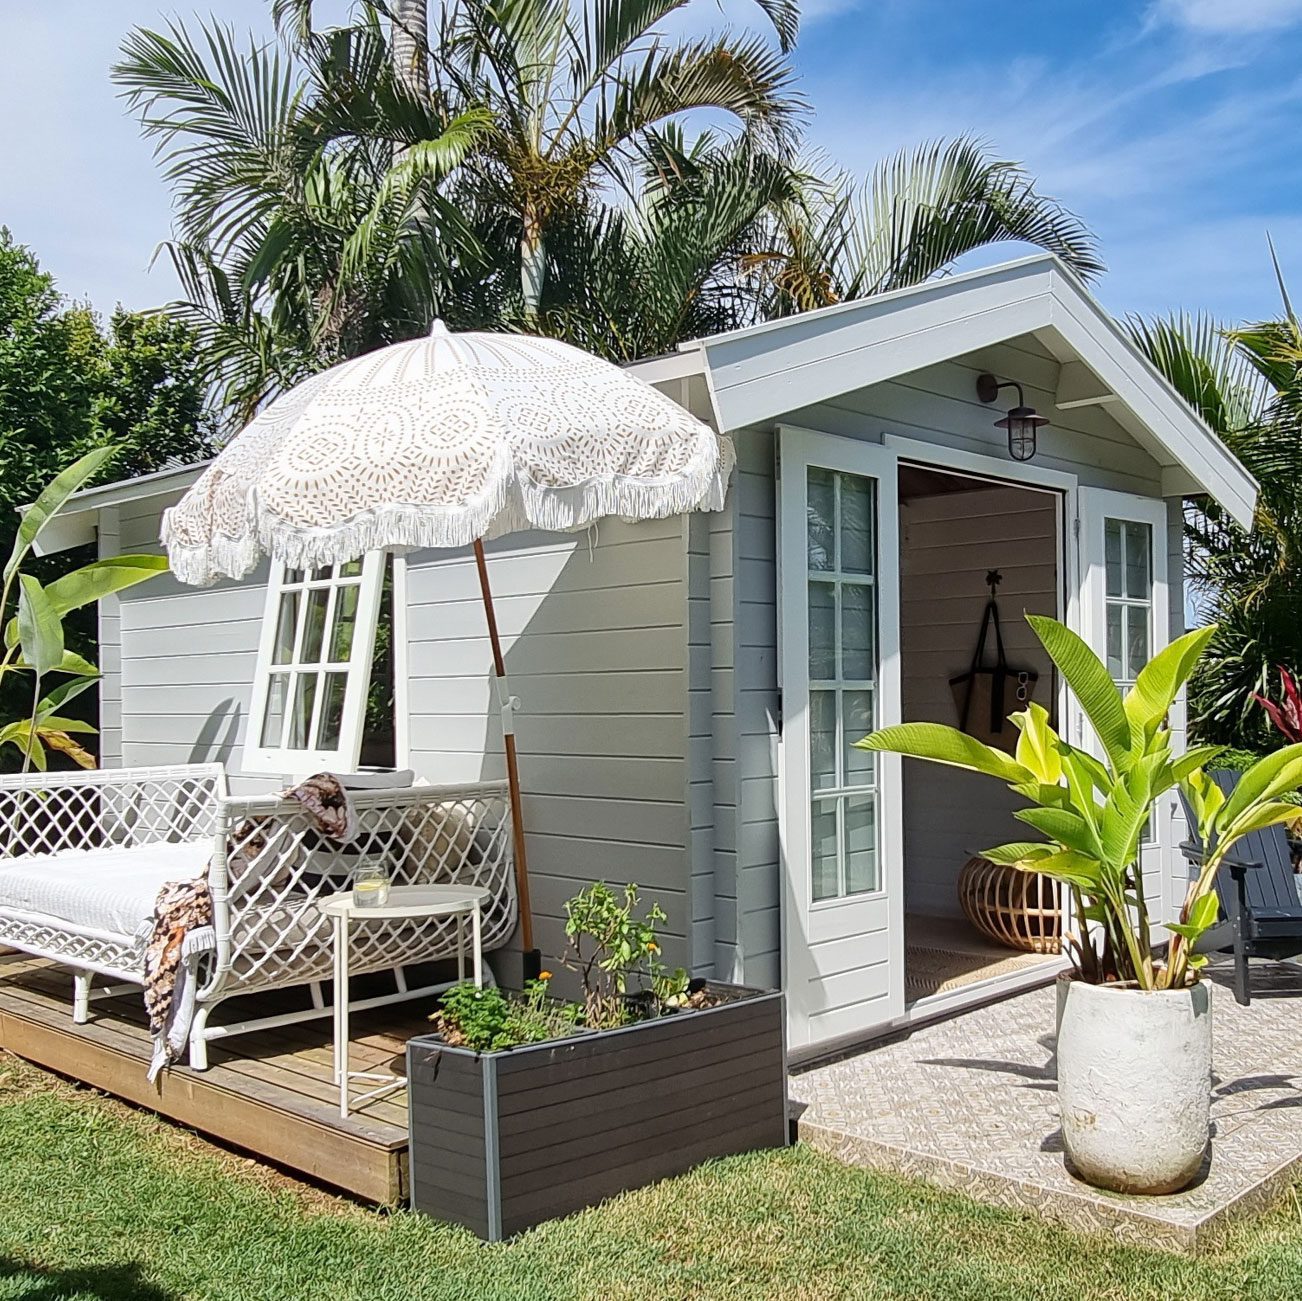
Your SheShed cabin is built and now it’s time to add all those accessories to make it unique and special to you. We have put together a few ideas to help you on your way!
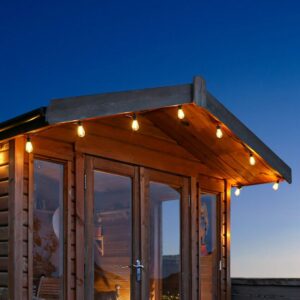
These can be solar, power, candle, oil or battery operated depending on what you prefer.
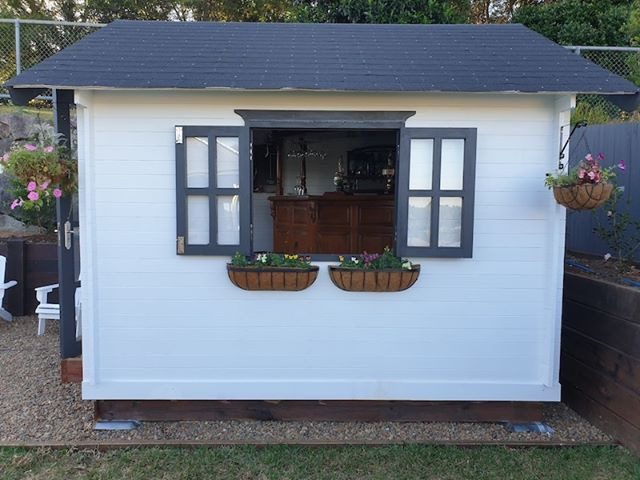
Add shutters to your windows for a vintage look or plant some cute window boxes for that cottage vibe.
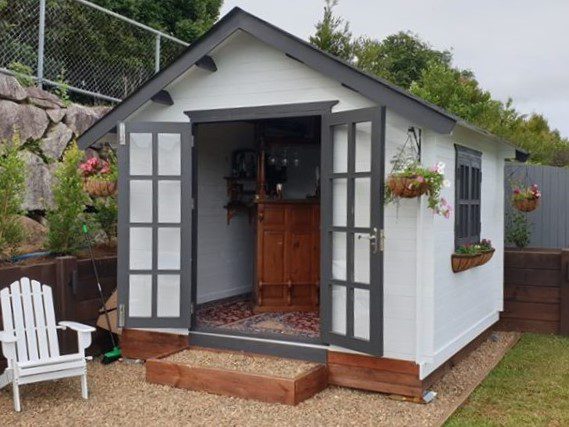
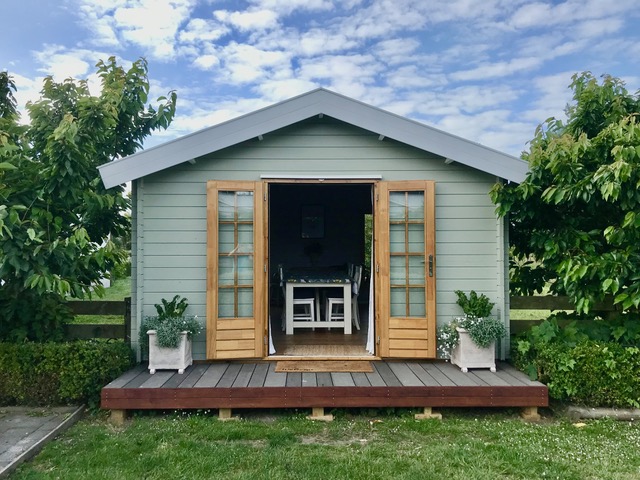
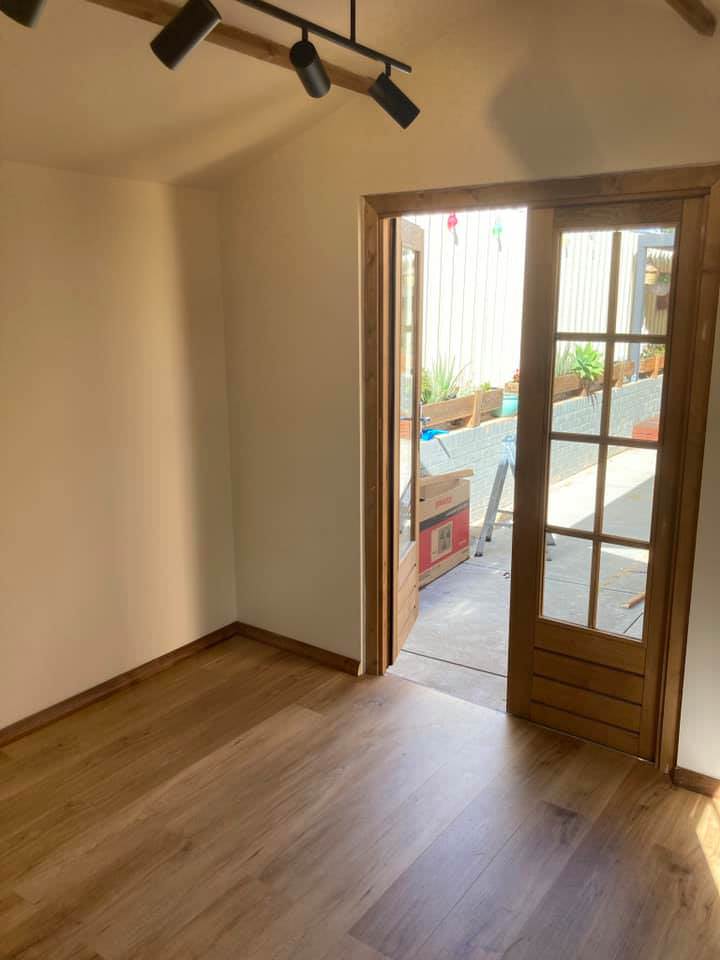
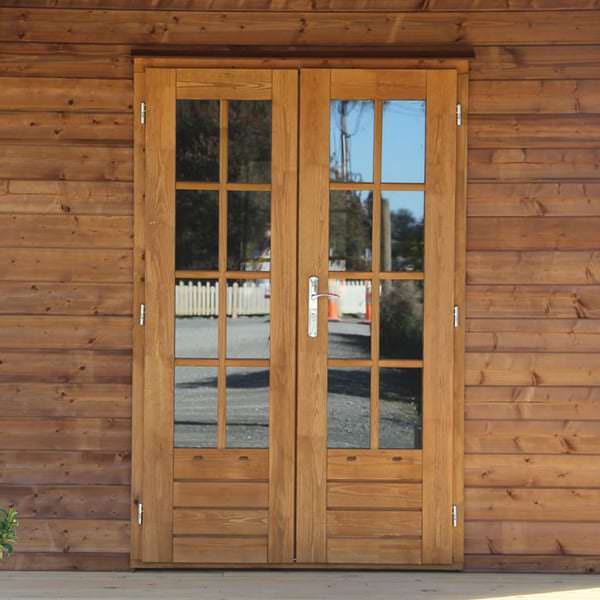
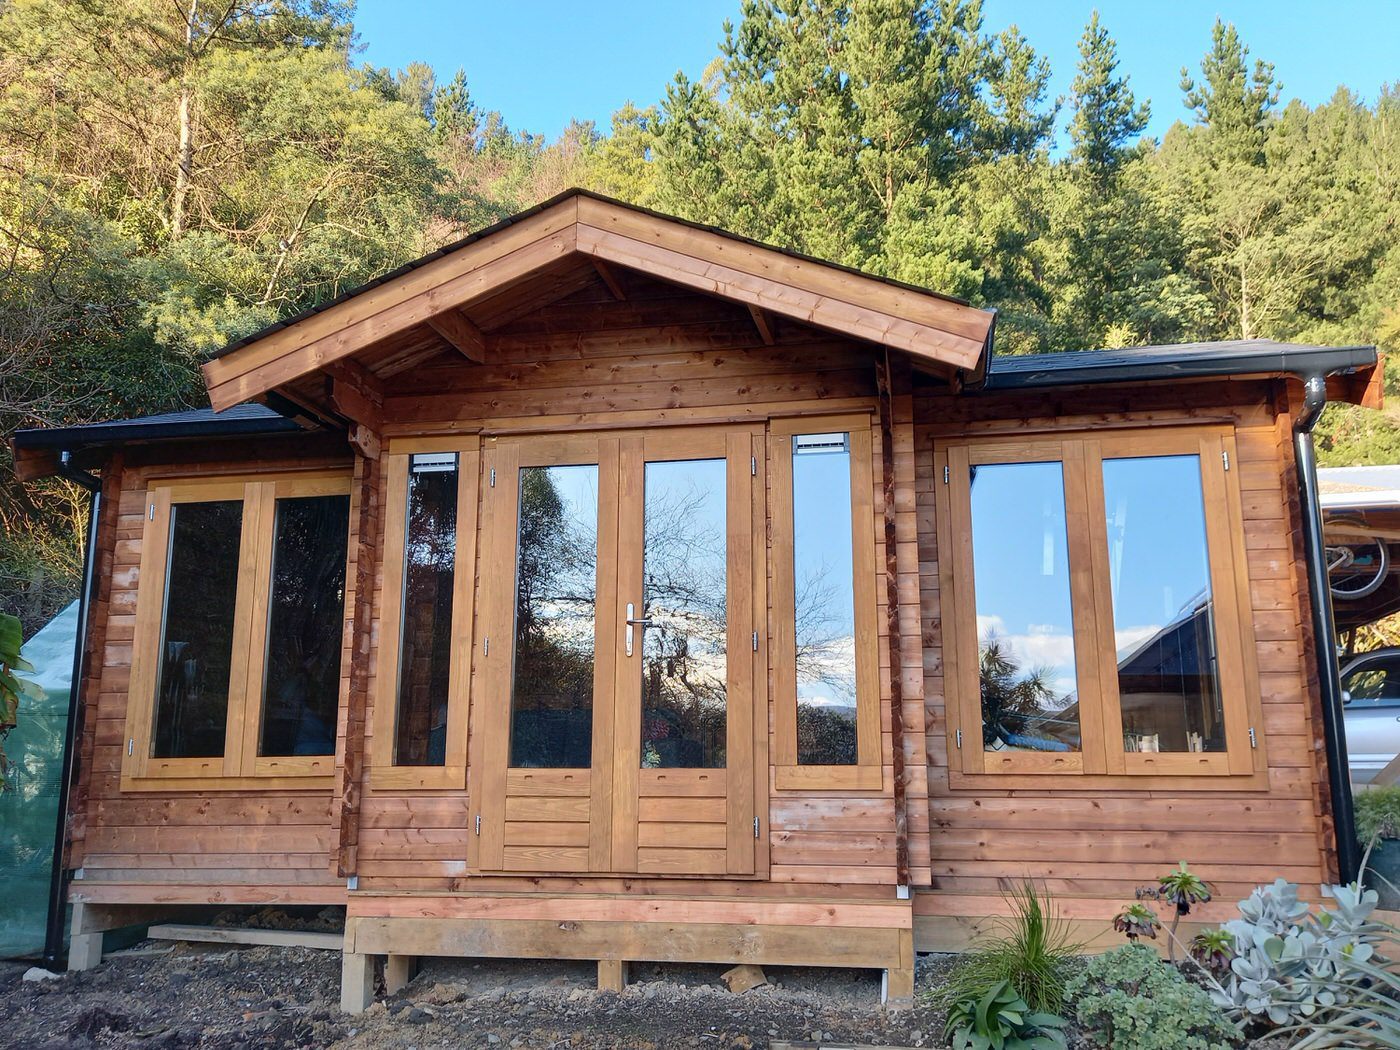
A deck will add a bit more outdoor charm to your shed, and will feel great when you open up the lovely French doors.
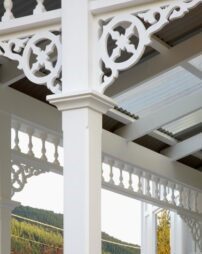
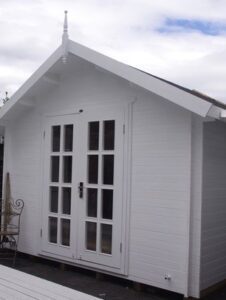
An easy classic style roof decoration are finials. These can be simple wood designs or, depending on your taste, unique and quirky.
Adding some extra touches like wood lace can give your shed the wow factor that other sheds just may not have.
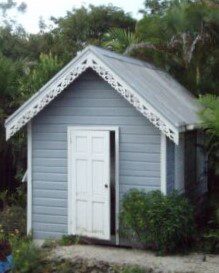

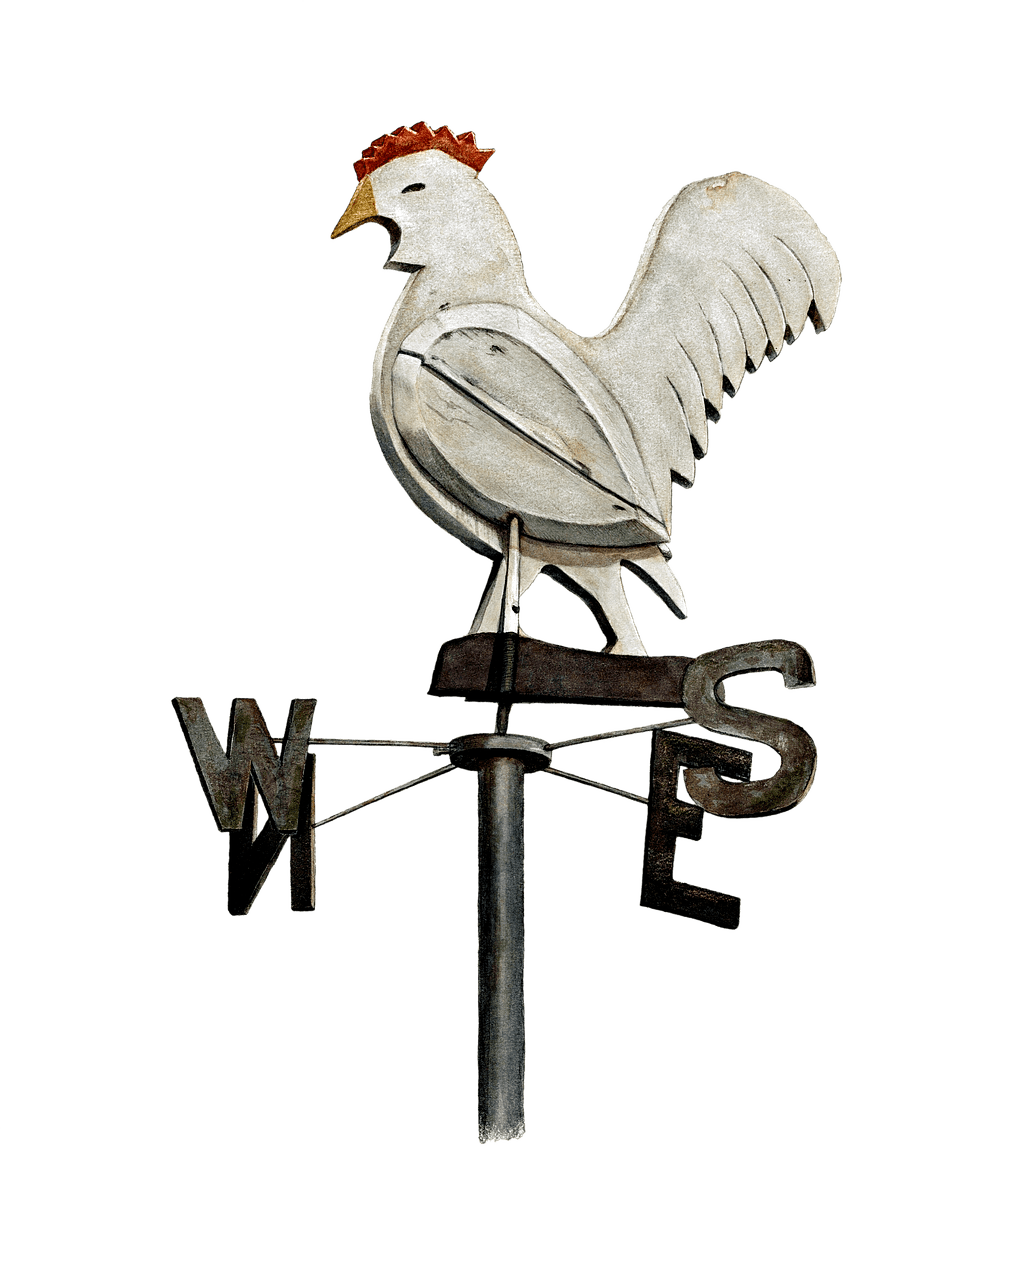
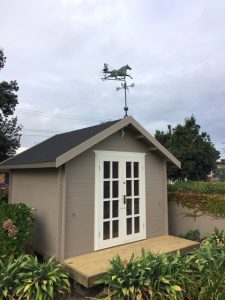
Another great option for the roof of your shed that will look great is a weathervane. With many styles available at prices to suit most, you can usually find the right one for you.


With imagination, creative flair and building skills you have endless possibilities to add to your She Shed. Small spaces can be huge with the amount of enjoyment they can bring.
So what are you waiting for? Get yours now!
So, you’ve decided to buy a shed. Now comes the hard part: what shed will best suit your needs, while staying in budget?
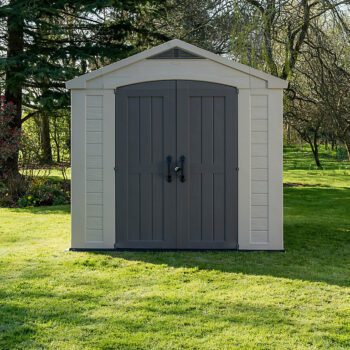
Do you go Resin, Metal or Wood? There are pros and cons for each and at the end of the day the choice is yours. Here are a few of our thoughts on each.
Easy to assemble with a modern design and low maintenance, when they get dirty you just need to give them a wash down.
According to the supplier, the UV protection prevents colour deterioration. Air vents keep the interior fresh and they are weatherproof.
The floor made of a resin mixed with extra toughening is meant to be able to withstand heavy objects like lawnmowers and motorbikes.
A downside for some would be the ‘playhouse feel’ and you must use stand-alone shelving for storage.
Your colour choice is limited.
It would also be interesting to see how well the UV protection does stand up to wear and tear and colour fade as you cannot paint a Resin Shed. (apart from the Duotech range).
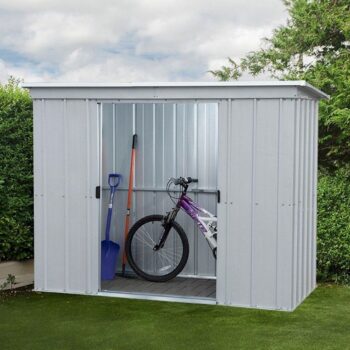
Metal sheds are long lasting and easy to assemble. There should be very little maintenance (provided installation is done correctly).
They resist extreme temperatures and are light and easy to move.
Although probably not the best-looking sheds, PVC and Vinyl coatings are helping to improve the look. Though they do feel a little flimsy to other types of sheds.
Some tin sheds are not rust resistant and this can become a problem as you need the proper tools to modify or repair.
Stand alone shelving is also needed for storage options.
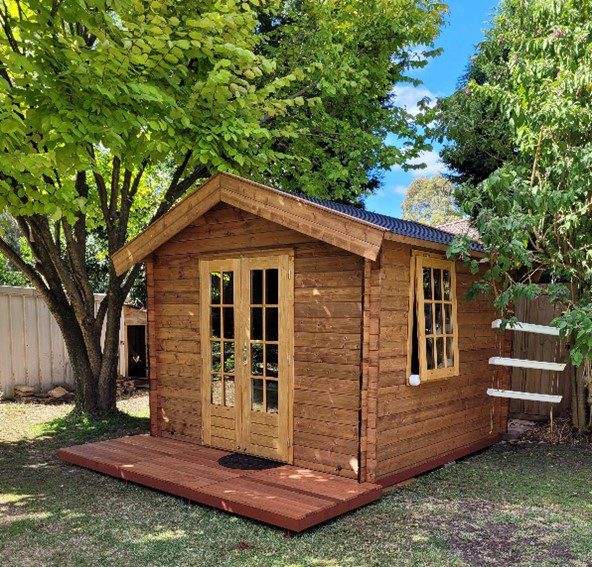
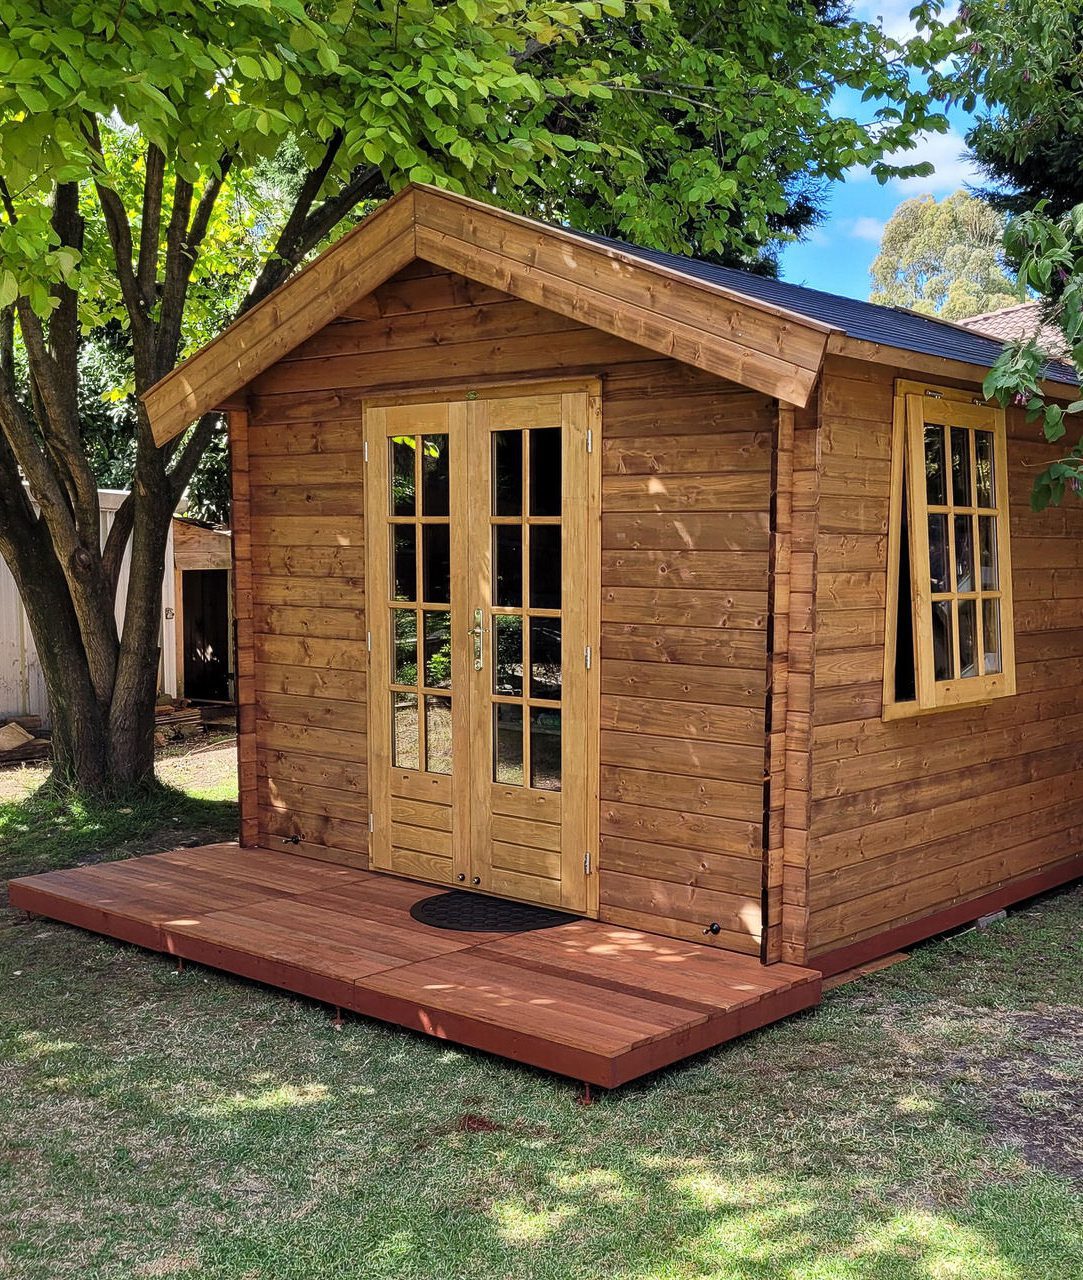
One of the main advantages of a wooden shed is its appearance, coming in many design options you can customise to suit your taste. Although they do need a lot more maintenance than their Resin or tin cousins, you can paint or stain in your own choice of colours.
You can make your wooden shed unique with window boxes, trellis and finials, adding a personal touch.
Easily lined, wooden sheds can become sleepouts, home offices and much more.
Shelving, cupboards and pictures can be easily attached to the wooden walls.
Although usually slightly more expensive, they have a warm, robust feel that a plastic/resin or a tin shed cannot give.
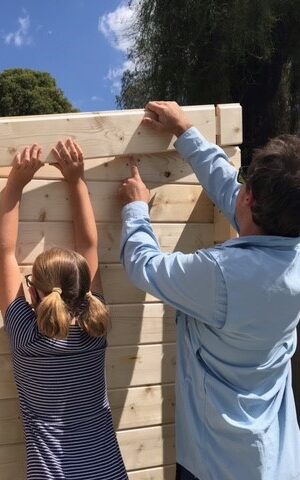
You do need some tools and skills to put a wooden shed together.
Maintenance is the key to a wooden shed to protect the timber from the elements of time. If looked after correctly they can give 15 plus years of good service.

SheShed kitsets are pre-approved in New Zealand for many common uses such as sleepouts, home offices, art studios, and much more, as long as you follow some specific rules. See our summary of the relevant points below, or for more information about building rules, check out: CanIBuildIt.govt.nz
Please note that this is our best understanding of the rules at the time of writing this article, and as the rules change from time to time and the interpretation may be different in different areas, this article must not be considered as covering all relevant aspects, or taken as legal advice. The SheShed team always recommend you check with your local council if you have any questions about local building requirements.
Click on the toggle-button options below to preview your likely consent status.
Including any kind of plumbing facilities for toilets, showers, sinks, or the storage of drinking water?
If used for sleeping accommodation, the facilities (eg bathroom and drinking water) of an existing dwelling must be readily available and used for sanitation.
(If you’re building on a sloped section, measure from the proposed floor level down to the ground on the steepest side.)
Have a look at the table below for a summary of heights, but please note that these heights are excluding any foundation or subframe:
| Standard Kitsets (Under 10 square meters): | Medium Kitsets (10 to 18 square meters): | Large Kitsets (19 to 30 square meters): |
|---|---|---|
| Cottage Garden Shed (5m2) = 2.6m tall. | Cabana Cabin (12m2) = 2.9m tall. | Tasman Cabin (20m2) = 2.9m tall. |
| Star Cabin (9m2) = 2.8m tall. | Coastal Cabin (12m2) = 2.56m tall. | Alpine Cabin (19m2) = 2.71m tall. |
| Tussock Cabin (8m2) = 2.47m tall. | Ranch Cabin (12m2) = 2.9m tall. | Brook River Cabin (19.4m2) = 2.9m tall. |
| Star Canopy (9m2) = 2.8m tall. | Star Deluxe (18.75m2) = 2.8m tall. | Lake Cabin (29m2) = 3.4m tall. |
Whether you need to get building consent or not, there are a few other things you’ll need to have a check of as well.
1. Will your cabin comply with your local council’s District Plan?
Each council creates its own District Plan specific to its area, so rules may vary depending on where your project is located. You must check with your local council to make sure your proposed building work complies with the District Plan. If it doesn’t, you will need a resource consent before building work starts.
2. Will your cabin comply with other legislation?
You may need to consider additional rules and legislation, such as the Resource Management Act 1991.
3. With or without a building consent, you will need to make sure you follow the Building Code.
An example of this is that you will need to include a smoke alarm if anybody will be sleeping in the cabin.
4. Even if (based on the questions above), you do need to get council consent, your local council has the authority to grant you an exemption from it at their own discretion.
An example of this, is someone who needs to include plumping facilities in their cabin for use as a pottery studio. The use of “plumping facilities” would normally require a building consent, but as long as nobody will be sleeping in the cabin, most local council’s are willing to provide an exemption in cases like this.
For more information about building rules, check out: CanIBuildIt.govt.nz
SheShed kitsets are pre-approved as Class 10A non-habitable sheds that can be exempt from requiring development consent when building in most areas of NSW as long as you follow some specific rules. See our summary of the relevant points below, or Click here to read the full NSW legislation.
Please note that this is our best understanding of the rules at the time of writing this article, and as the rules change from time to time and the interpretation may be different in different areas, this article must not be considered as covering all relevant aspects, or taken as legal advice. The SheShed team always recommend you check with your local council if you have any questions about local building requirements.
(Click on the toggle-button options below to preview your likely consent status.)
Note: Composting toilets and rainwater collection may be ok, but you'll need to check with your local council as there may be other requirements for these. It's also worth looking into portable shower and toilet units as viable options within the consent rules.
Note: If you're building on any zone other than RU1, RU2, RU3, RU4 or RU6, your shed must be "located behind the building line of any road frontage".
(Including but not limited to carports, other garden sheds, gazebos and greenhouses etc)
If you don't meet one of the points above, you might still be able to build your shed, but you will most likely need to check with your local council and/or get planning approval.
If it turns out that you are likely to require planning approval or development consent, don't panic, this does not mean you can't build your SheShed, it just means you need to get more information and may have a few extra requirements to consider.
You can find more information about your next steps here on the New South Wales Planning Portal website.
2024
SheShed Australia & New Zealand. All rights reserved.