
0
$0
0 items
When it comes to creating your personal haven with a SheShed cabin in Australia, we are here to support your navigating the rules and regulations regarding council consent. Each state has its own set of guidelines and understanding them is key to enjoying your SheShed without any hiccups. Many of our cabins don't need any approval at all!
Click on the links below to view the official regulations for each State on their local governmental websites. (Links open in a new tab.)
• New South Wales (planning.nsw.gov.au/...exempt-developments...)
• Queensland (brisbane.qld.gov.au/...building-a-shed...)
• Australian Capital Territory (planning.act.gov.au/...development...)
• Victoria (vba.vic.gov.au/...building-classes...)
• Tasmania (cbos.tas.gov.au/...building-and-renovating...)
• South Australia (plan.sa.gov.au/development-applications...)
• Western Australia (wa.gov.au/...outbuildings...)
• Northern Territory (nt.gov.au/...building-a-garden-shed...)
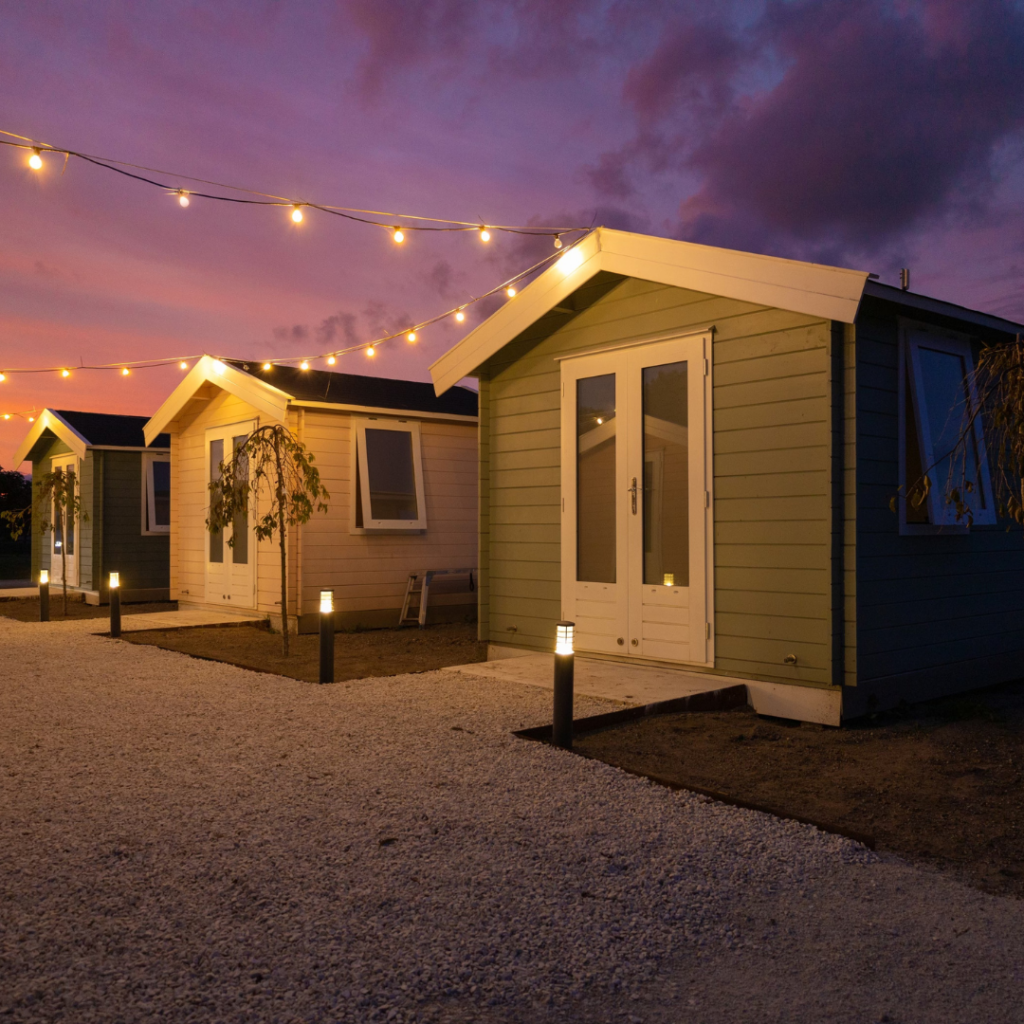
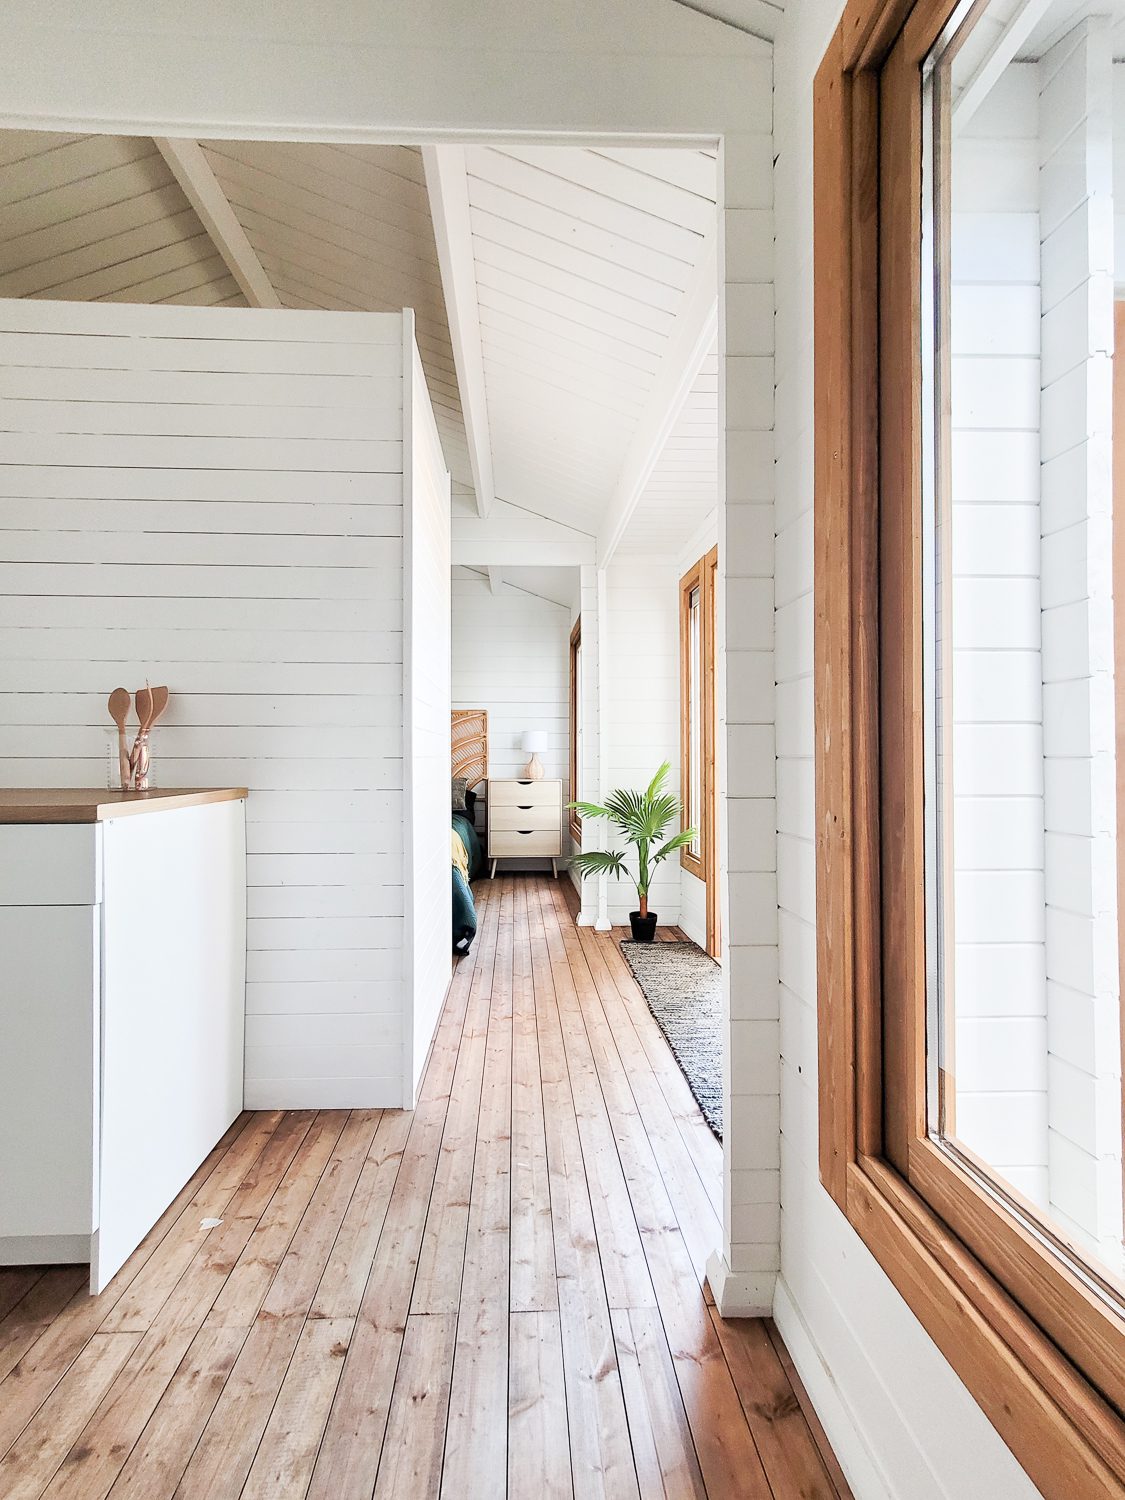
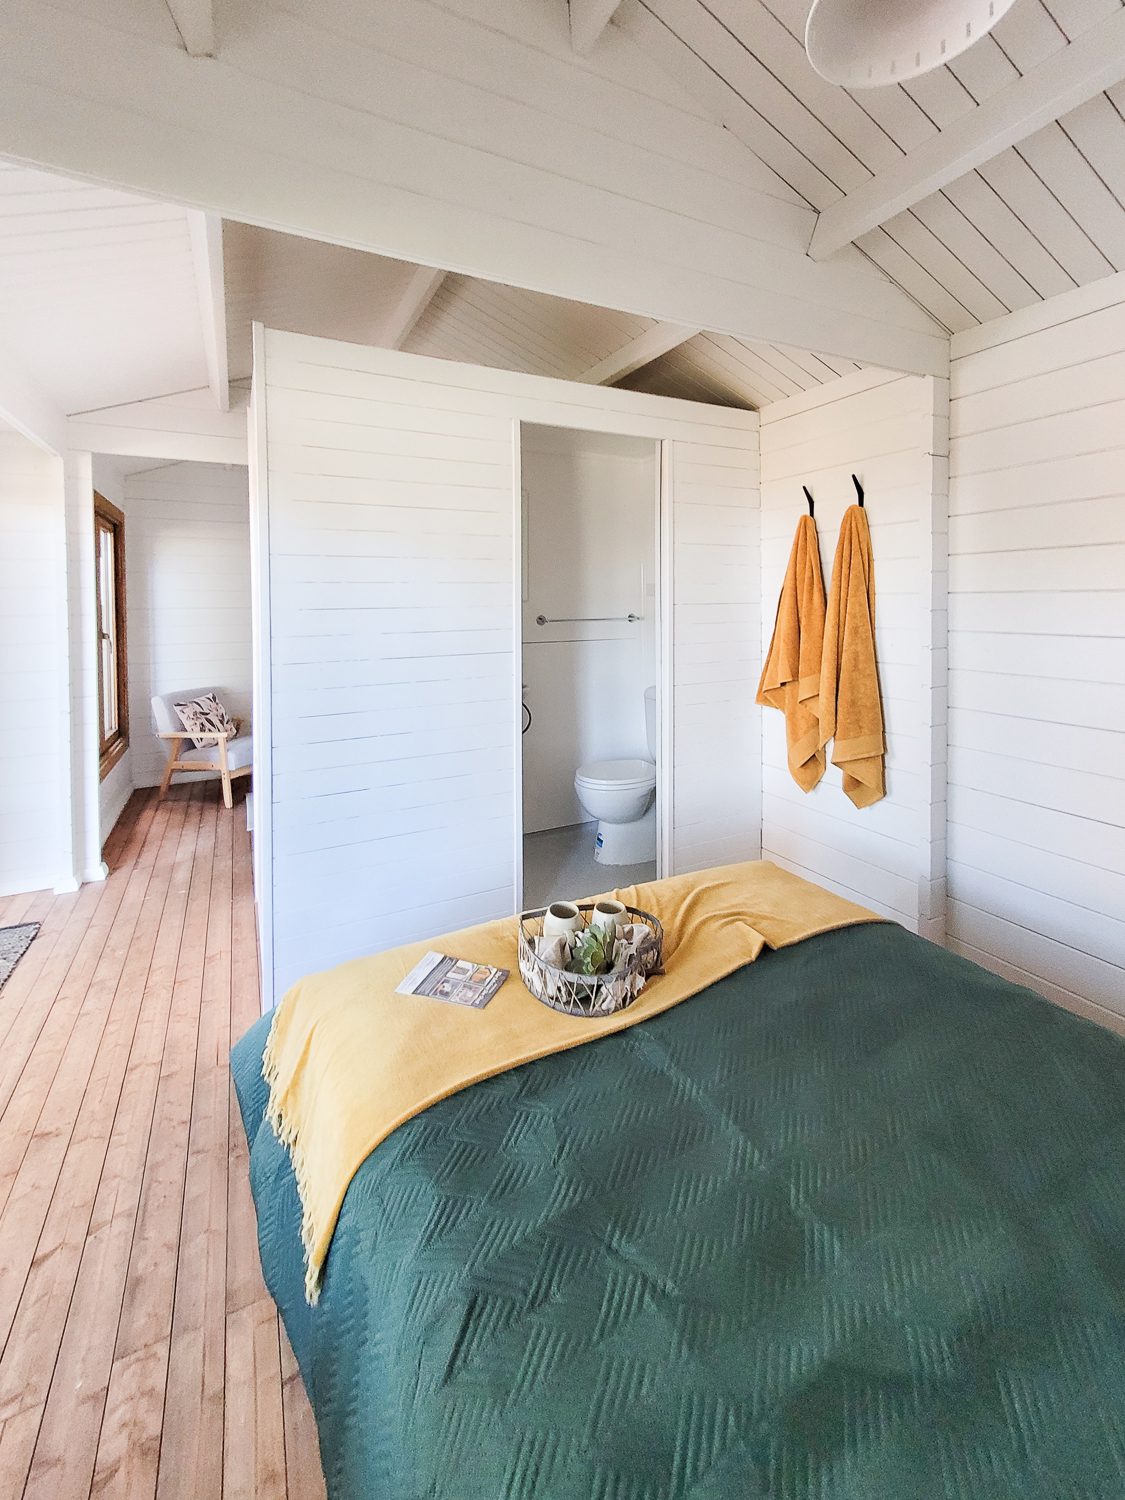
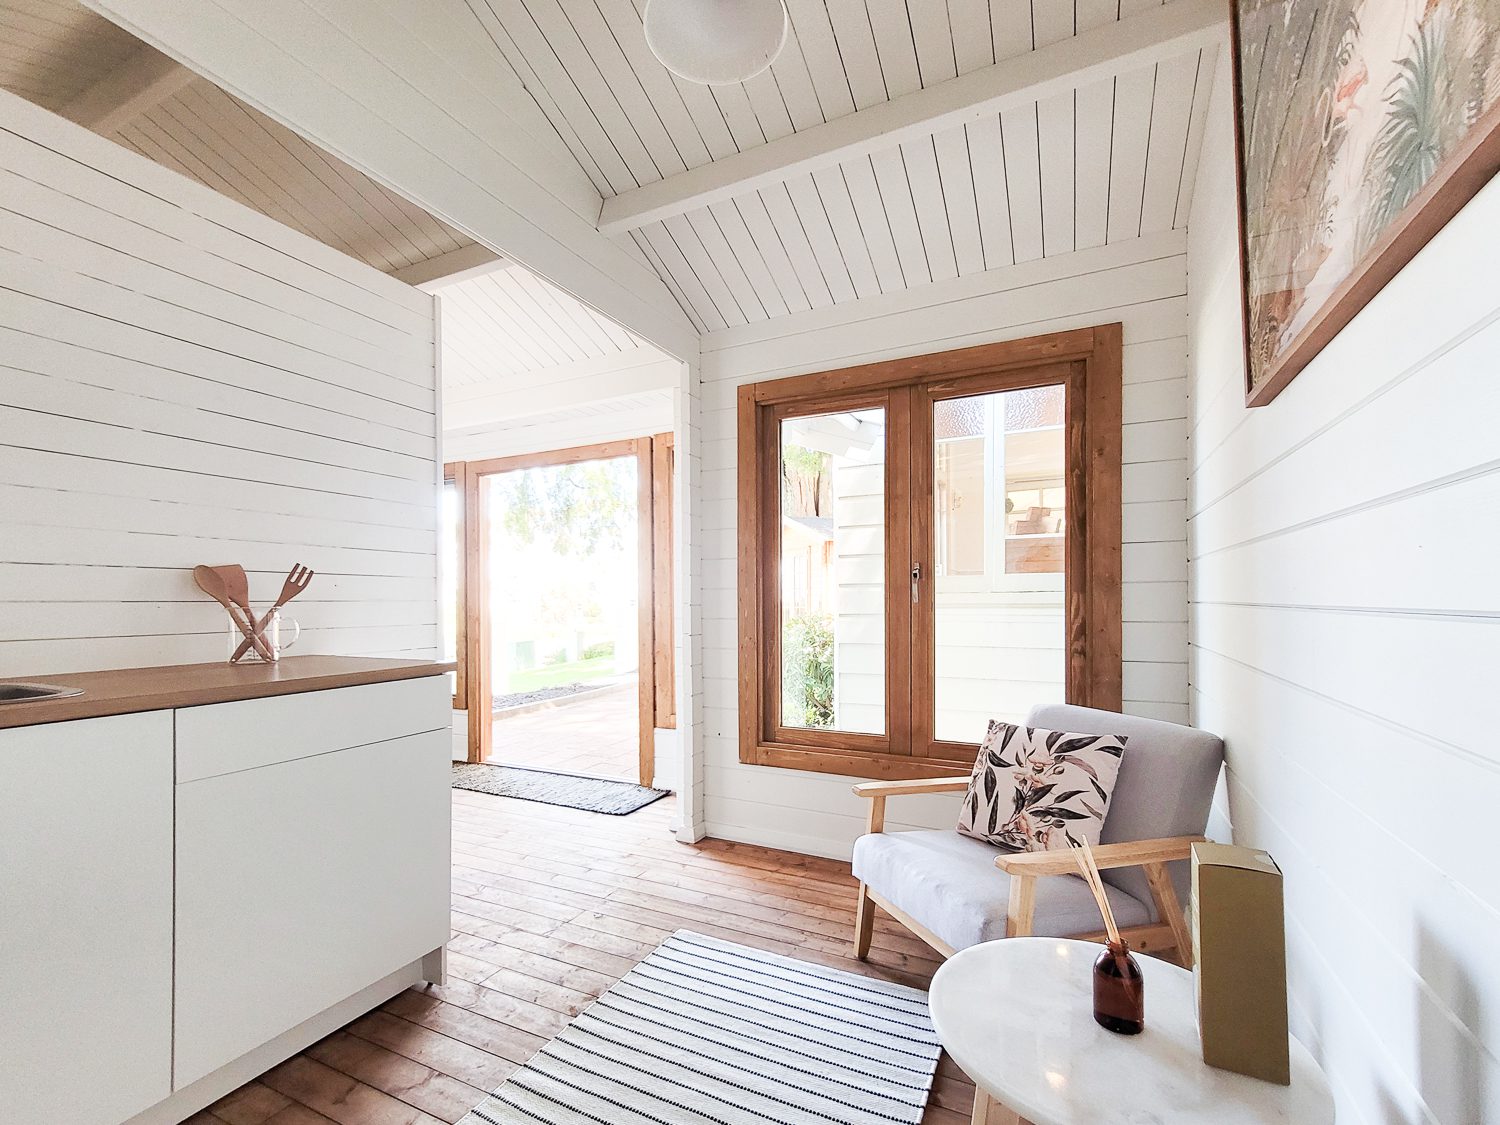
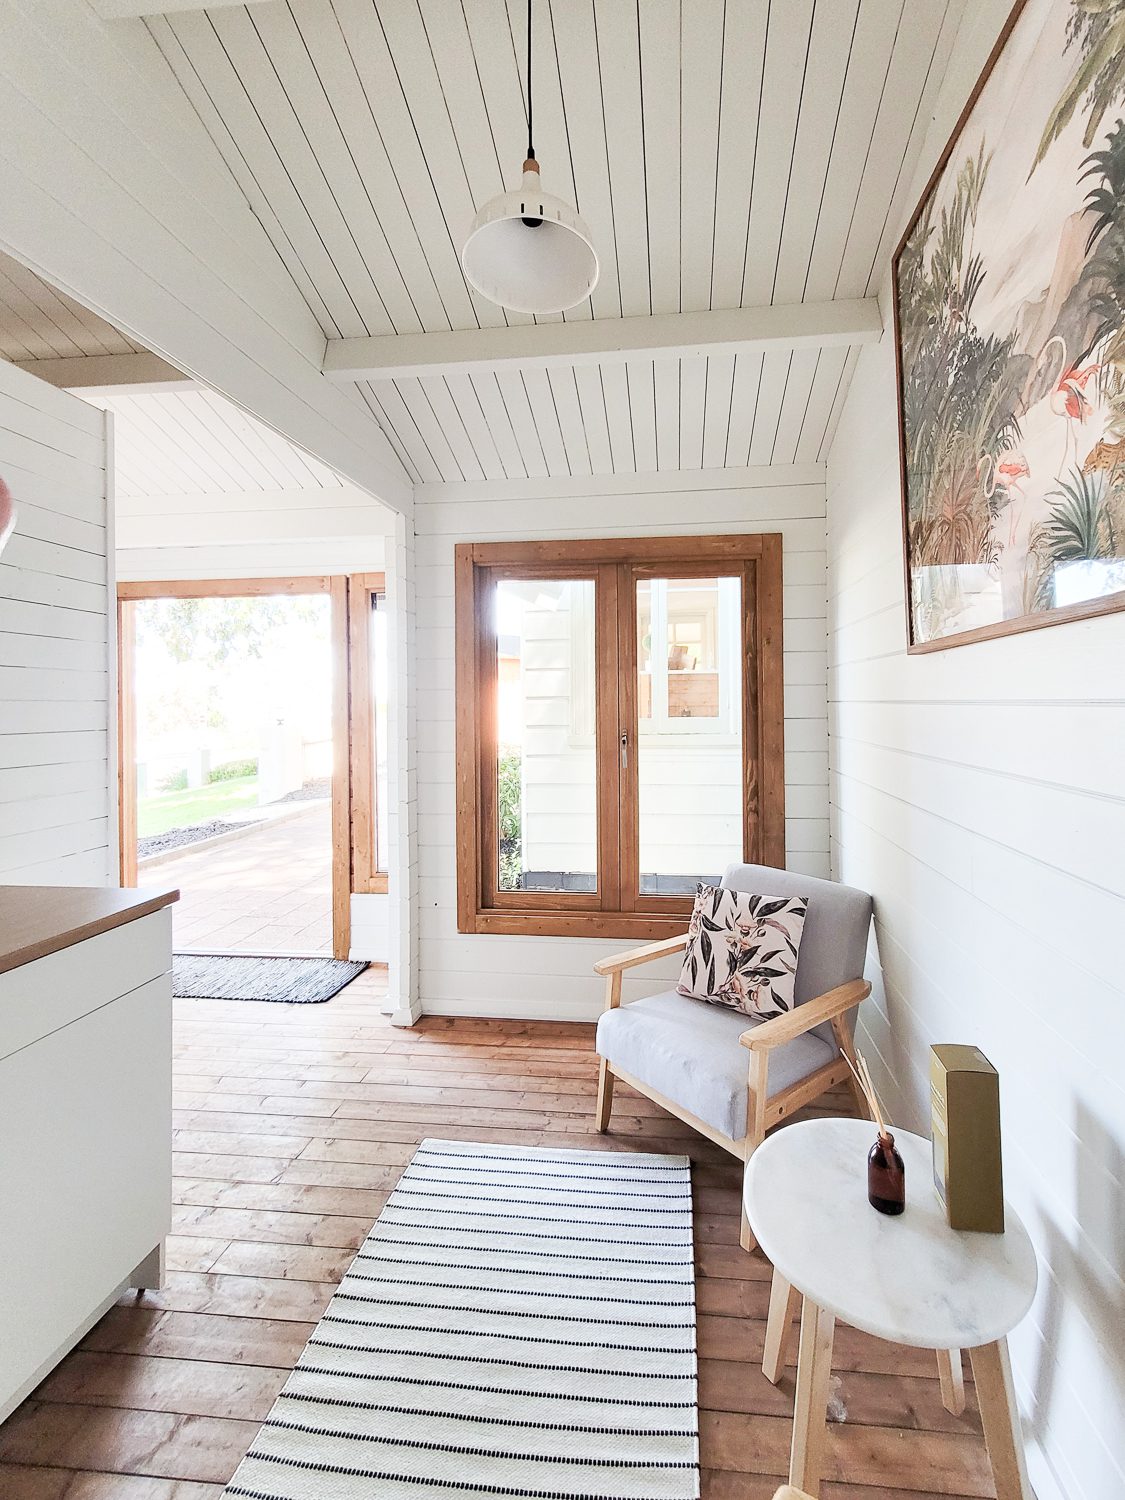
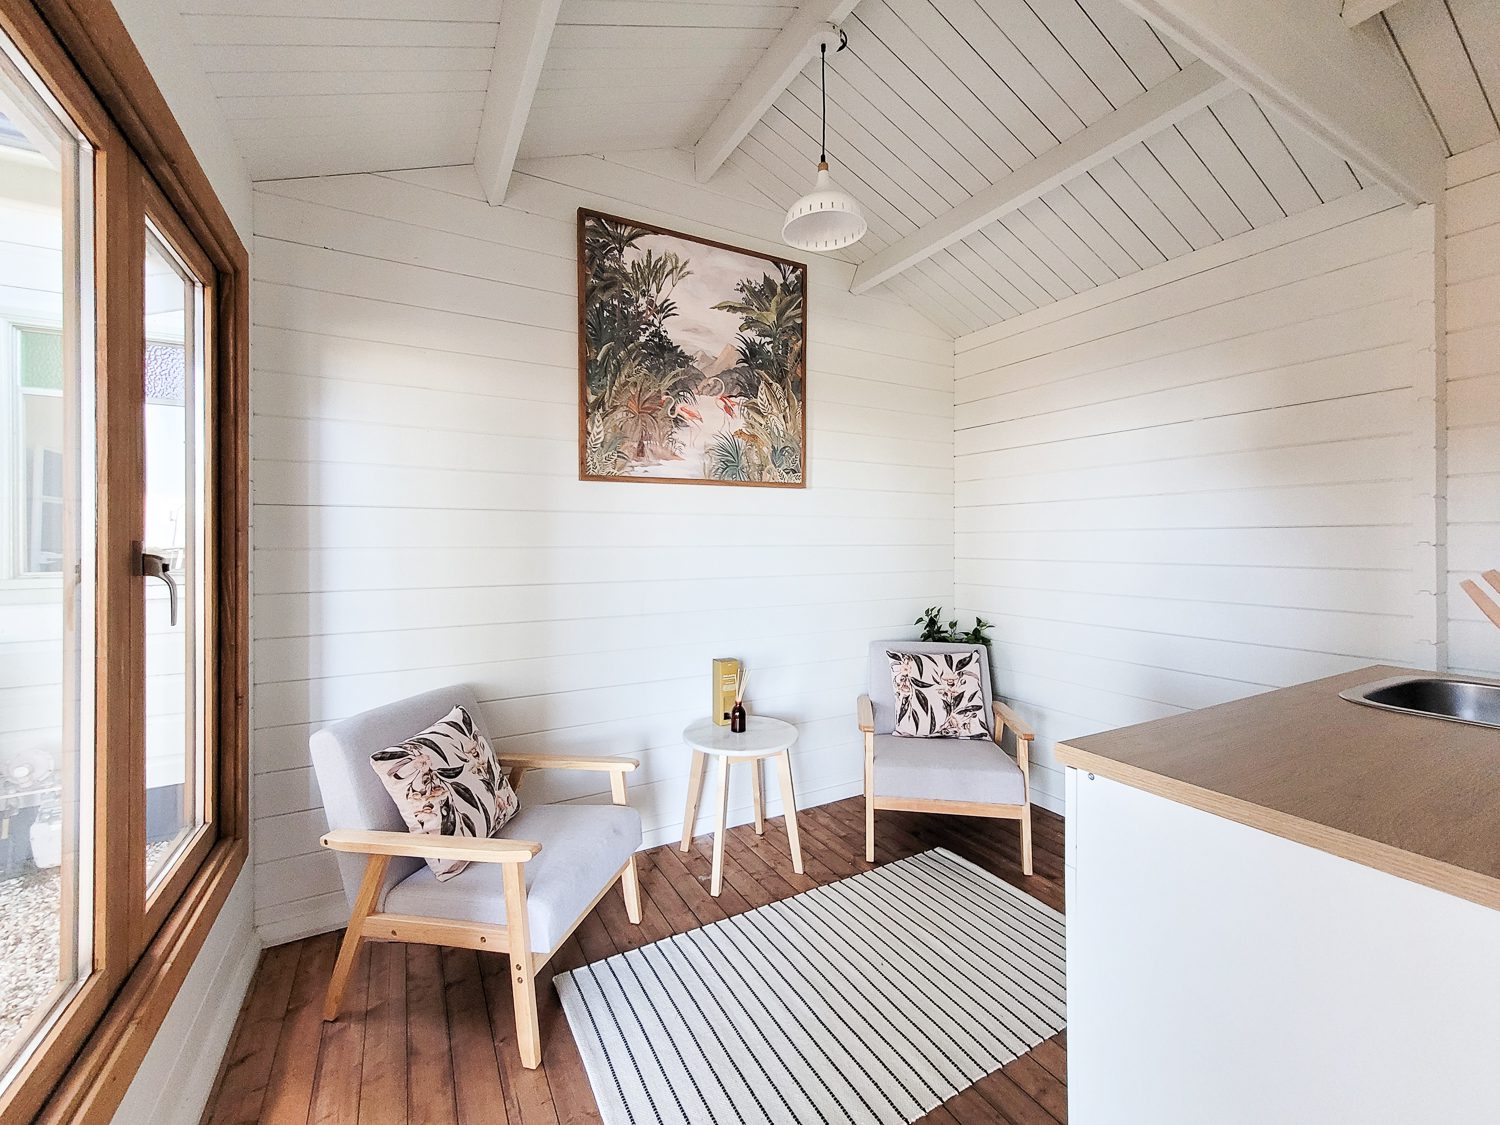
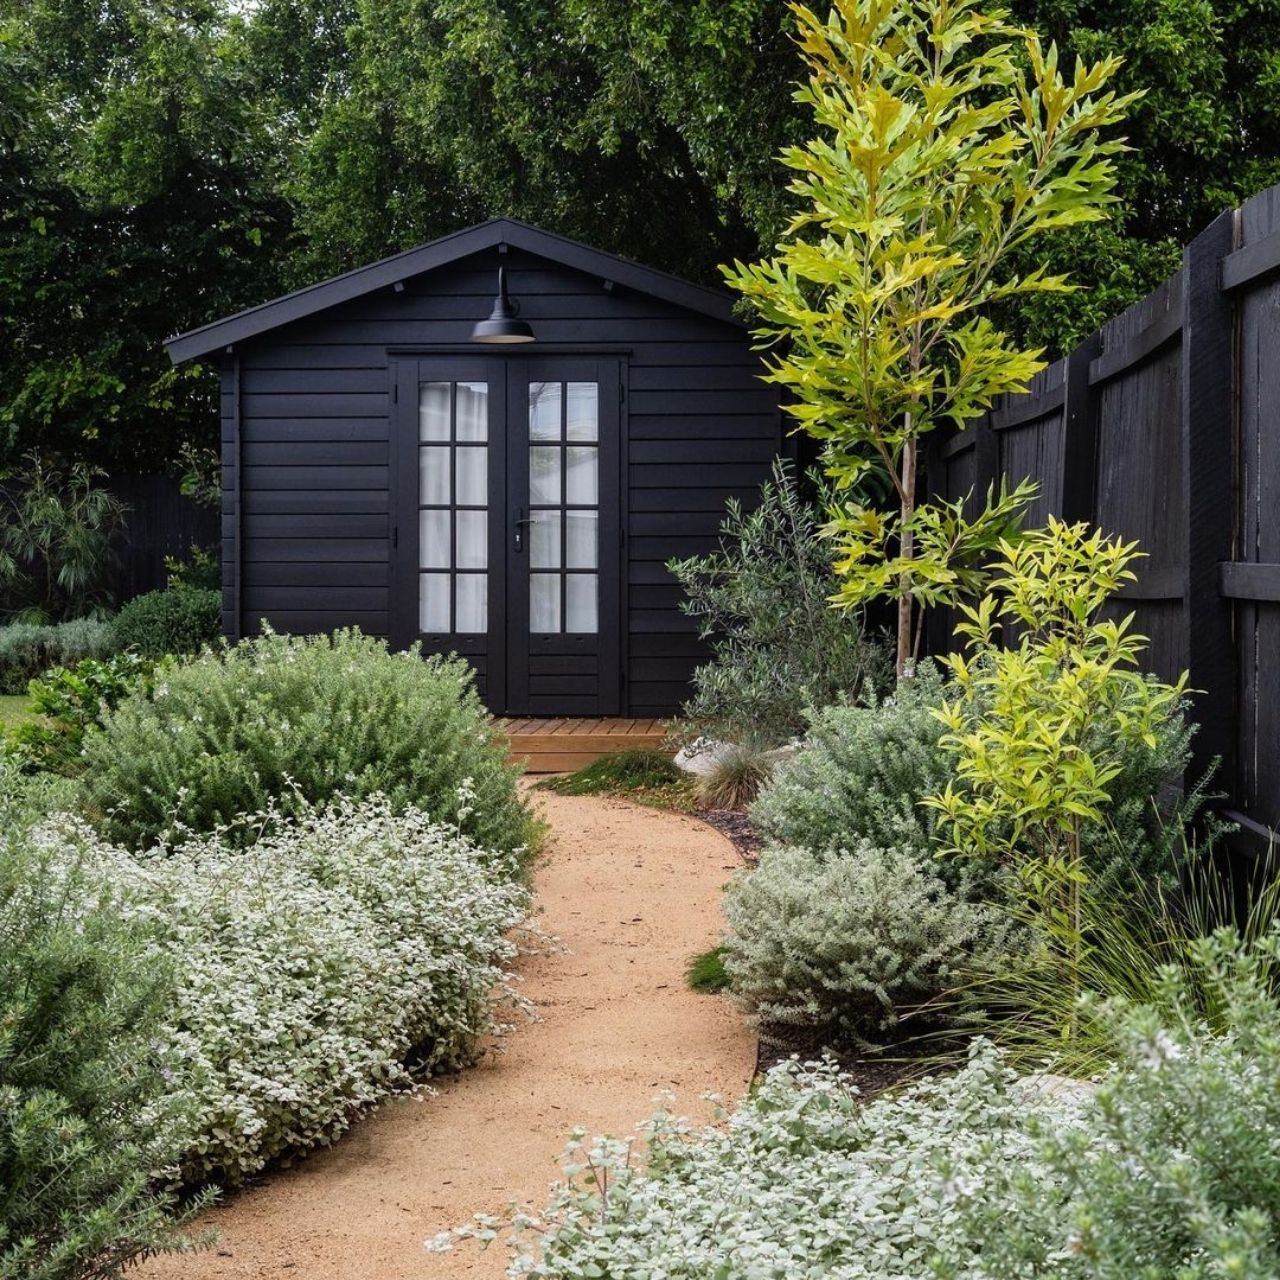
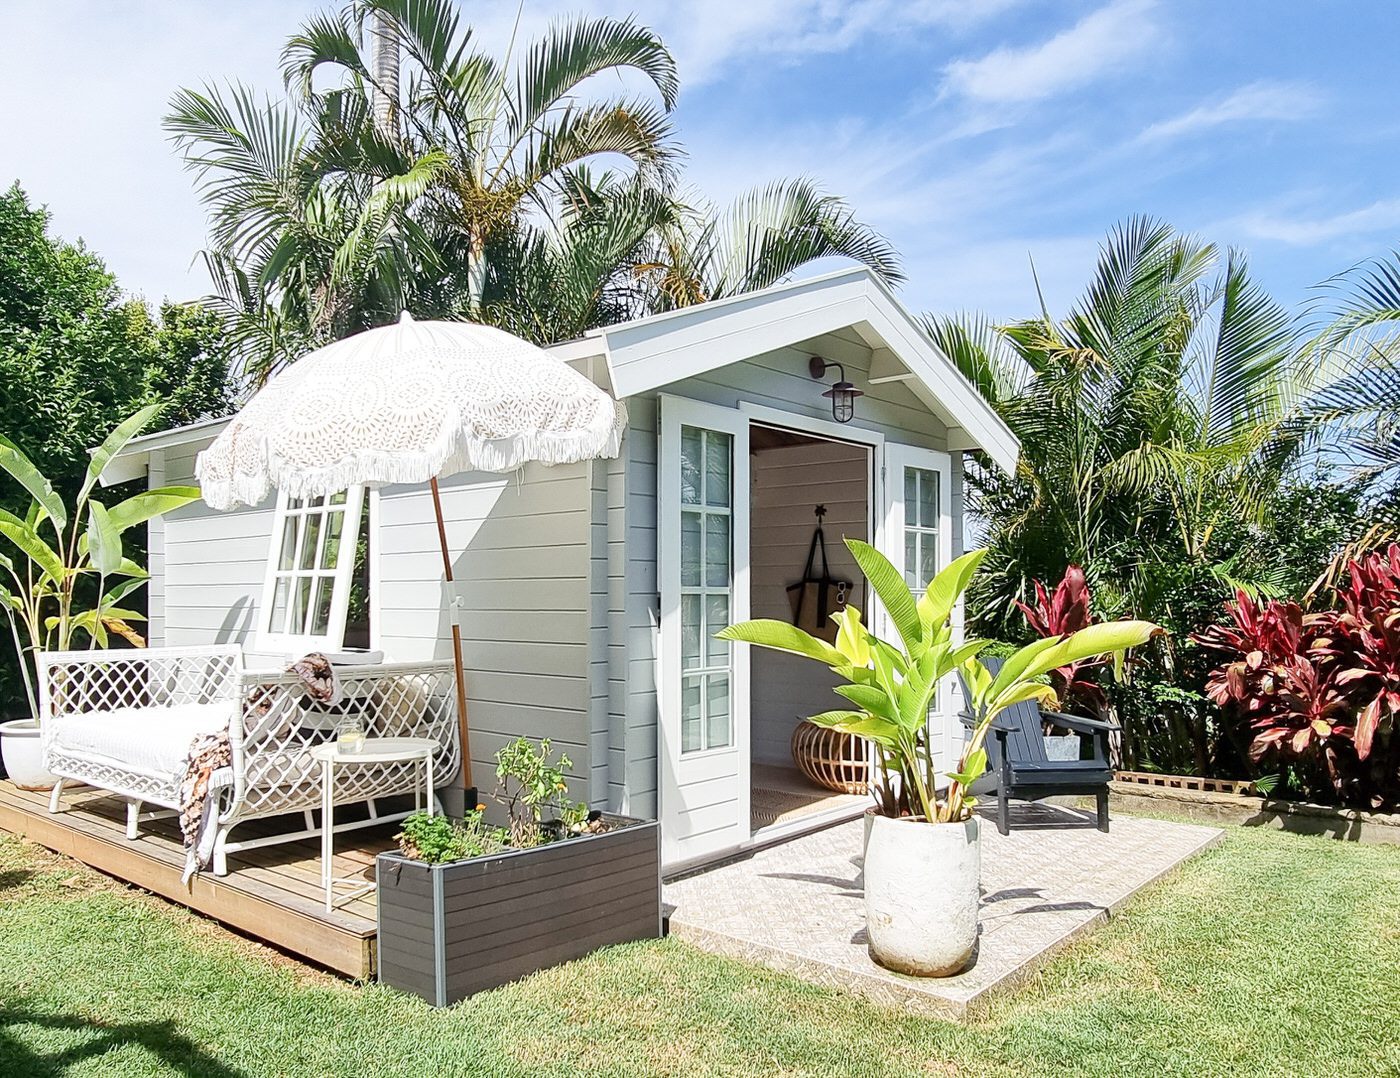
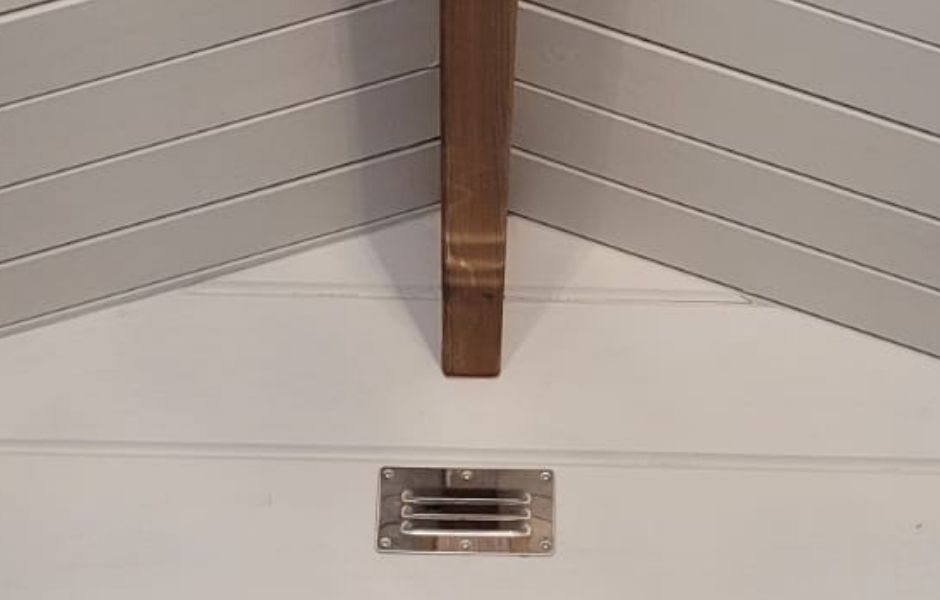
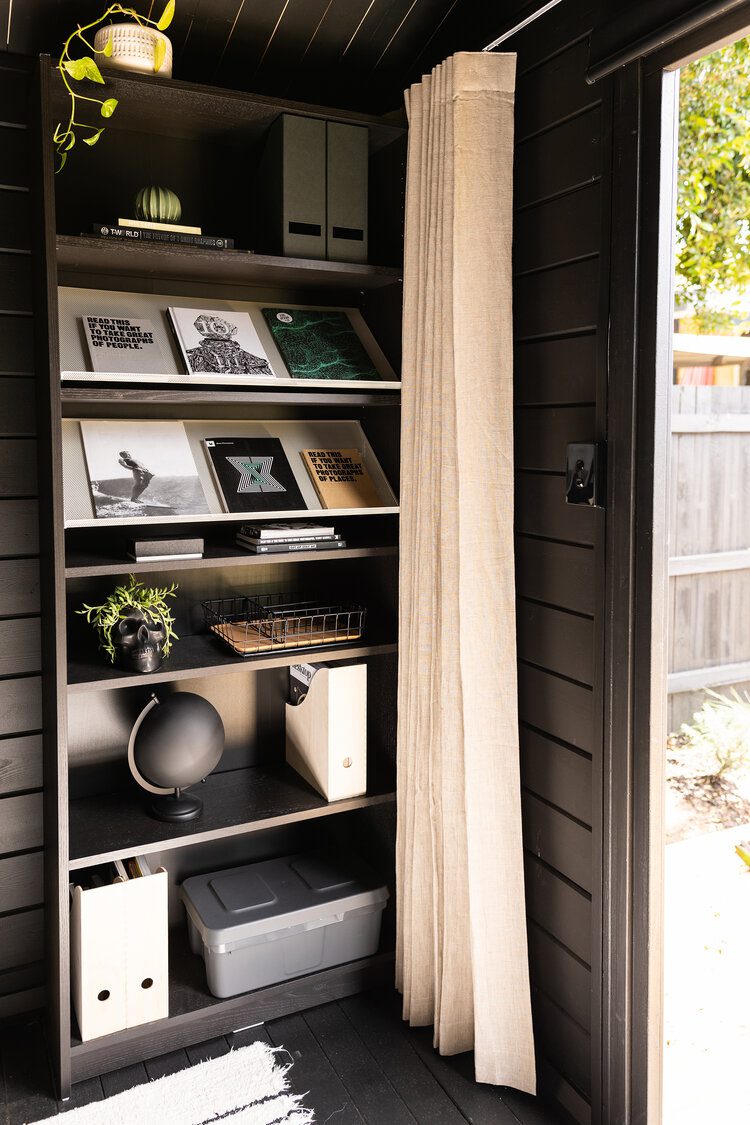
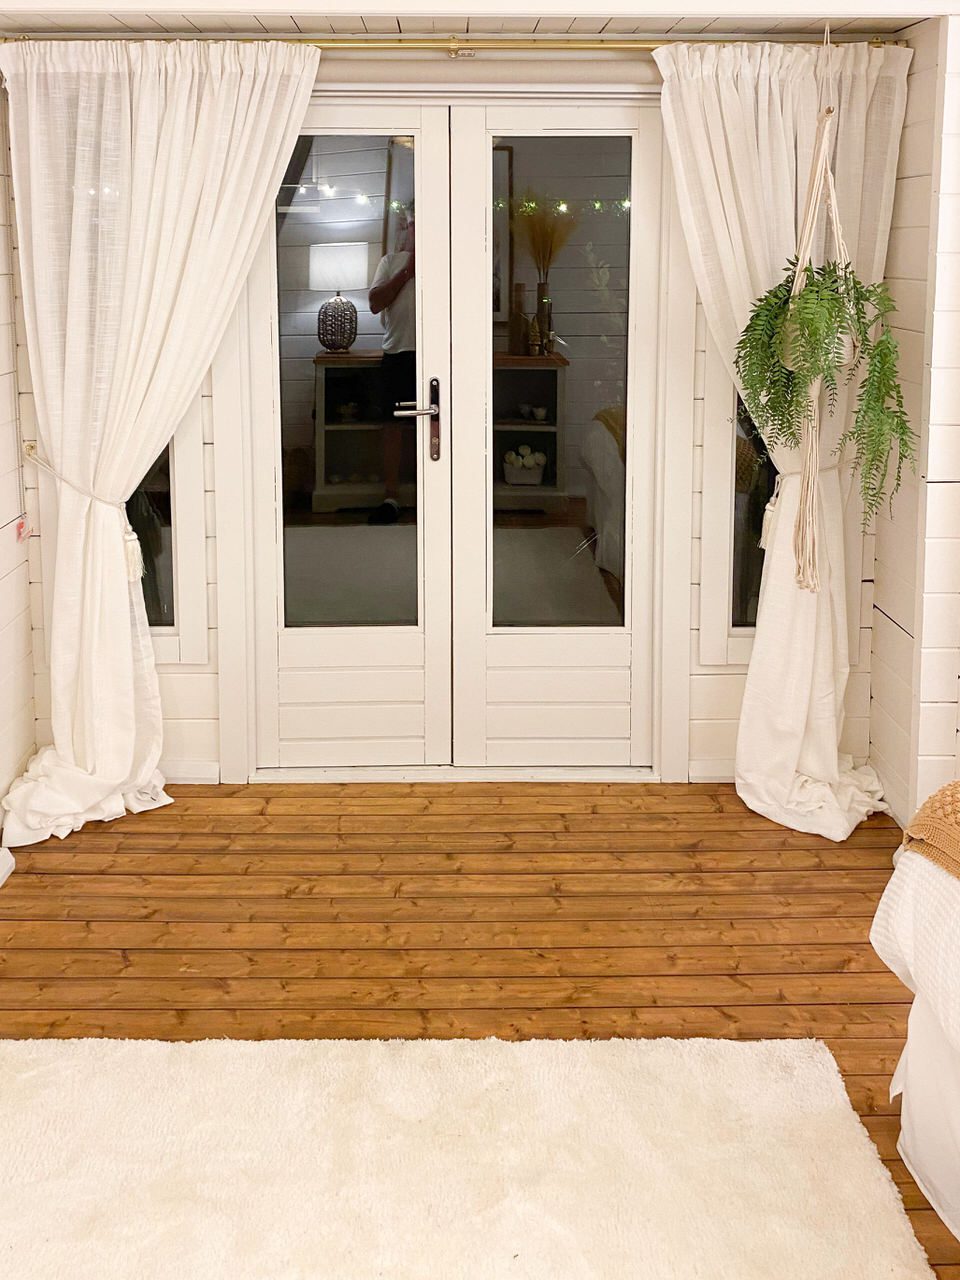
At SheShed, we’ve had many customers create stunning sanctuaries, some including bathrooms or other plumbing facilities like basins and sinks. We recommend adhering to your local rules, and here are some examples of what our customers have achieved in their own SheShed cabins and backyard sheds:
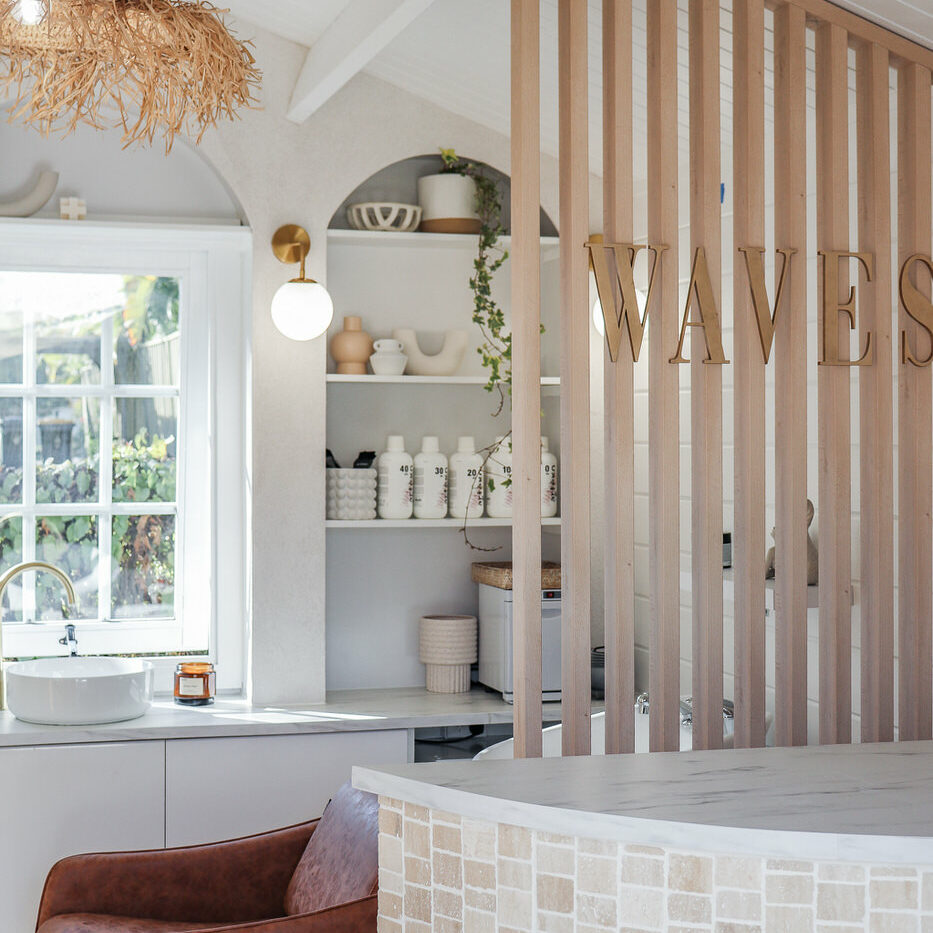

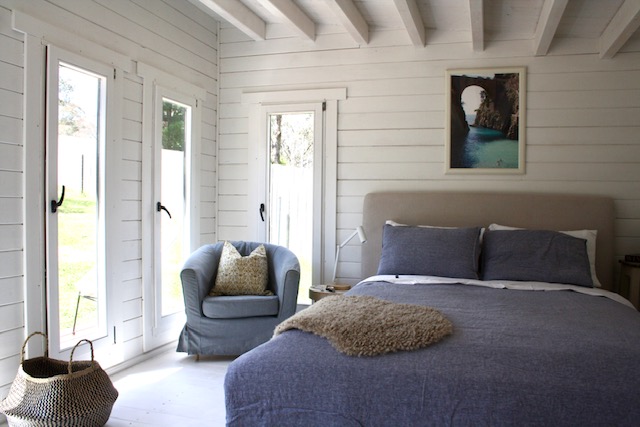

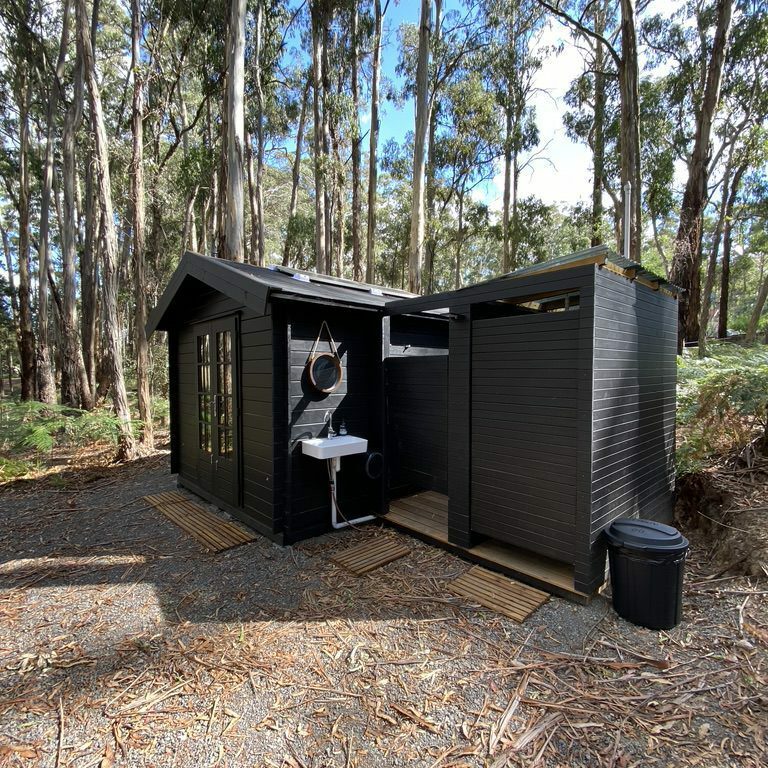
*scroll across to browse this image gallery
Some important factors to consider when determining whether your cabin needs council approval include:
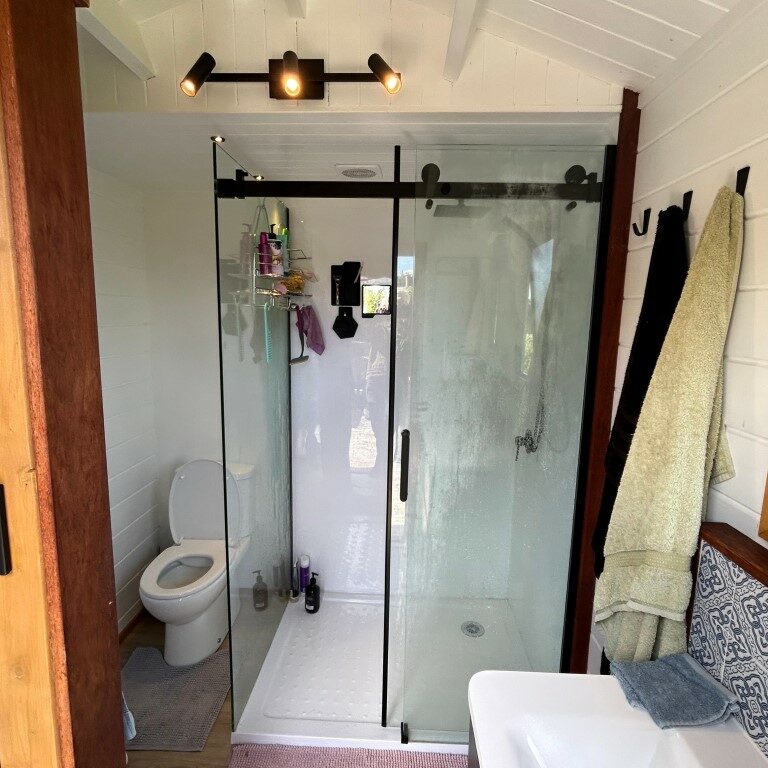
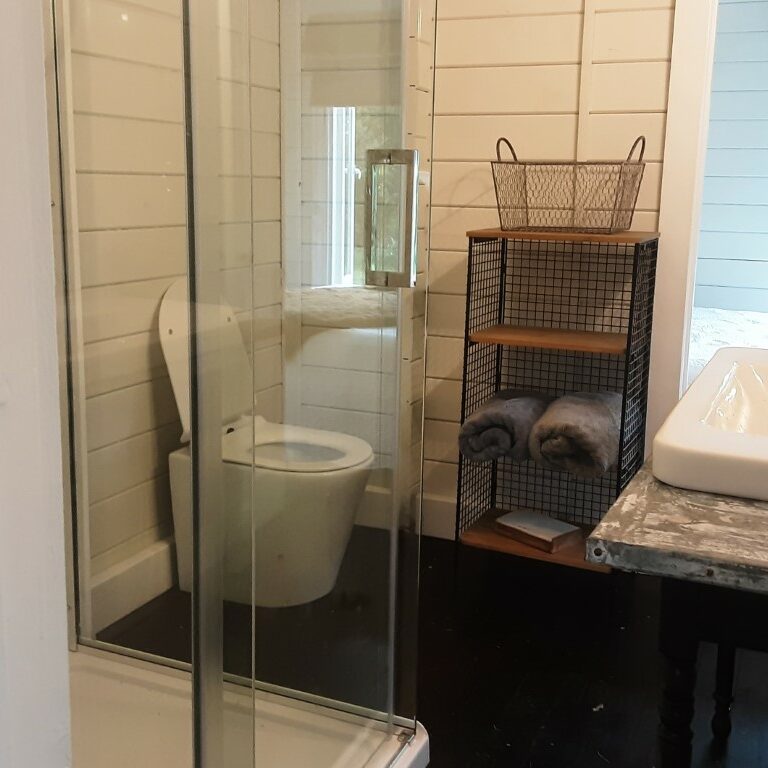
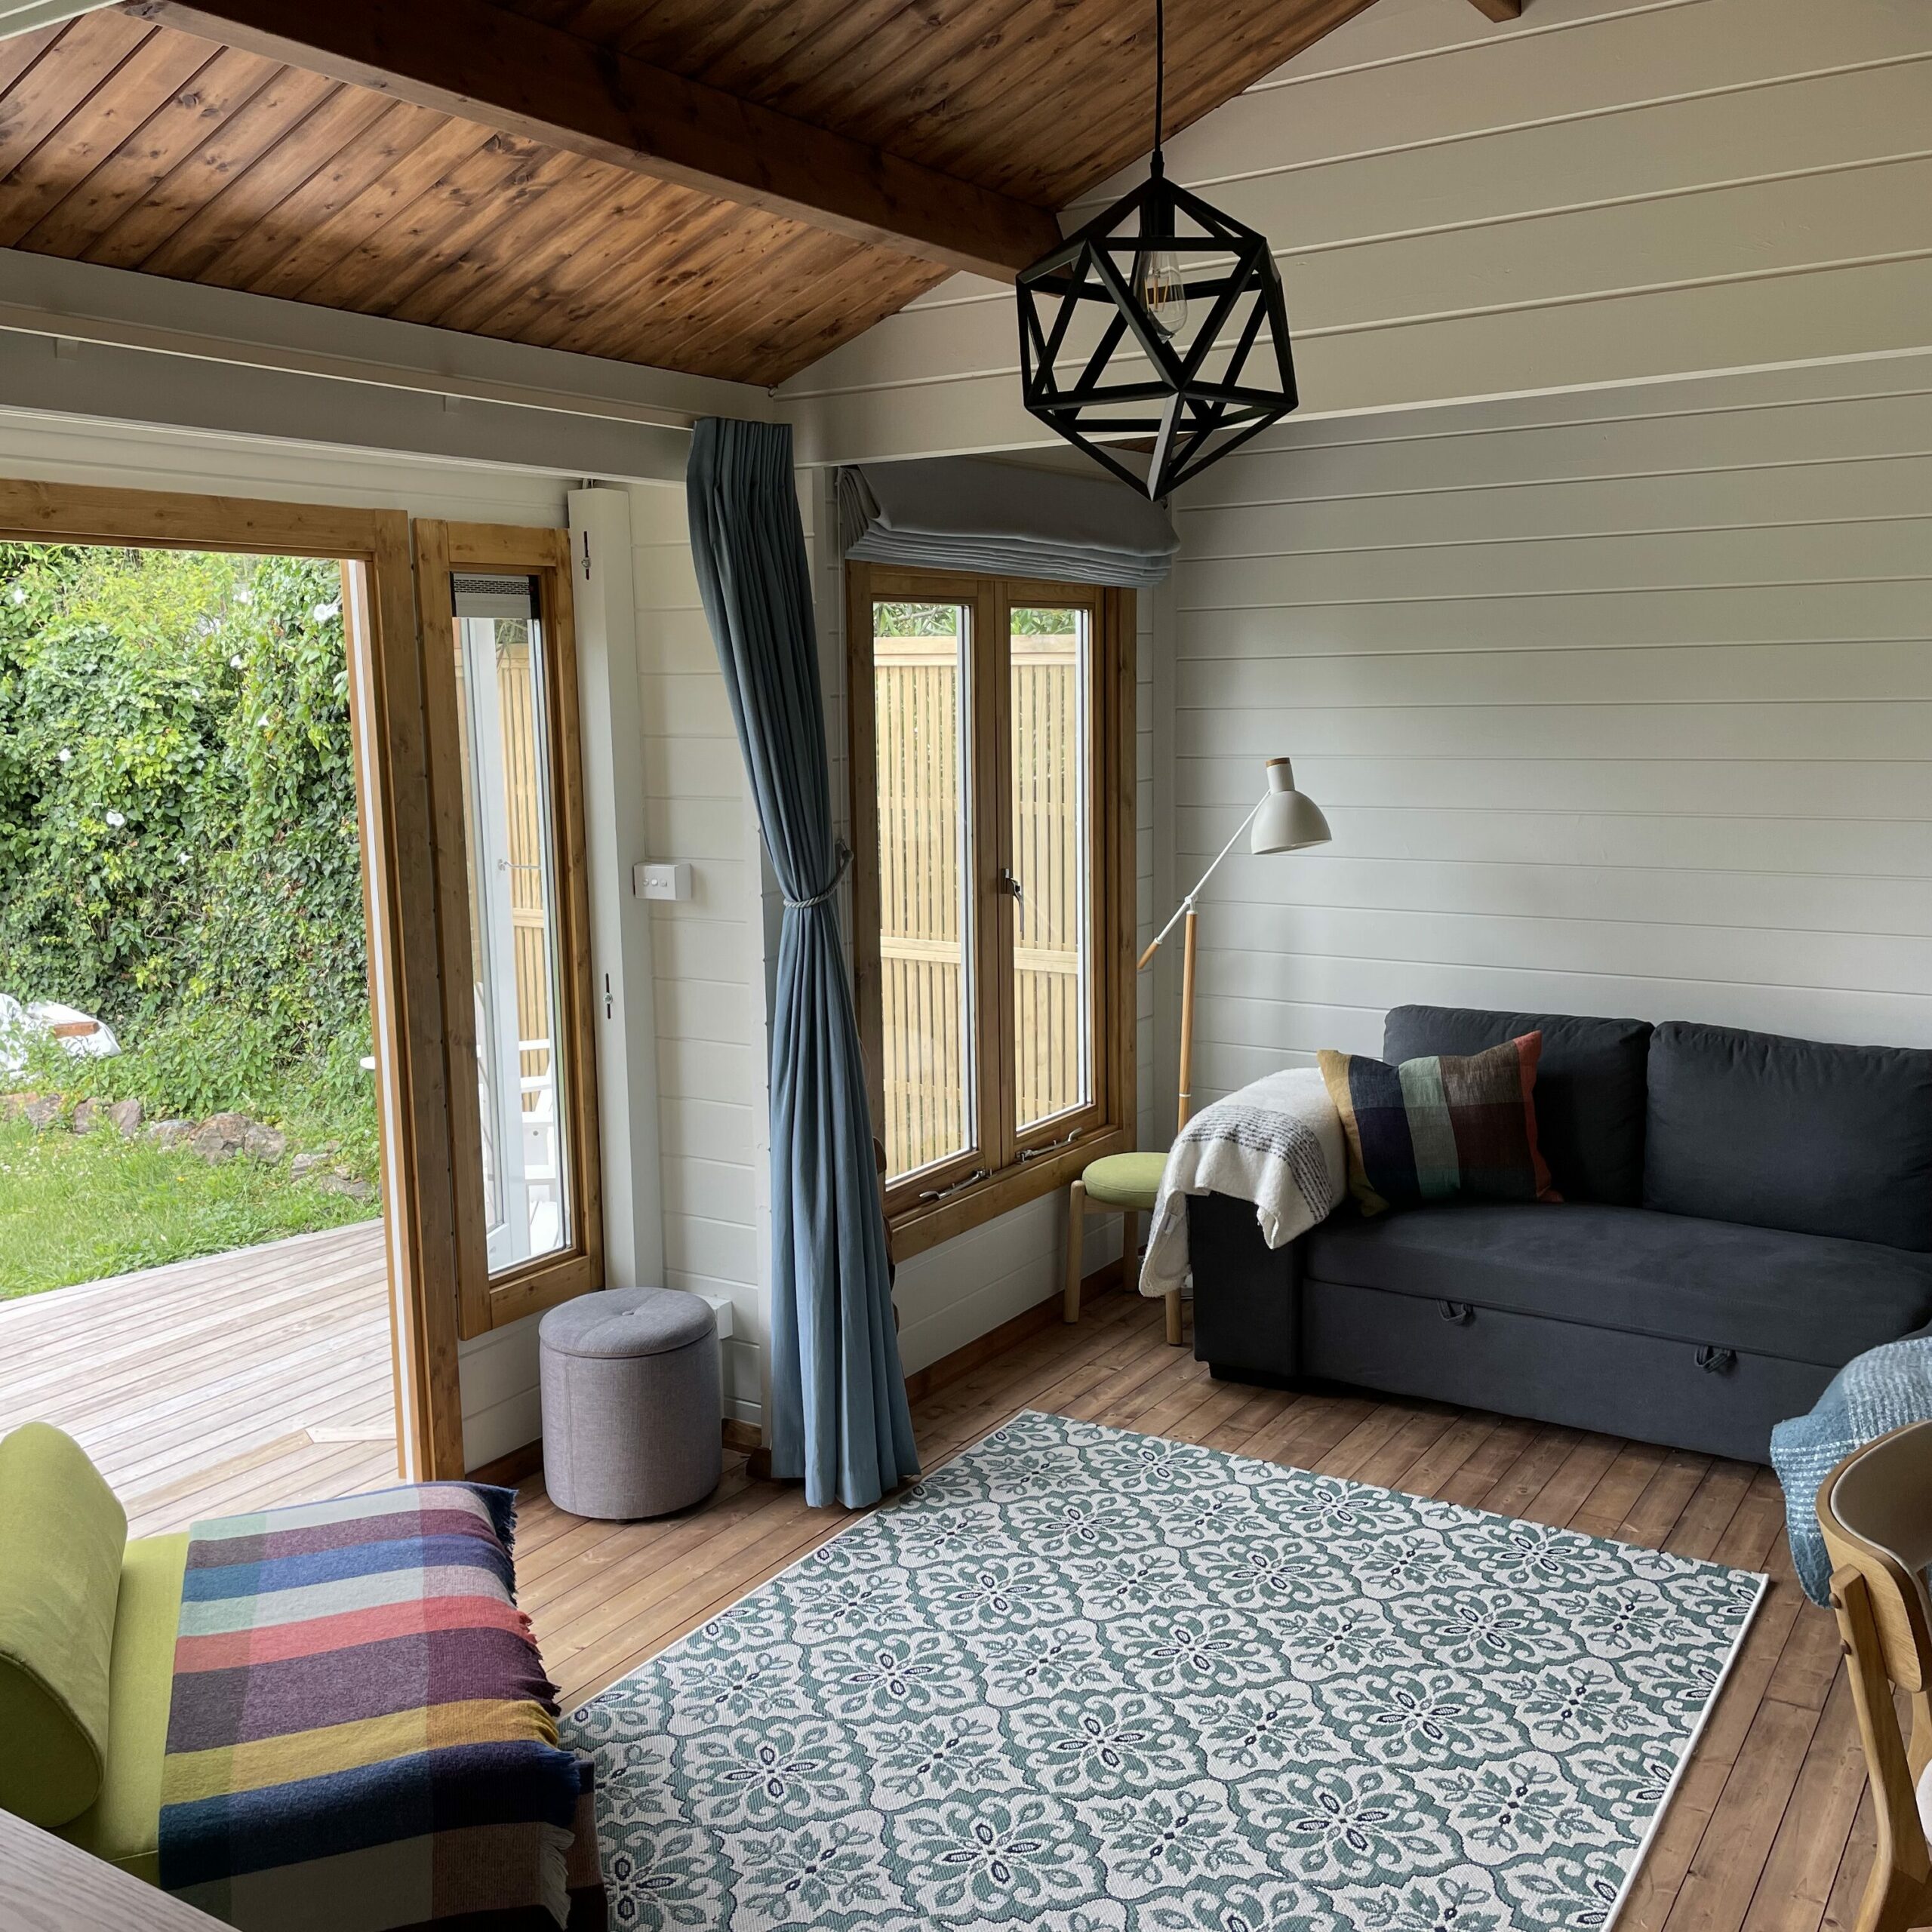
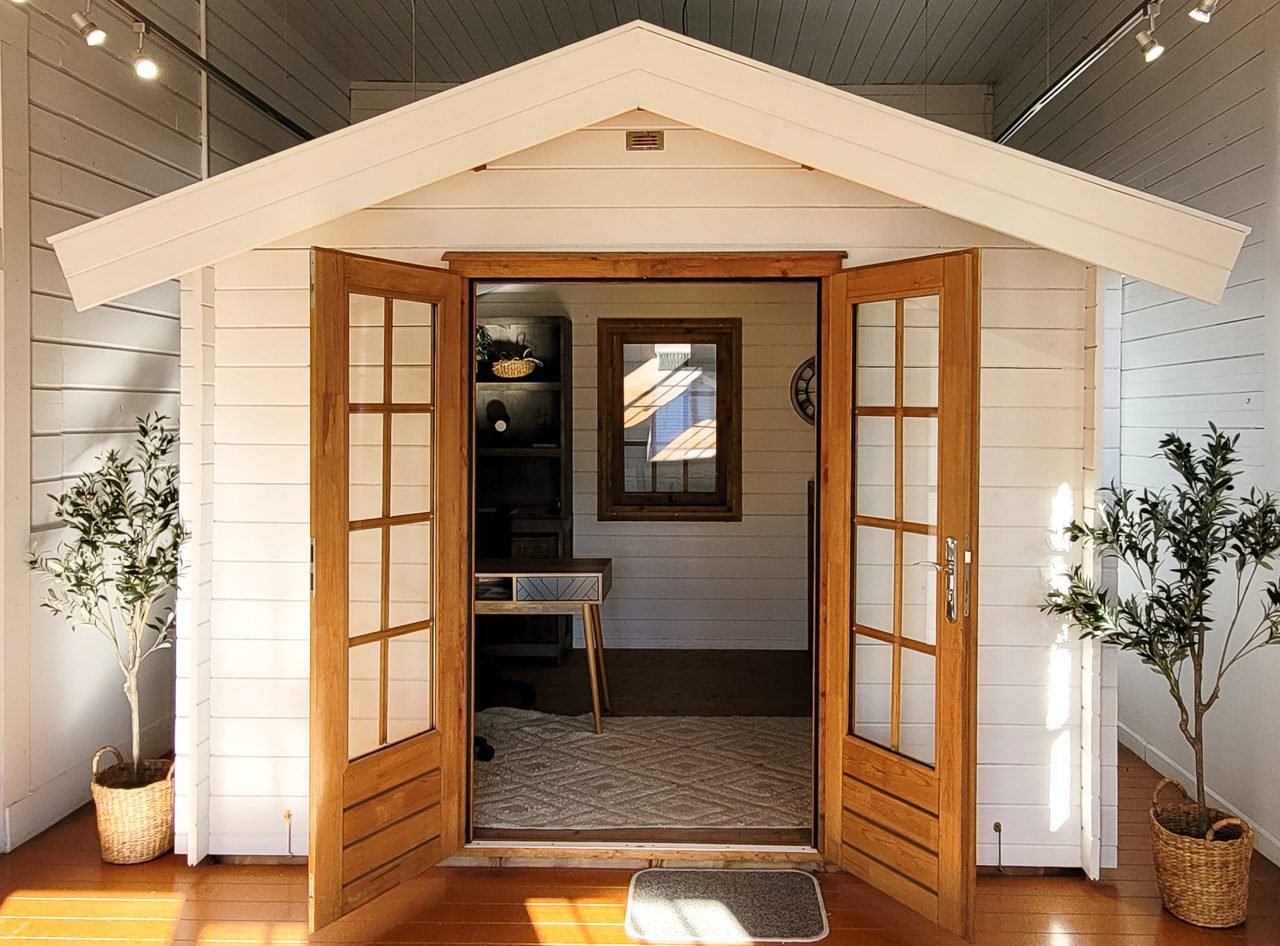
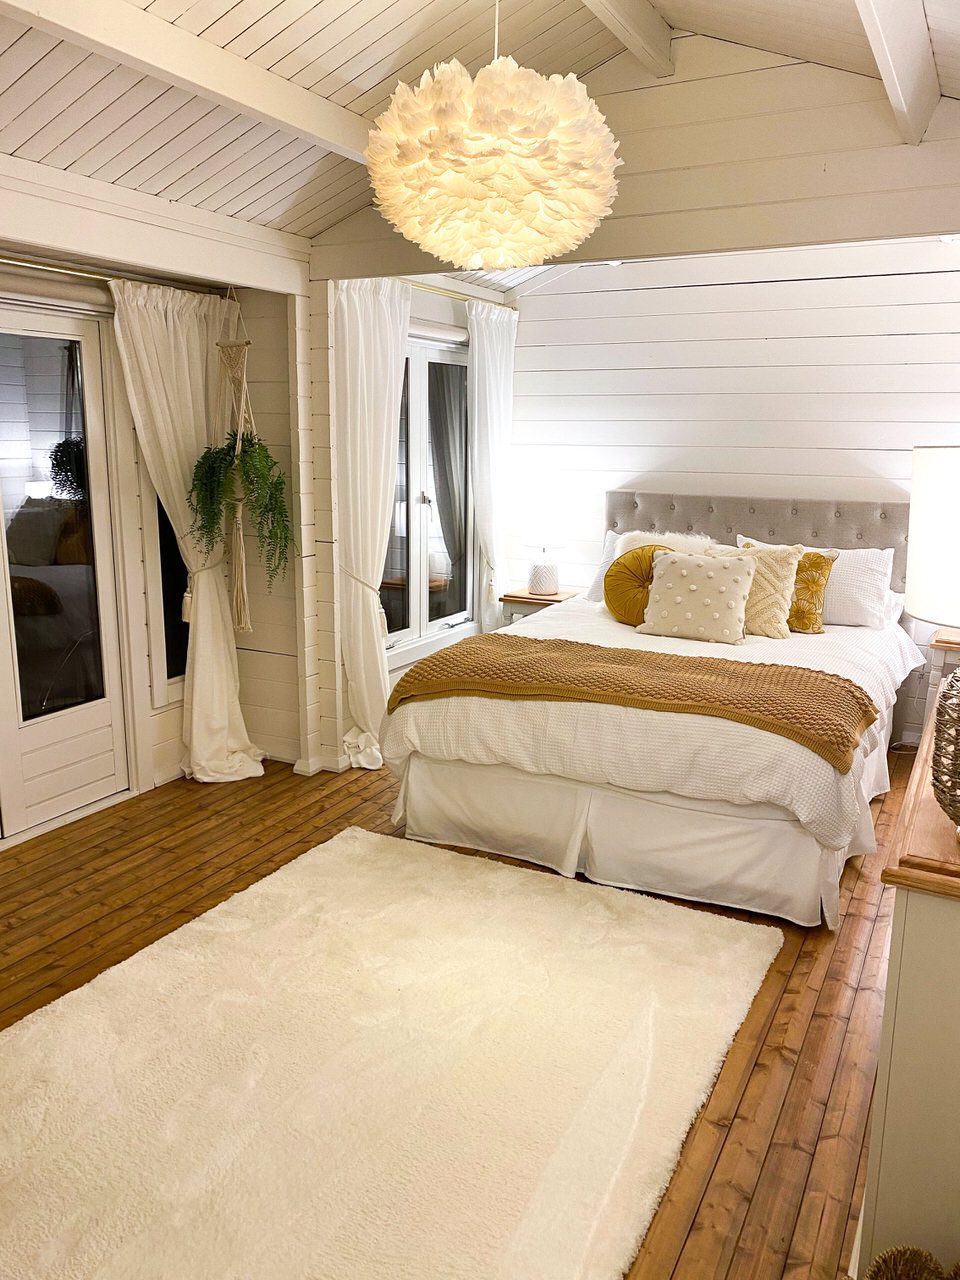
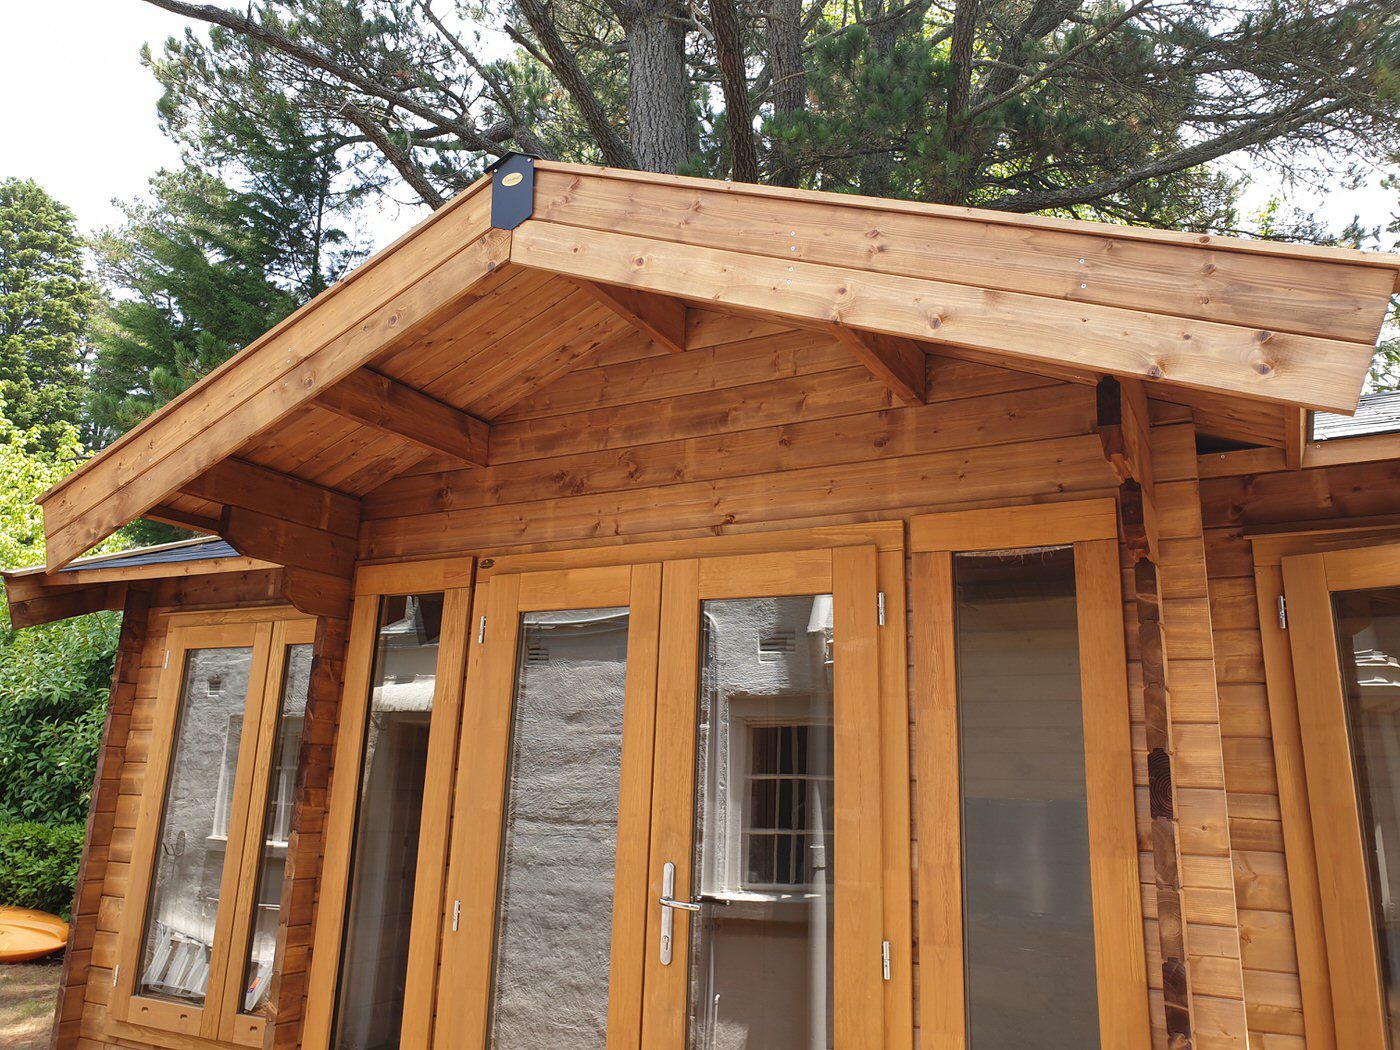
Step into the cozy charm of our Brook River Display cabin at the SheShed Showroom and office in Katoomba. This display wonderfully showcases how a SheShed can effortlessly become a versatile, multi-zone living space. We've added a delightful pre-fabricated bathroom pod from the folks at Add-a-Bathroom to enhance its features. And here's a little secret for our SheShed customers – quote your order and enjoy an exclusive 20% discount on all Add-a-Bathroom products. It's our way of adding a touch of comfort to your SheShed experience.
*Scroll across to view this gallery
Our team is here to guide you to the right places for the council consent process in Australia. We can assist you in understanding and navigating the specific regulations in your state, and who you need to get in touch with, ensuring a reduced-hassle experience.
Contact SheShed: For any inquiries regarding council consent for your SheShed cabin in Australia, reach out to our expert team at 1800 316 583.
Our SheShed flatpack kitset cabins are the perfect way to add extra living space to your home, or create a backyard office, or finally get that dedicated hobby workspace. But what if you need a bathroom or kitchen?
Each of our kitset cabins do not come with built in facilities, as we know each person purchasing has a different use, some just for an office, home business, studio or sleepout, and in some locations adding these facilities changes the council consent requirements.
So, can you add a kitchen or bathroom facilities to a SheShed log cabin or timber shed?
Yes and no, depending on your location...
The great news is that in most Australian states there are easy ways that you can add a bathroom or kitchenette to your backyard timber shed with only minimal additional requirements for getting council approval.
Give our friendly Australian shed consultants a call to chat over your project ideas and to learn more: 1800 316 583
For New Zealand though, adding cooking or sanitary facilities to your shed will class it as a dwelling, so if you want to get council consent, there are a few more hoops to jump through.
While not impossible, there are some significant alterations that would need to be made to your kitset, so see below or contact us for more information.
For either country though, we always recommend checking directly with your local council for any requirements that you'd need to meet to add facilities to your cabin, or you can give our friendly team a call to chat over your build project ideas and see if there are any other viable options available.
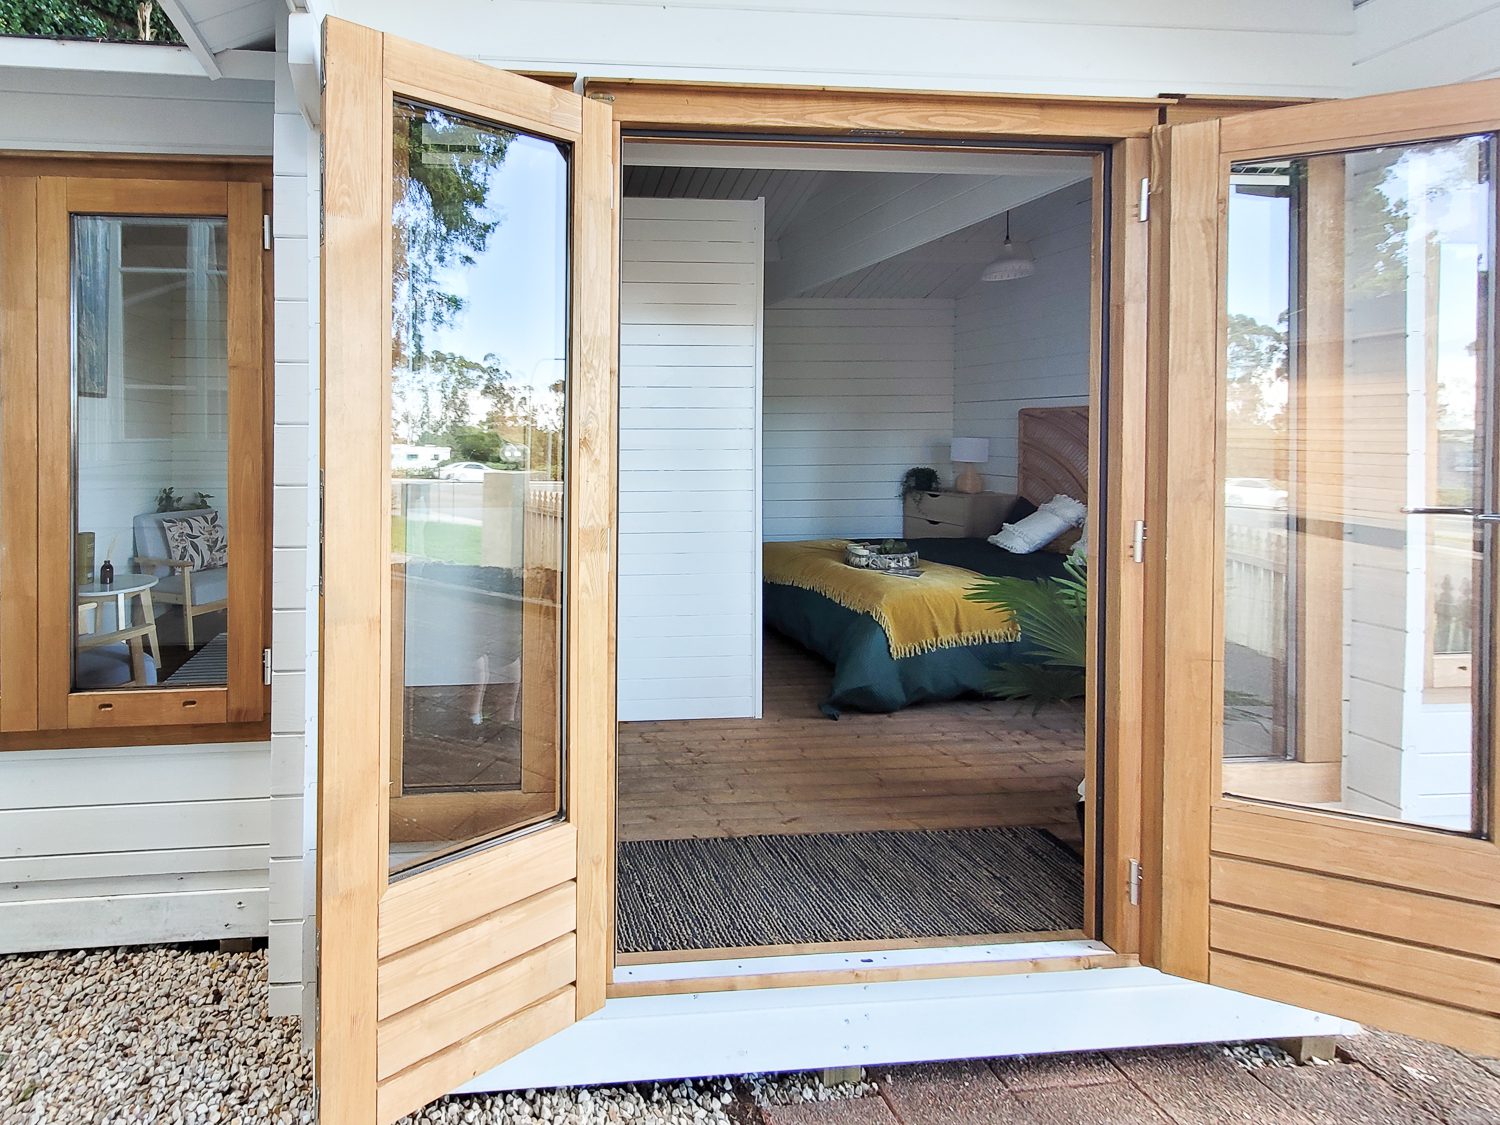
You can also book a complimentary Zoom tour of our Brook River Cabin in New South Wales (shown in the video above), which has a self-contained bathroom pod and small kitchenette added after construction.
If you live somewhere with restrictions on adding a kitchen or bathroom and you want to pursue getting council consent, what other options are there to consider?
Building an additional smaller shed dedicated as an outhouse or bathroom, can be a lot easier to get council consent. In some locations, (NZ and Aus), outhouses may be exempt, acceptable because of being “historically considered a permitted activity”, but this will vary from council to council, and will still have some restrictions on how it’s implemented.
Partially covered outdoor cooking facilities can also often be created in an aesthetically pleasing way and may have less stringent council requirements than a consented building. But either way, if you are unsure about the regulations, we do recommend checking directly with your local council in both New Zealand and Australia, or you can also talk to a local town planner if you're unsure for all requirements you will need to meet.
If you’re still keen on converting your kitset into a consented dwelling in New Zealand, our SheShed technical team have outlined a few areas where alterations may need to be made to the kitset to make it fit for purpose as a consented dwelling in New Zealand. Some of these include but are not limited to:
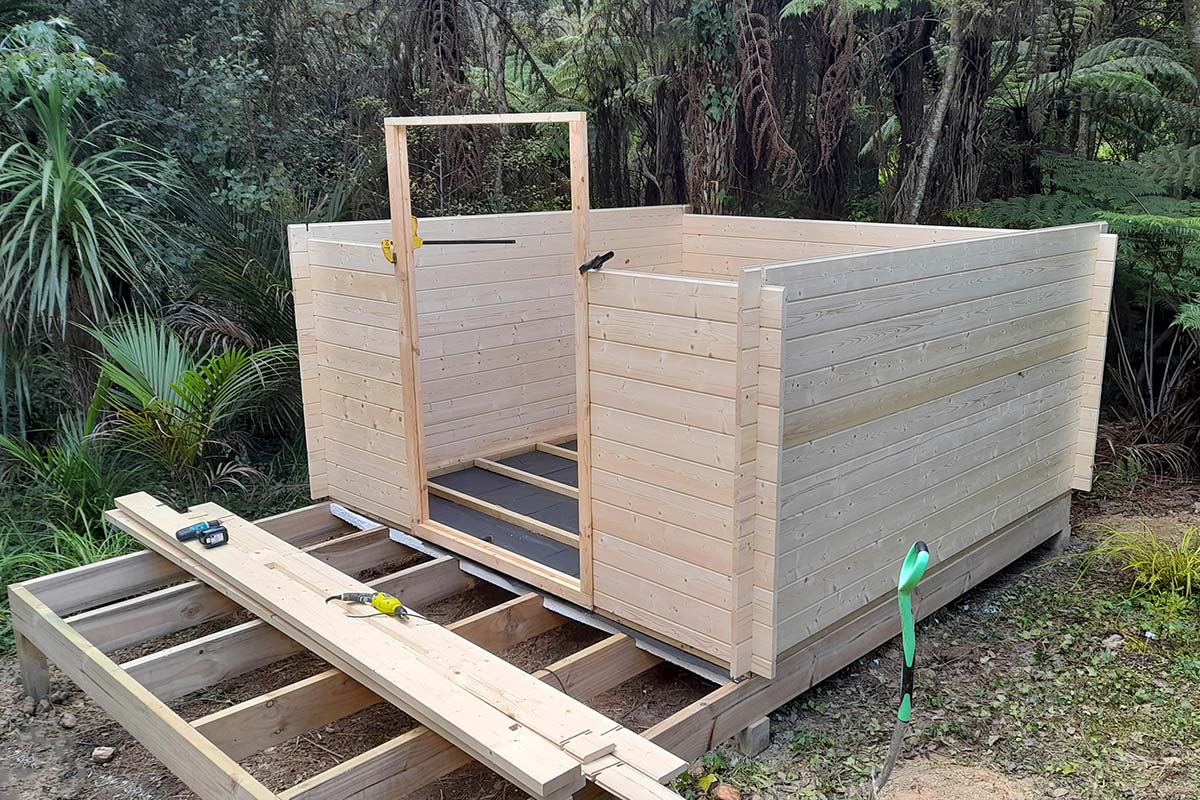
When you’re considering purchasing a log cabin flatpack or kitset shed for that extra backyard space, and you know you don’t have either the time, tools, or the skills to take on the project yourself, your next step is to figure out who will assemble the kitset for you. Many of our SheShed customers have friends or family members with the classic Do-It-Yourself know-how required to take on a project like this, but for everyone else, you must look at hiring a handyman, carpenter, builder, or other suitably experienced trades person to either assist or handle the whole thing for you.
Occasionally our customers will ask us what they should expect in terms of costs for hiring a builder for their flatpack kitset shed, but the problem with answering that question is that there’s no fixed recommended price or even a simple guide to figuring that out. So, we thought we’d make one, and here it is!
We can’t account for everything, so all other things being equal, let’s compare some estimated build costs for each of our log cabin kitsets based on building it on top of an existing concrete pad. The following recommendations don’t include timeframes to construct the foundation or subbase for the cabin to be placed on.
| Kitset Models: | Average Build Time: | Average Costs (Cabin Only): |
|---|---|---|
| Cottage Garden Shed, Star, or Cabana: | 2-4 Days | $1,800 to $3,000 |
| Star Summit/Canopy, Tussock, or Ranch: | 3-6 Days | $2,000 to $4,000 |
| Coastal, Star Deluxe, or Tasman: | 4-8 Days | $3,000 to $6,000 |
| Alpine, Brook, or Lake: | 6-12 Days | $4,500 to $9,000 |
(These estimates apply for both AUD and NZD, and are based on the most common costs that our customers have reported to us).
Unlike our example above, in most cases you won’t have the perfect concrete pad already existing to build on, so here are some more things you’ll need to take into account when budgetting for the cost of building a flatpack kitset cabin…
We’ve put together a list of builders and handy-persons here on our website that you can reach out to about building your flatpack kitset shed for you. Whilst we take a lot of care to search out & recommend installers that provide exceptional service & workmanship, you as the client need to ensure that you feel comfortable that whoever you choose to engage to complete the building phase of your project will work to get the desired outcome you are looking for.
We are constantly updating our builder database with tradespeople that are recommended from our other SheShed clients, but remember that it is your responsibility to verify that they will be able to complete the project to your satisfaction, as you are responsible for the engagement and management of their services. But there’s nothing like finding a gold tradie who is happy, confident and makes the build project a joy!
We’d love to know about it! We’re also looking for customer recommendations on great electricians, painters, interior stylists, or anybody else who’s helped make your backyard cabin dream come true, so contact us to let us know who worked well for your build project!
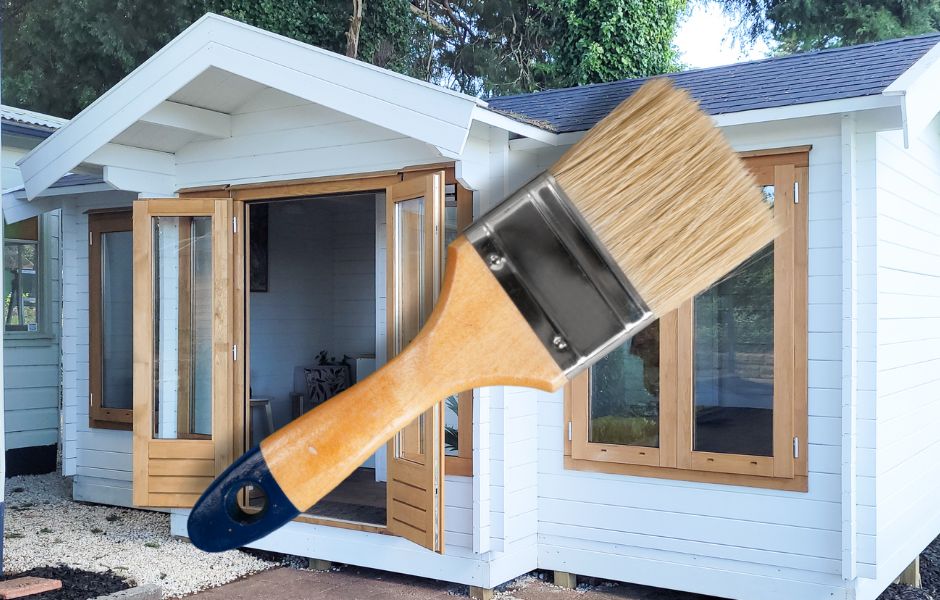
Yes, it is very important to paint your SheShed cabin after you have built it. Paint protects the exterior of your cabin from weather damage and helps to keep it looking beautiful for years to come. Additionally, a well-painted cabin both inside and out will help ensure that it stays functional and structurally sound over time.
In this Learning Hub article, we’ll discuss why we recommend painting your wooden SheShed kitset cabin – and share some tips on how to do it properly. Keep reading to learn more!
When painting your SheShed ensure that you use a minimum 3 coat system (Minimum 1 coat primer/ 2 top coats) on any timber surfaces including, but not limited to, Doors, Windows, Walls, and Facade components to:

Fill any cracks or knots with timber filler and sand before painting.
Pay careful attention when painting the end grains as the end grain of timber absorbs moisture at a much higher rate than the face or edges. Sealing the end grains properly will prevent “wicking” (absorbing of liquid by capillary action) and stains.
Most timbers, whether treated or untreated contain an amount of natural extractives called tannins, which can sometimes leach or bleed through the endgrain or knots in the wood, potentially causing a yellow/brown stain that is particularly visible on lighter colour paints. The potential for this staining can be reduced or eliminated by using a stain blocking primer when you paint your SheShed.
Our SheShed warranty only covers cabins that have been completely painted, with a minimum 3 coat system (Minimum 1 coat primer/ 2 top coats) on any timber surfaces including, but not limited to, Doors, Windows, Walls, and Facade components. The LRV value of the external paint, varnish or stain must be 40% or higher for the SheShed warranty to apply*. We recommend a paint system that provides a film thickness of 80microns minimum.
Varnishes & stains that don’t repel moisture or UV and don’t have an LRV value of greater than 40% are not suitable for use on SheShed products.
If you are ever in doubt, is a great idea to chat to your paint specialist about the LRV index and what is best suited to your climate and shed location. When looking for paints for your exteriors, firstly make sure it is a good quality exterior paint and secondly check the LRV index.
Find out more about LRV on our Blog HERE.
*Whilst SheShed/ Fort Group may advertise SheShed cabins that have been painted with colours that have a lower LRV value than 40% we take no responsibility for defects than can manifest themselves into problems like warping, cupping, splitting, resin bleed and excessive shrinking/ timber movement, loosening of timber knots etc.
If you are planning to build a SheShed kitset cabin, be sure to choose a high-quality paint that is designed specifically for use on wood. There are many different paint types available, so do some research and talk to professionals about what will work best for your particular situation. With proper care and regular maintenance, you can be sure that your timber cabin will look great and function well for many years to come.
A SheShed is the perfect way to get away from it all, without even having to leave your property! Being a solid-wood construction, a SheShed has more natural insulation than a tin shed due to the nature of timber itself, but do you need to add extra insulation to your kitset cabin? The answer is – it depends…
In this article we’ll take a quick look at the benefits of different types of additional insulation you can add to your SheShed, and some factors that you need to keep in mind when planning your kitset build.
An important thing to note here is that insulation itself won’t keep you warm in the winter and cool in the summer; Insulation, refers to how quickly a difference in temperature can transfer from one space into another. For example, how quickly will heat on the inside of your cabin, escape through the walls, floor and roof, and start “leaking” into the air around the cabin? Or, how quickly will the hot summer-sun outside of your cabin, soak through the roof to overheat the inside of your cabin?
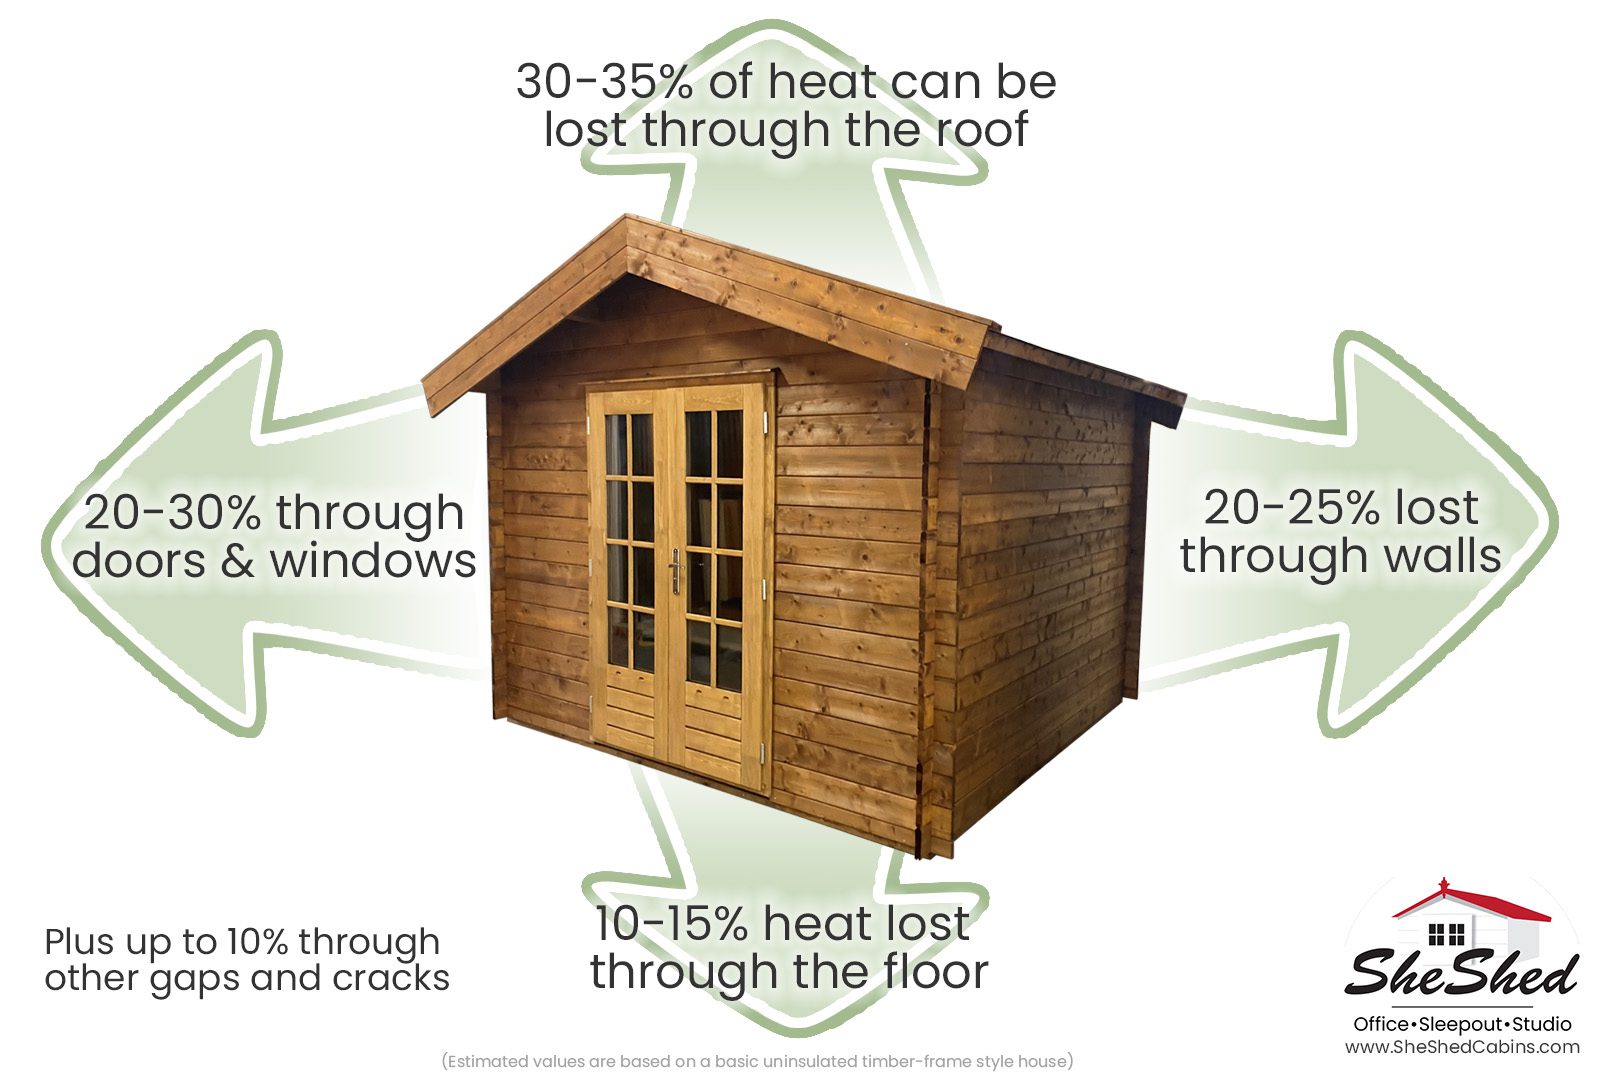
Adding insulation is a passive way to slow down the natural heat-transfer process, but does not by itself actively add or remove heat, so depending on your climate, you may still need to consider adding in an extra heating or cooling device such as a fan heater or small air conditioning unit.
We’re looking forward to doing more specific experiments on this in the future, but in the meantime, we can draw parallels with an uninsulated timber-frame home where it’s widely accepted that approximately…
Let’s address each of these five areas and look at what has already been done or can practically be done extra to help keep your cabin comfortable in most conditions.
*Please note that SheSheds is not associated with any of the brands or products mentioned in this article, and we receive no compensation if you choose to purchase any of our recommended solutions.
Should you add it? – We sometimes recommend it, but depending on your climate, it’s often not required…
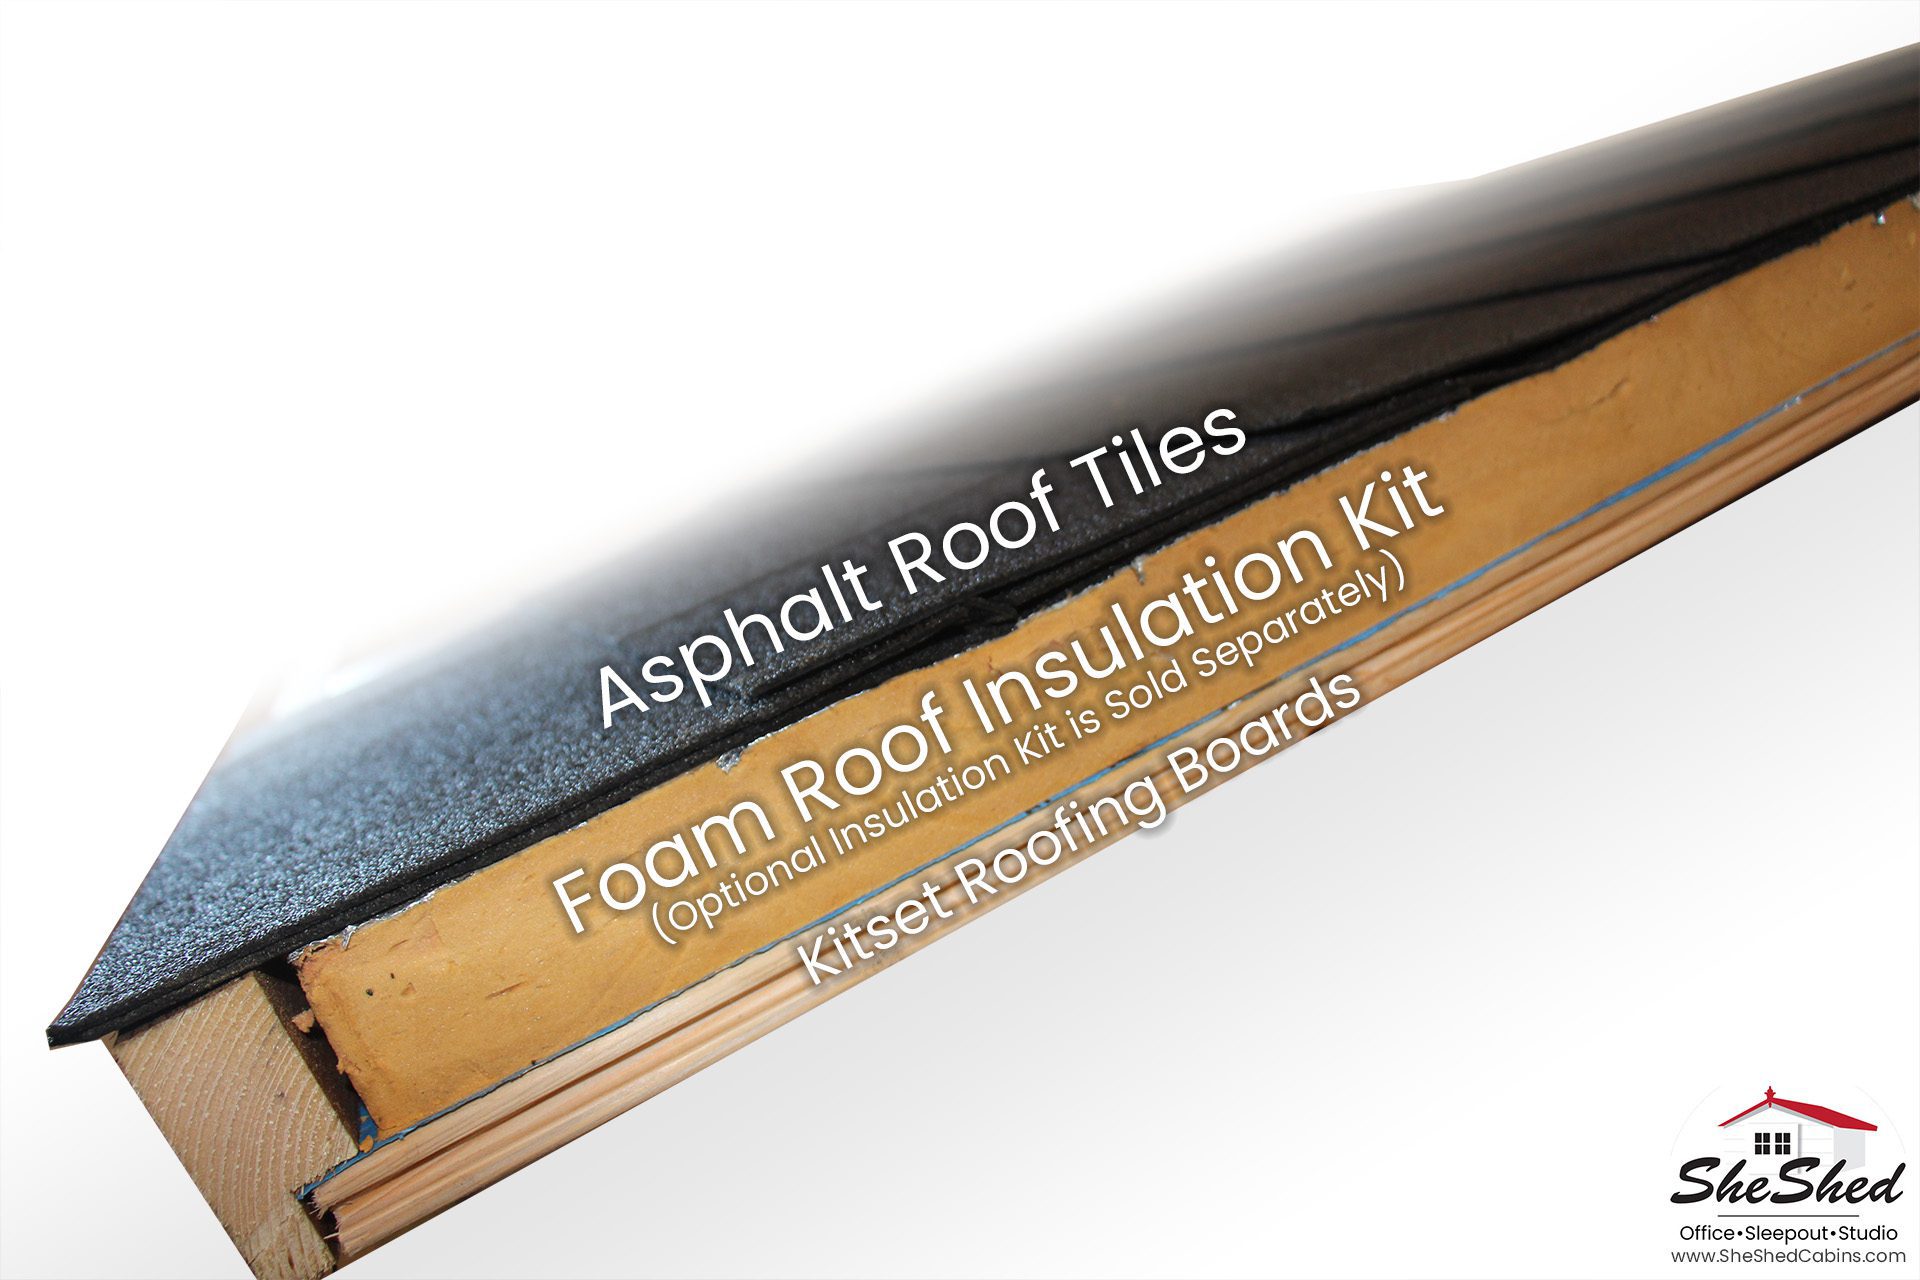
Option One: Leaving the roof how it comes in the kitset.
This option suits the majority of our customers, as the existing roof boards with the included asphalt tiles have a combined insulation rating of about R 1.84.
Option Two: Purchase the SheShed Roof Insulation Kit.
This is the only insulation option that we provide ourselves, as it’s particularly well suited to the construction style of most our cabins. Following our step-by-step instructions, our commercial-grade foam roof insulation kit gets installed under the asphalt tiles but above the wooden roof boards, leaving the inside of the cabin and ceiling visually unaffected. With this addition, it brings the total roof insulation value up to about R 3.6.
This option is currently available as an optional addon to any of our kitsets that feature asphalt roof tiles, and is priced depending on which size cabin you are building.
Option Three: Lining the roof internally.
An ugly option but sometimes more cost-effective; This involves building an internal ceiling cavity under the roof boards, which you can fill with something like natural wool insulation, Pink Batts® or equivalent and then line with a nice plywood or plaster board. This is helpful if you desire roof insulation higher than R 3.6 but unfortunately lowers the internal height of your cabin and usually covers over the beautiful exposed wooden beams that so many of our customers love.
Option Four: Lining the roof externally.
To avoid lowering your internal ceiling height like mentioned in Option 3, you may decide to instead add additional roof battens on top of the existing roof boards, building yourself a ceiling cavity for adding in extra roof insulation like Pink Batts® or equivalent, and then covering over with a corrugated iron/steel roof and flashing like a traditional house roof.
All our SheShed doors and windows are double-glazed to a high standard to help minimize much of the potential heat loss through these areas. To help further reduce potential heat-loss or drafts, ensure your doors and windows have been installed correctly as per your cabin’s instructions, and double check how evenly they are closing against their frame seals, as their hinges can be adjusted as needed.
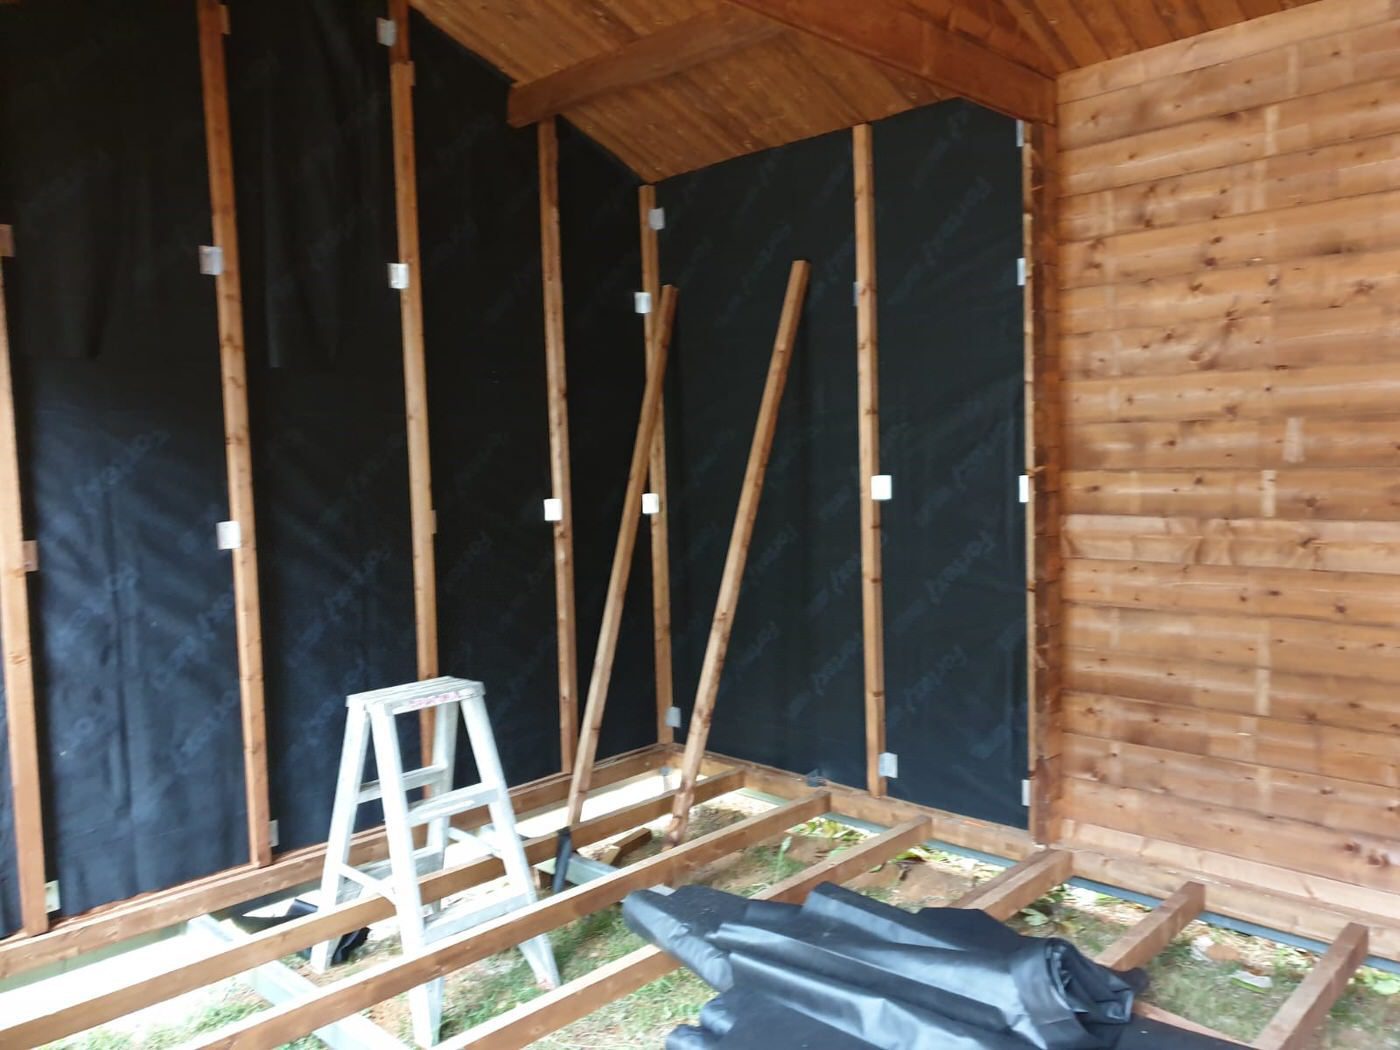
Should you consider adding wall insulation to your SheShed cabin? – Sometimes, but hardly ever. Although a lot of heat can be lost through the walls of a building, adding wall insulation is usually reserved for only the coldest winter climates for several reasons. It can be fairly expensive, it reduces the internal size of your cabin, and if installed improperly it can negatively affect the durability and weather-tightness of your cabin.
Option One: Leave the kitset how it comes, but make sure you assemble it correctly to reduce gaps between boards, then inspect and seal any knots in the timber to fill any possible gaps or cracks. And finally, seal and paint at least the outside of the cabin with a good 3-coat or more system.
Option Two: Consider choosing a cabin kitset with thicker walls.
Our smaller 28mm-walled cabins have a natural insulation rating of about R1.96, whereas our kitsets with 44mm and 45mm thick walls are about R3.08 without adding any additional insulation.
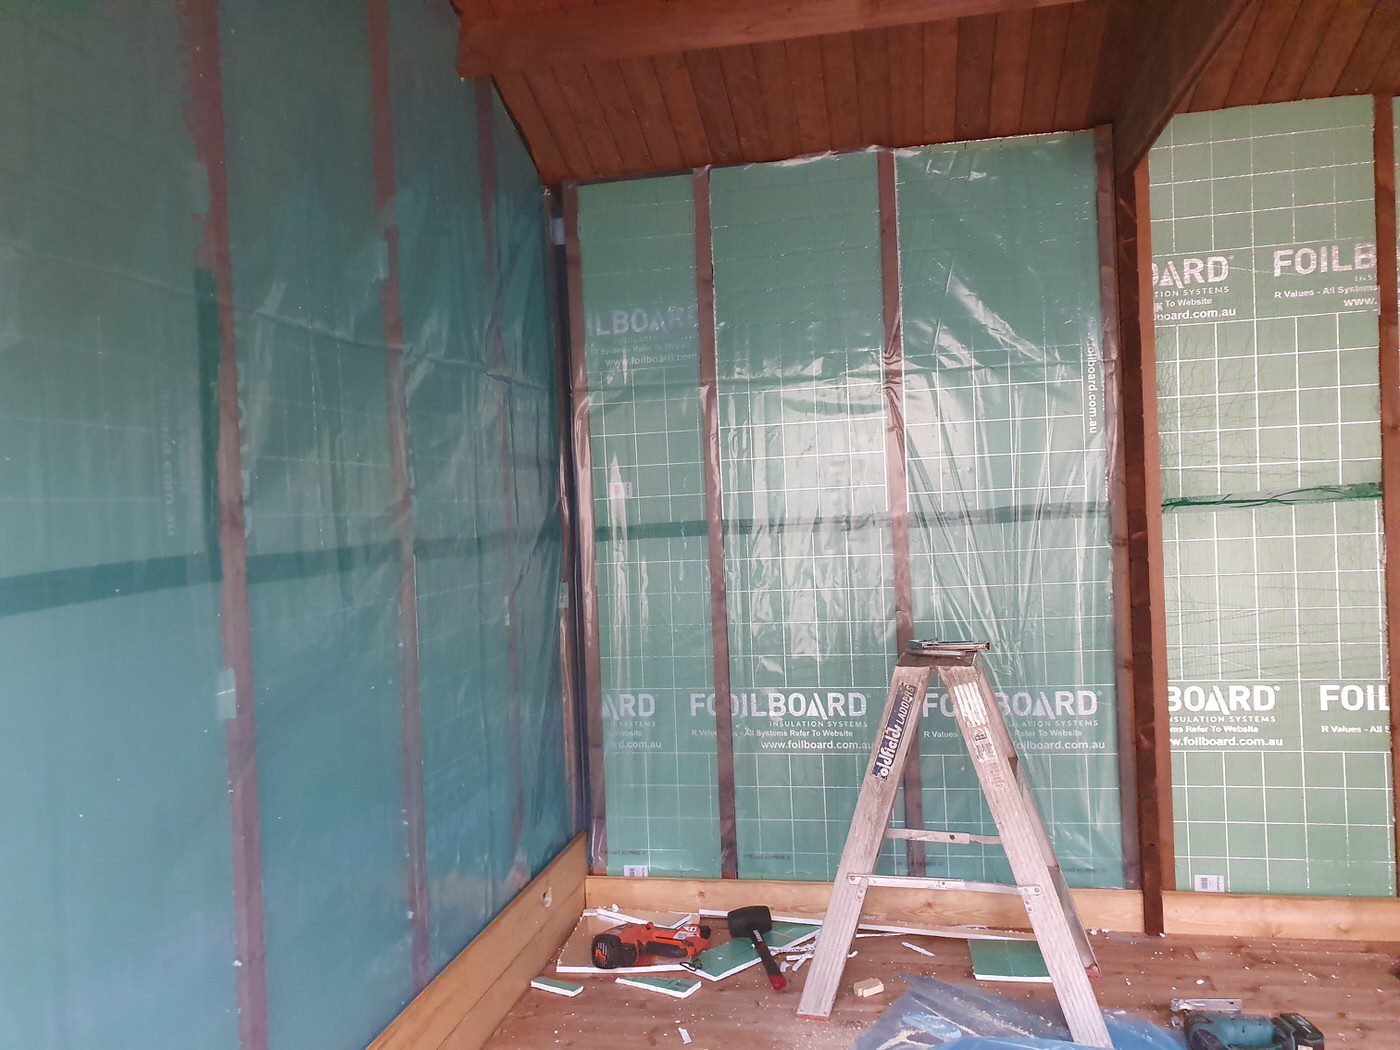
Option Three: Build an internal wall cavity to add additional wall insulation.
This involves fixing additional battens to the inside walls of your SheShed, (usually with 45x45mm dimensions), to create a wall cavity for insulation, which then gets covered over with a lining of a quality plywood, or extra wall boards, or more commonly just with standard plasterboard. This lining can then be easily painted or wallpapered to suit your interior designs.
If you decide to go this route with your SheShed, we have slotted metal wall brackets available for purchase that are used to fix any vertical wall battens to the cabin wallboards. These slotted brackets make the internal lining you add, act as a kind of floating shell, allowing the kitset cabin’s wall boards to naturally grow and shrink with temperature changes over the seasons, without cracking your internal lining or causing extra gaps or bowing in the external wallboards that can bring leaks.
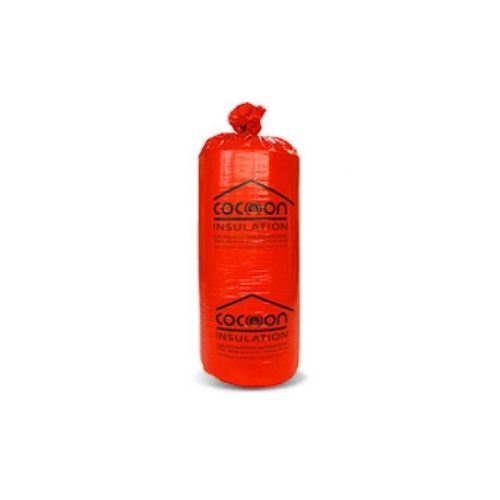
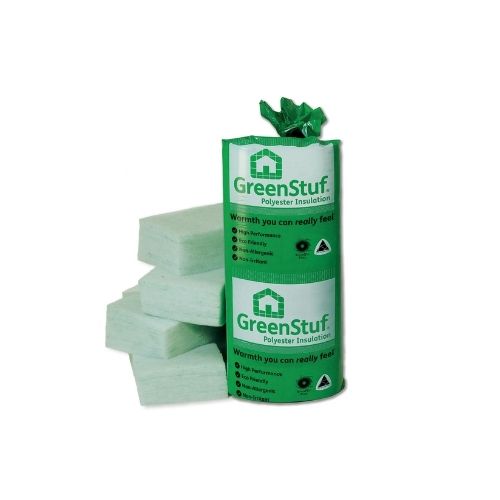
Some wall insulation options that you could consider adding in an internal wall cavity include natural wool products, like a Blanket Wool Insulation: This insulation comes in a blanket form and has Thermal ratings of R2.6, R3.2 and R3.6. It can be used on walls and ceilings. The material is safe, healthy and non-toxic, which is always appreciated.
Another commonly used option is Pink Batts® or equivalent fiberglass insulation, usually with a range of sizes, thicknesses and insulation ratings available from most building supply stores.
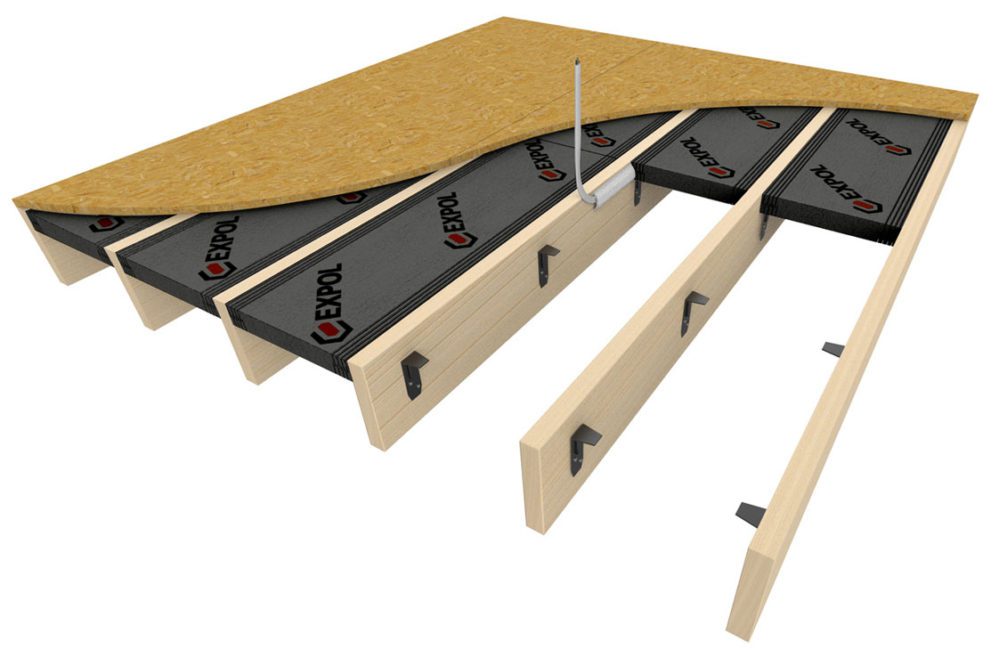
We almost always recommend purchasing additional underfloor insulation. Why? Because it’s the cheapest and easiest insulation to add to your SheShed during the construction of your cabin. Our experience is: if you think it’s a possibility you’ll need it, you may as well do it now, as you’ll not regret having it, and may struggle to add it later.
In addition to being an insulator, adding underfloor insulation can also help to deaden sound from both outside and inside your cabin, making it perfect for those who want to enjoy some peace and quiet in their SheShed. Another benefit of underfloor insulation is that it can help reduce potential drafts, making the space even more comfortable.
Does SheShed provide underfloor insulation? No, we don’t, as it’s much more cost-effective for our customers to purchase their own underfloor insulation from a local building supplier or chain store, such as Bunnings or Mitre10.
Our first recommendation is usually something like Expol Underfloor Insulation with a rating of R1.8 or similar. One example is Expol Black, which is a graphite infused EPS supplied in the same sizes as the standard white under floor insulation and is a premium product which achieves superior R values. It’s made with a tough polystyrene (EPS) that will NOT SAG or SLUMP over time – providing better protection for all of us who spend more than just weekends in our SheShed cabins!
The best part is they’re easy to install; and will fit in between the bearers under your SheShed.
As an example, you’ll need to purchase enough for 9 square meters (usually two packs) for our Star Cabin Kitset, or four packs for our 19m2 Brook River Kitset.
A high-grade insulation that comes in a 1200 wide roll. You can get pre-cut widths to fit between floor joists. Meets NZ standards and is a high-grade product. Click here to find in NZ.
A quality underfloor insulation that fits between floor joists. Comes in three widths- 450mm, 500mm and 600mm. You roll it out between floor joists and staple in place. Click here to shop NZ or Click here to Shop Australia.
A Polystyrene insulation with a concertinaed edge, which sits hard up against the floorboards. It is a great economic option that is great under a SheShed cabin. Each sheet is 60mm thick, 1200mm long and is available in a wide range of widths: 360mm, 410mm, 440mm, 470mm and 560mm. Click here to shop NZ.

UnderfloorPink® Batts® SnugFloor® is a range of thermal underfloor insulation products R1.6/R2.6 with both narrow & wide options. Click here to shop NZ.
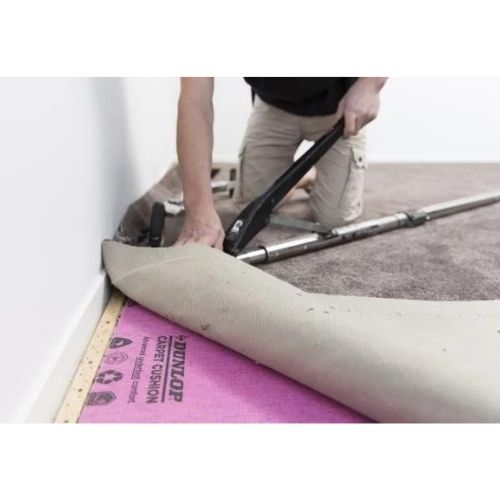
Carpet is a great option to add floor insulation. These days many carpet underlays have excellent thermal regulating properties and are very easy to install.
As described in Option One of preventing heat loss through walls, you can help reduce potential gaps and cracks by making sure you assemble the kitset correctly to reduce gaps between boards. After the build is complete, thoroughly inspect and seal any knots in the timber to fill any possible gaps or cracks, then seal and paint at least the outside of the cabin with a good 3-coat or more system.
If you’re looking to buy a SheShed kitset Cabin, it’s important that you understand the importance of insulation and whether or not you need to add it to your build.
Our new Kitset Cabin Range (Tussock, Coastal & Alpine) include the roof insulation. You can check out our full range HERE.
If you’re still not sure which insulation is best for your SheShed cabin, or if you have any other questions about the build process, please call us. Our team of Shed Consultants are more than happy to help answer any questions you may have.
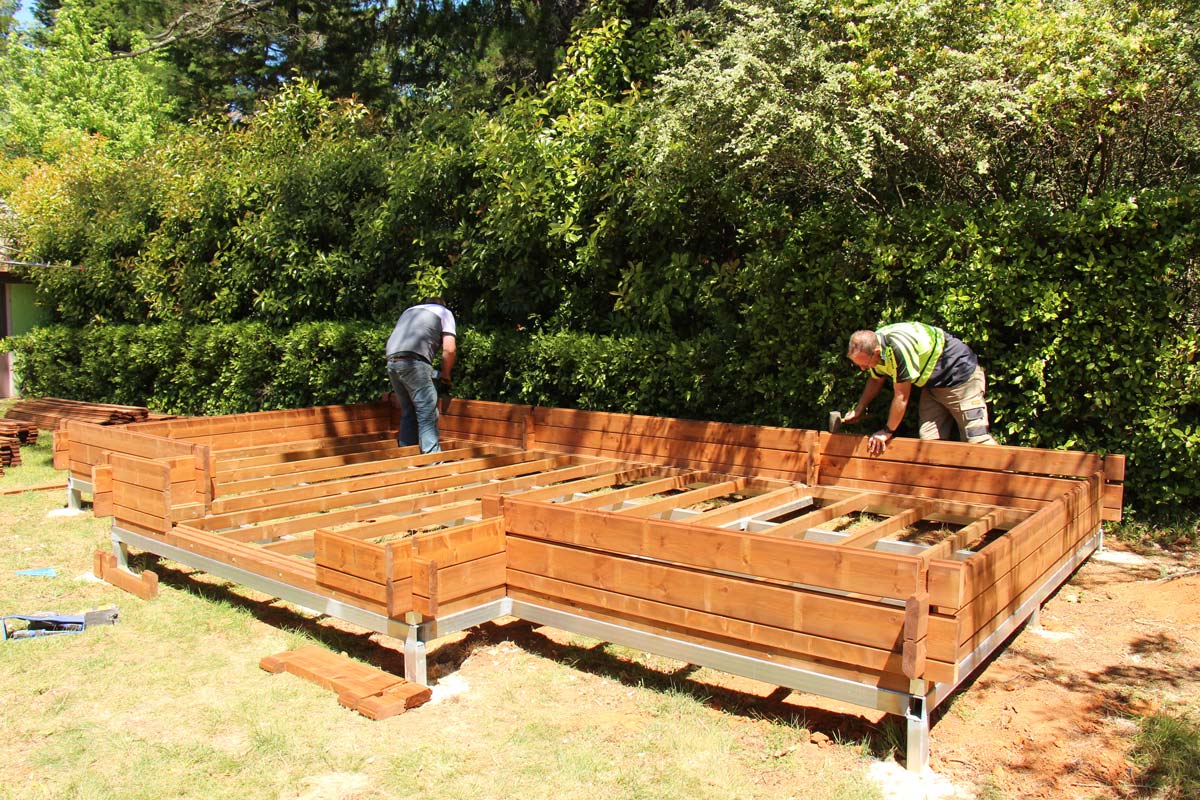
Wondering what is the best foundation for your shed? We can help with a few options on how you could best prepare the spot for the ground. The most important thing is that the ground needs to be level. Why? An uneven surface or moving ground could cause the doors to jam and not open/shut with ease, and it could cause part of the shed to drop or boards to become loose.
You have several options, and these depend on things like:
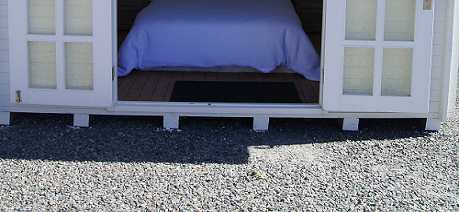
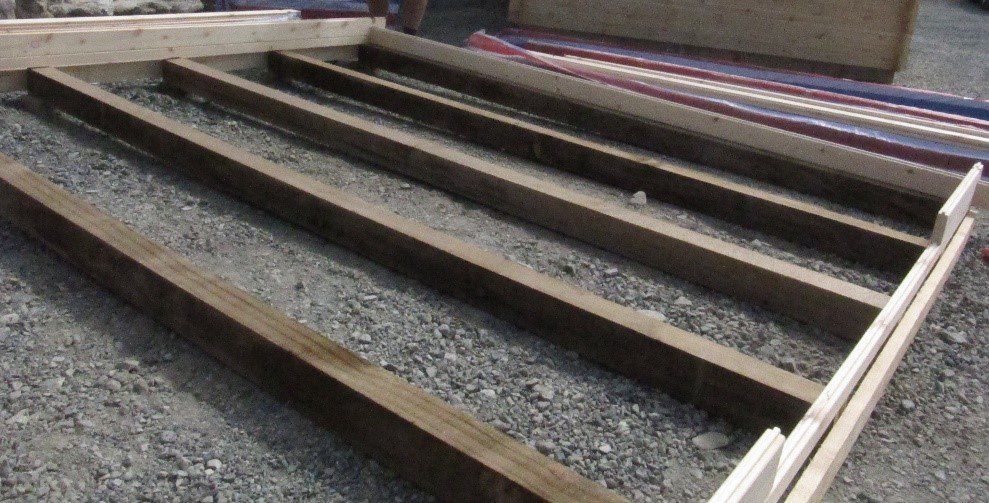
The easiest and quickest option for those with a very flat surface is to place your treated bearers straight on the ground. This can be on grass if you have a nice hard, flat site and this makes it relatively easy to move it later.
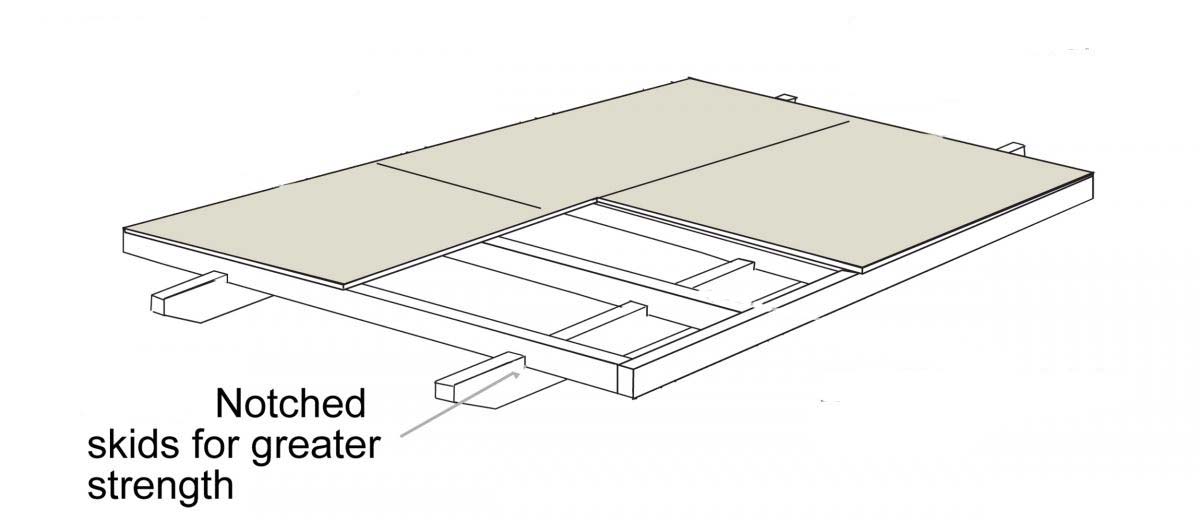
This is also very similar to placing your shed on skids.
If you are wanting to move your shed around your property make sure your skids are strong and can take the weight and movement of the shed. Generally, the larger the shed the larger and stronger the skids need to be. Notching into your floor joists or bearers will help with strength.
Your treated bearers will now have a good solid base to sit on.

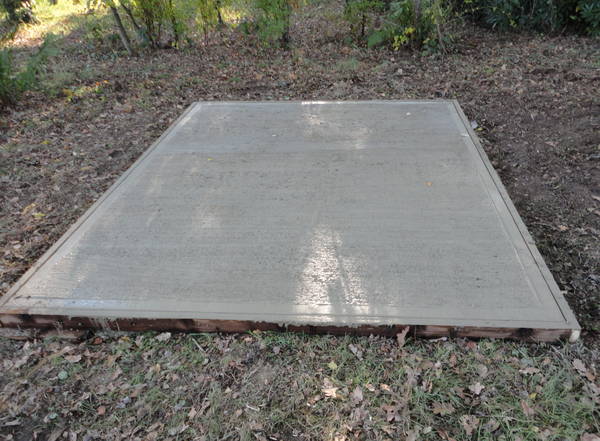
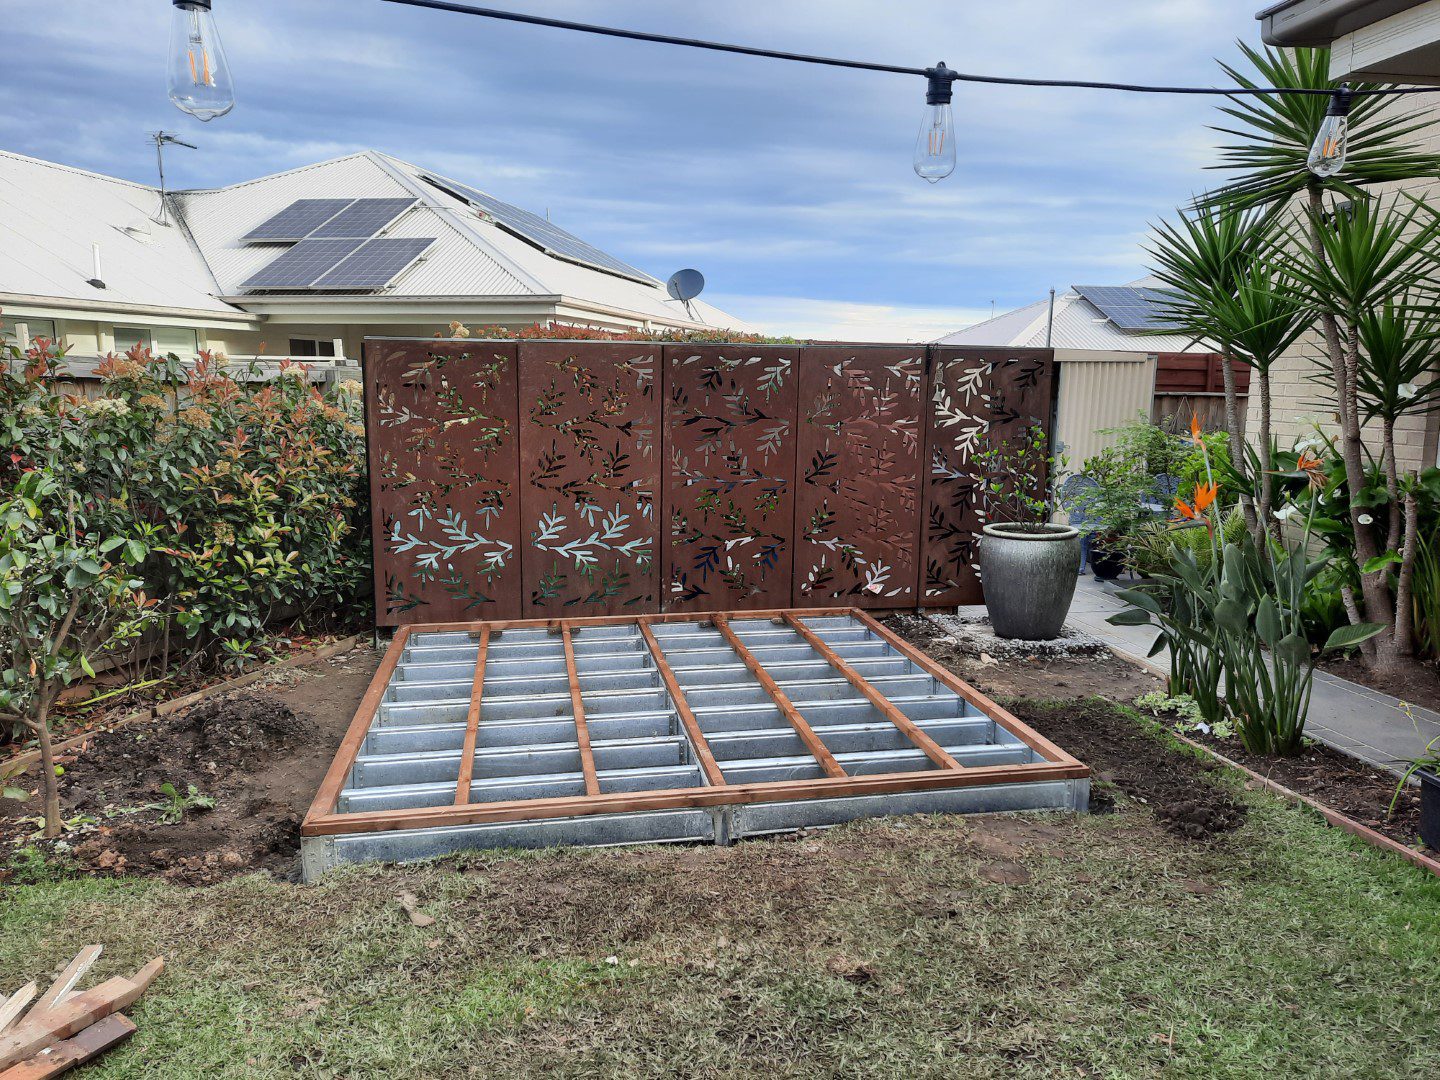
You could opt to place your bearers on a concrete pad. This is a more expensive option but will create a very solid base for your She Shed.
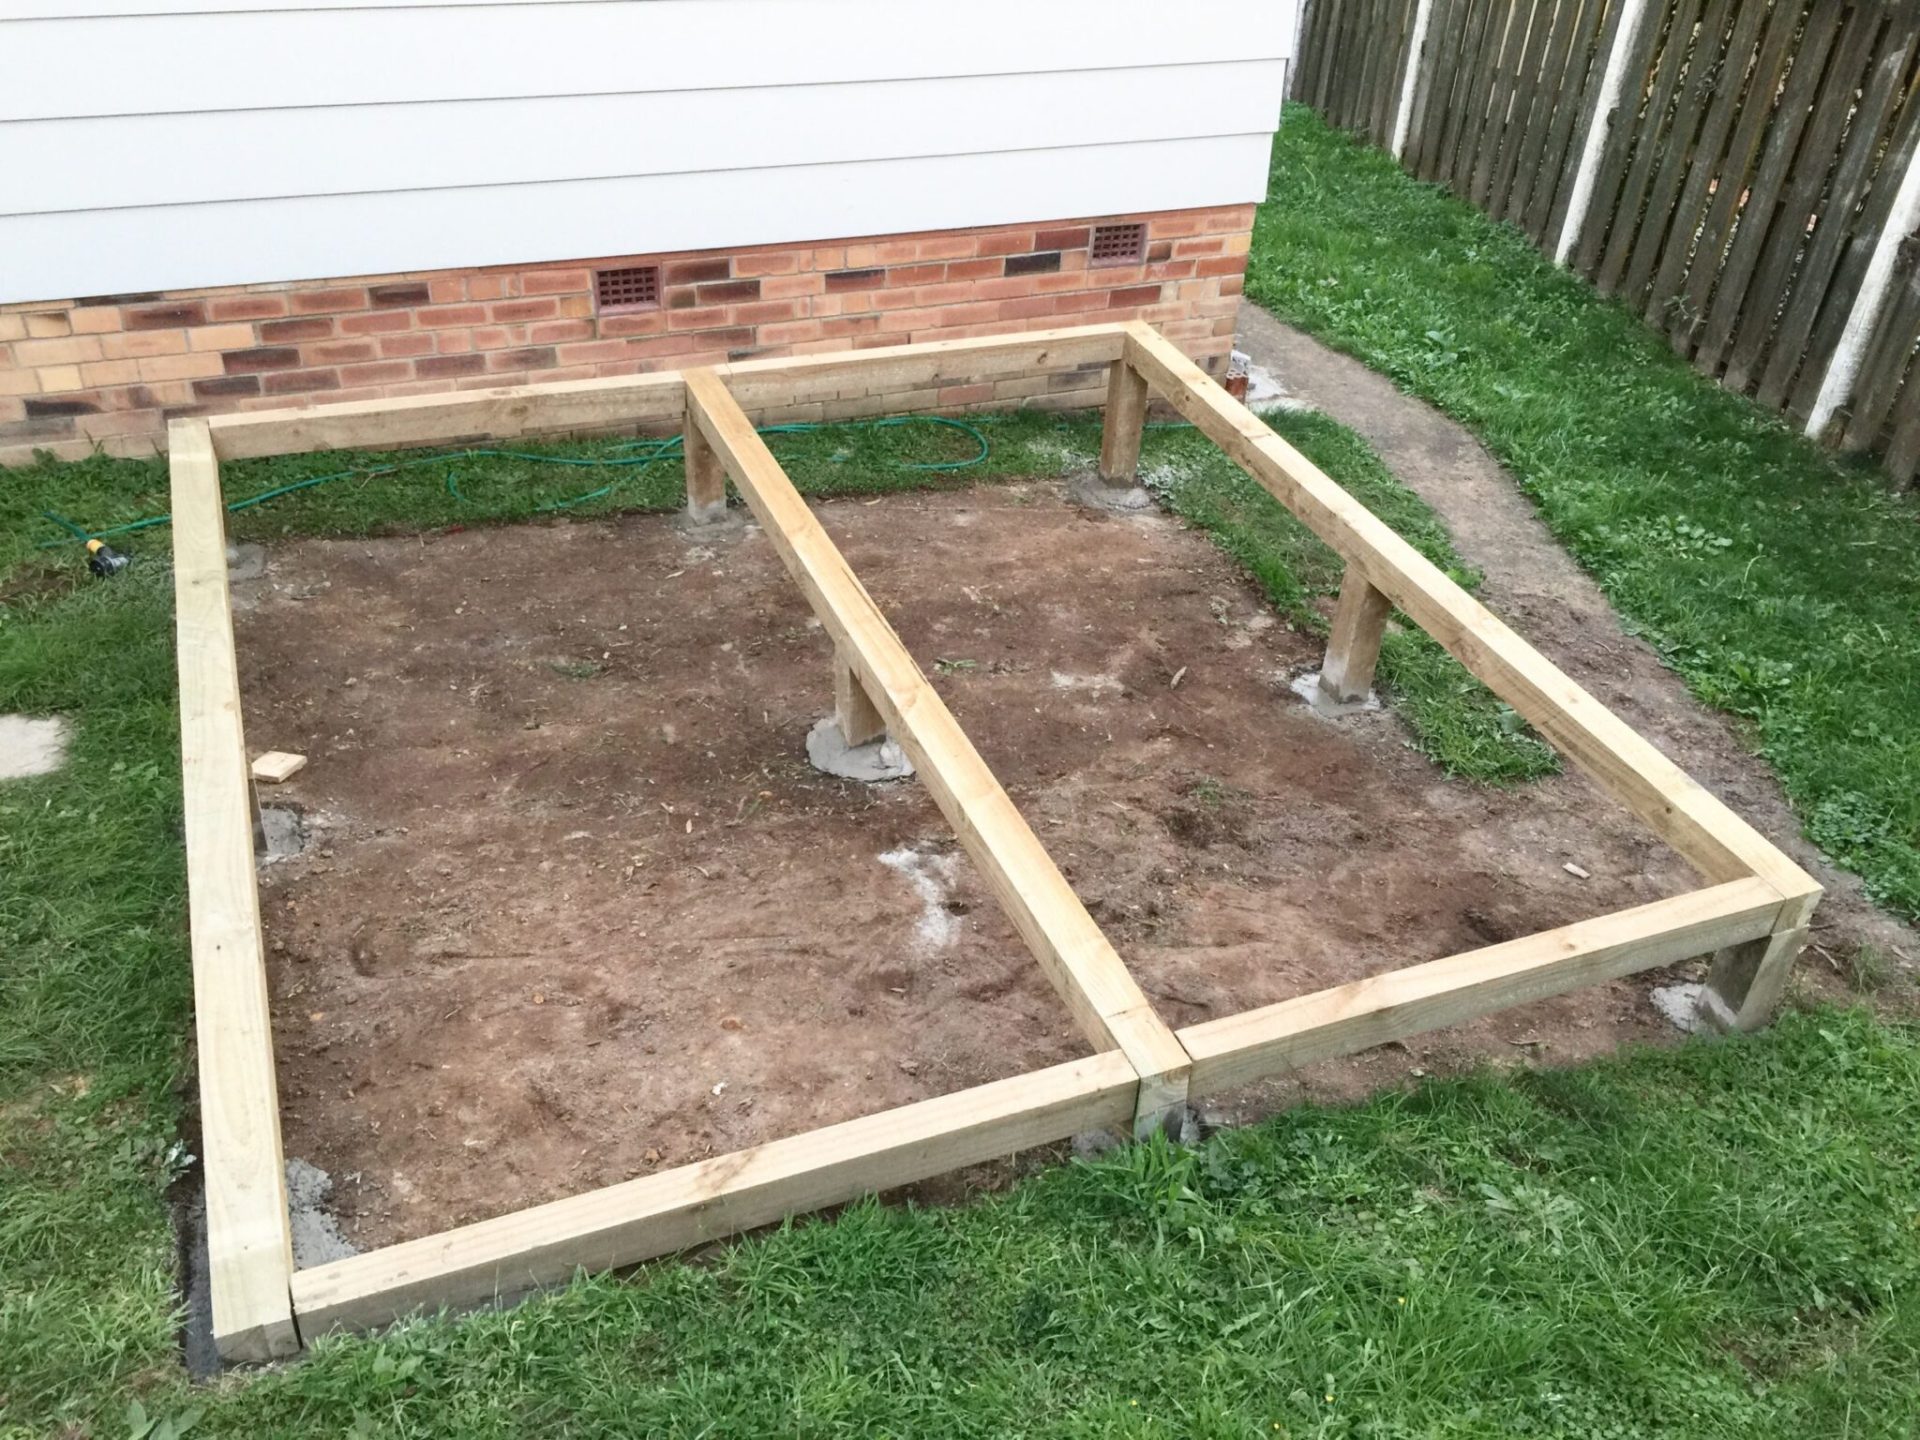
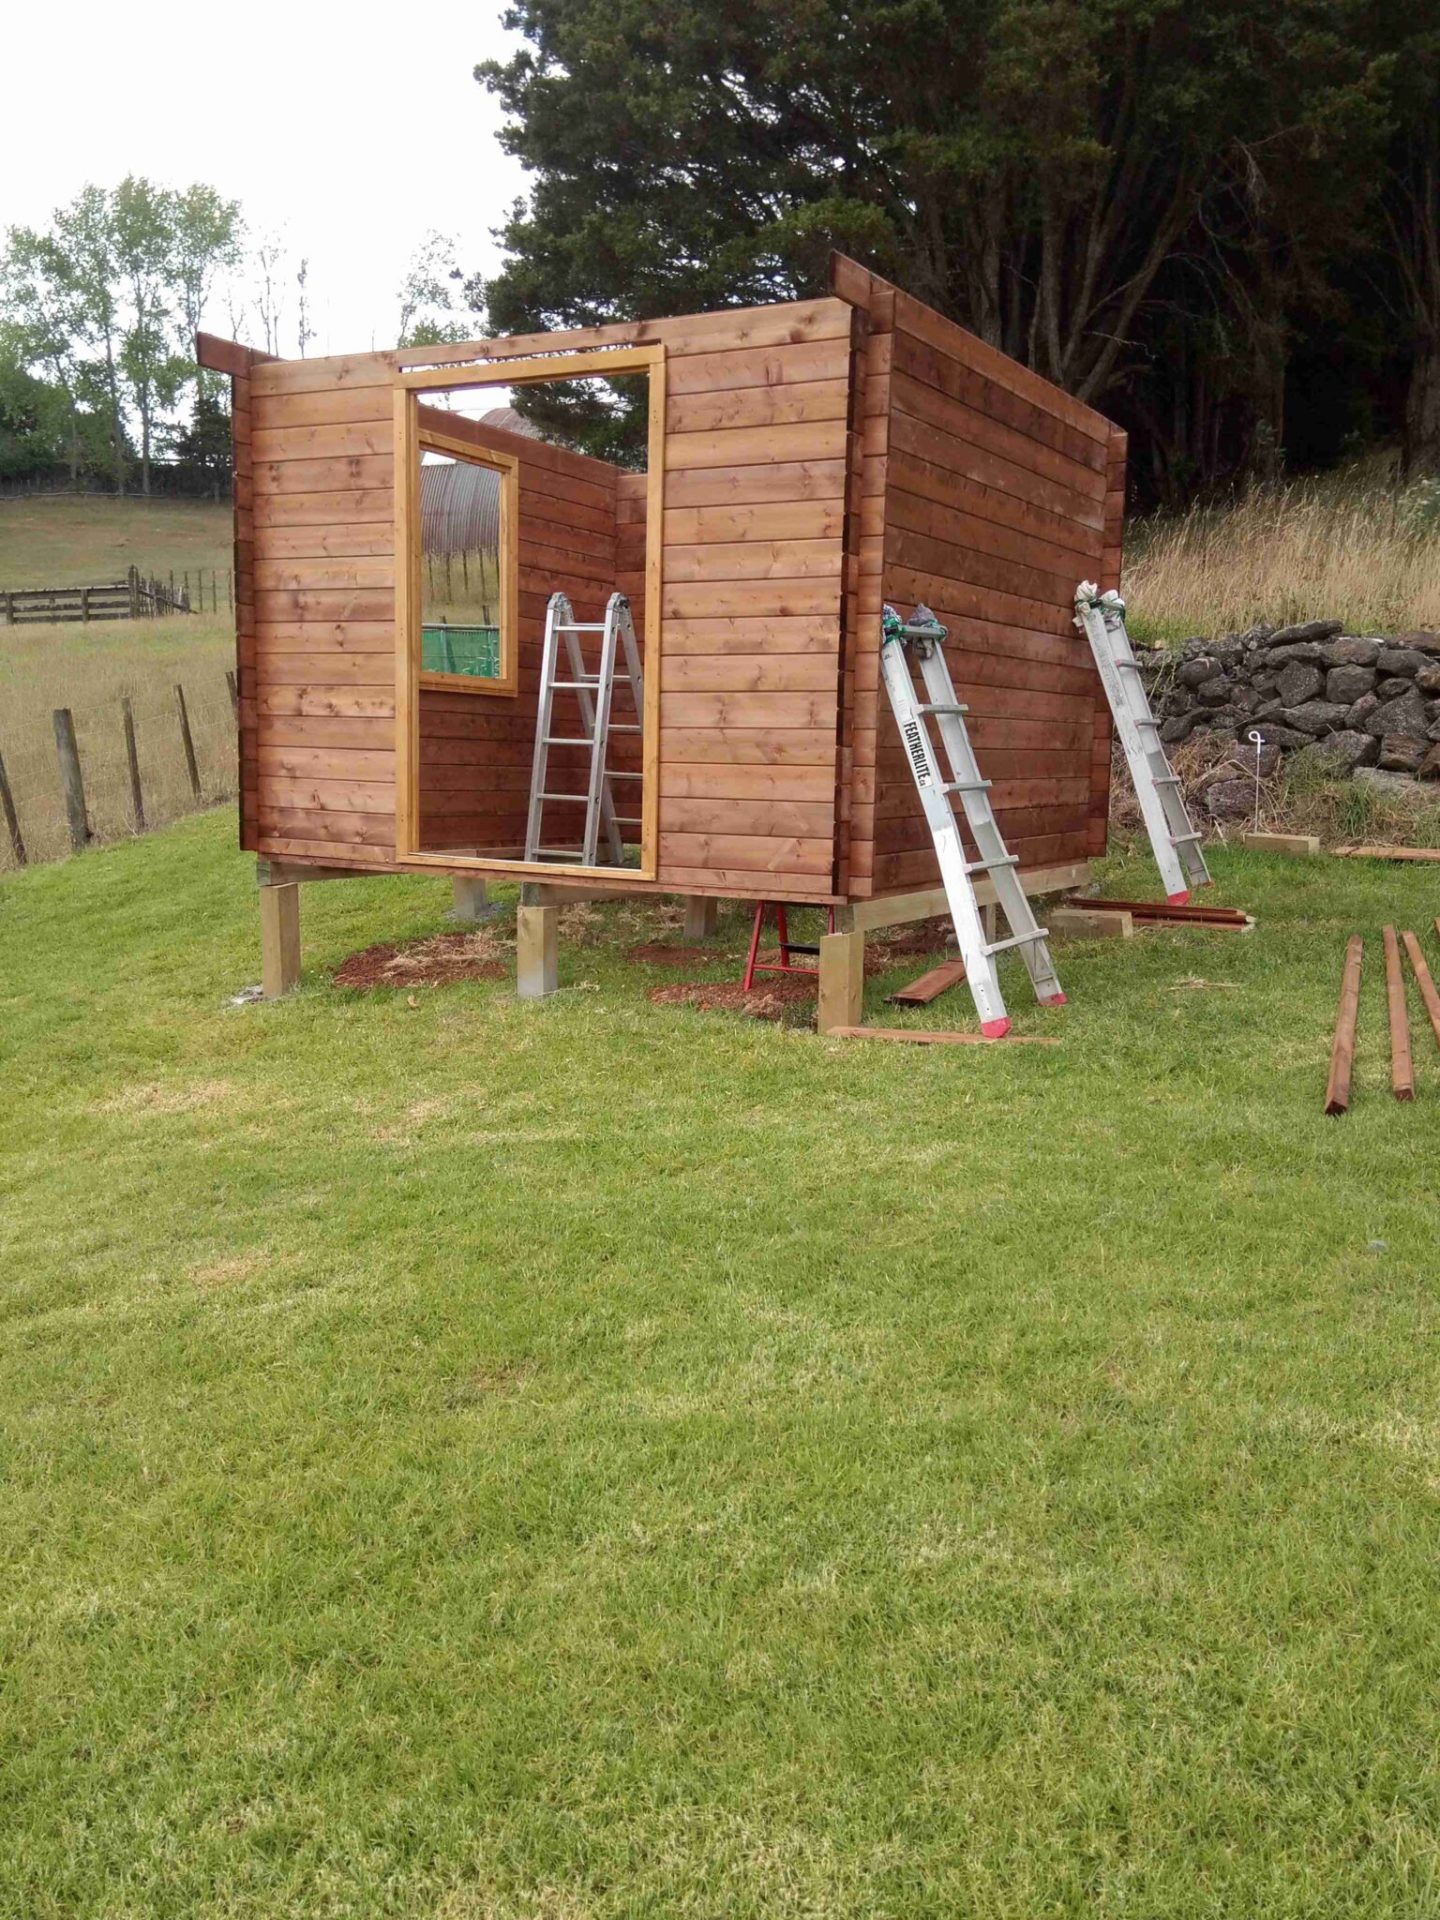
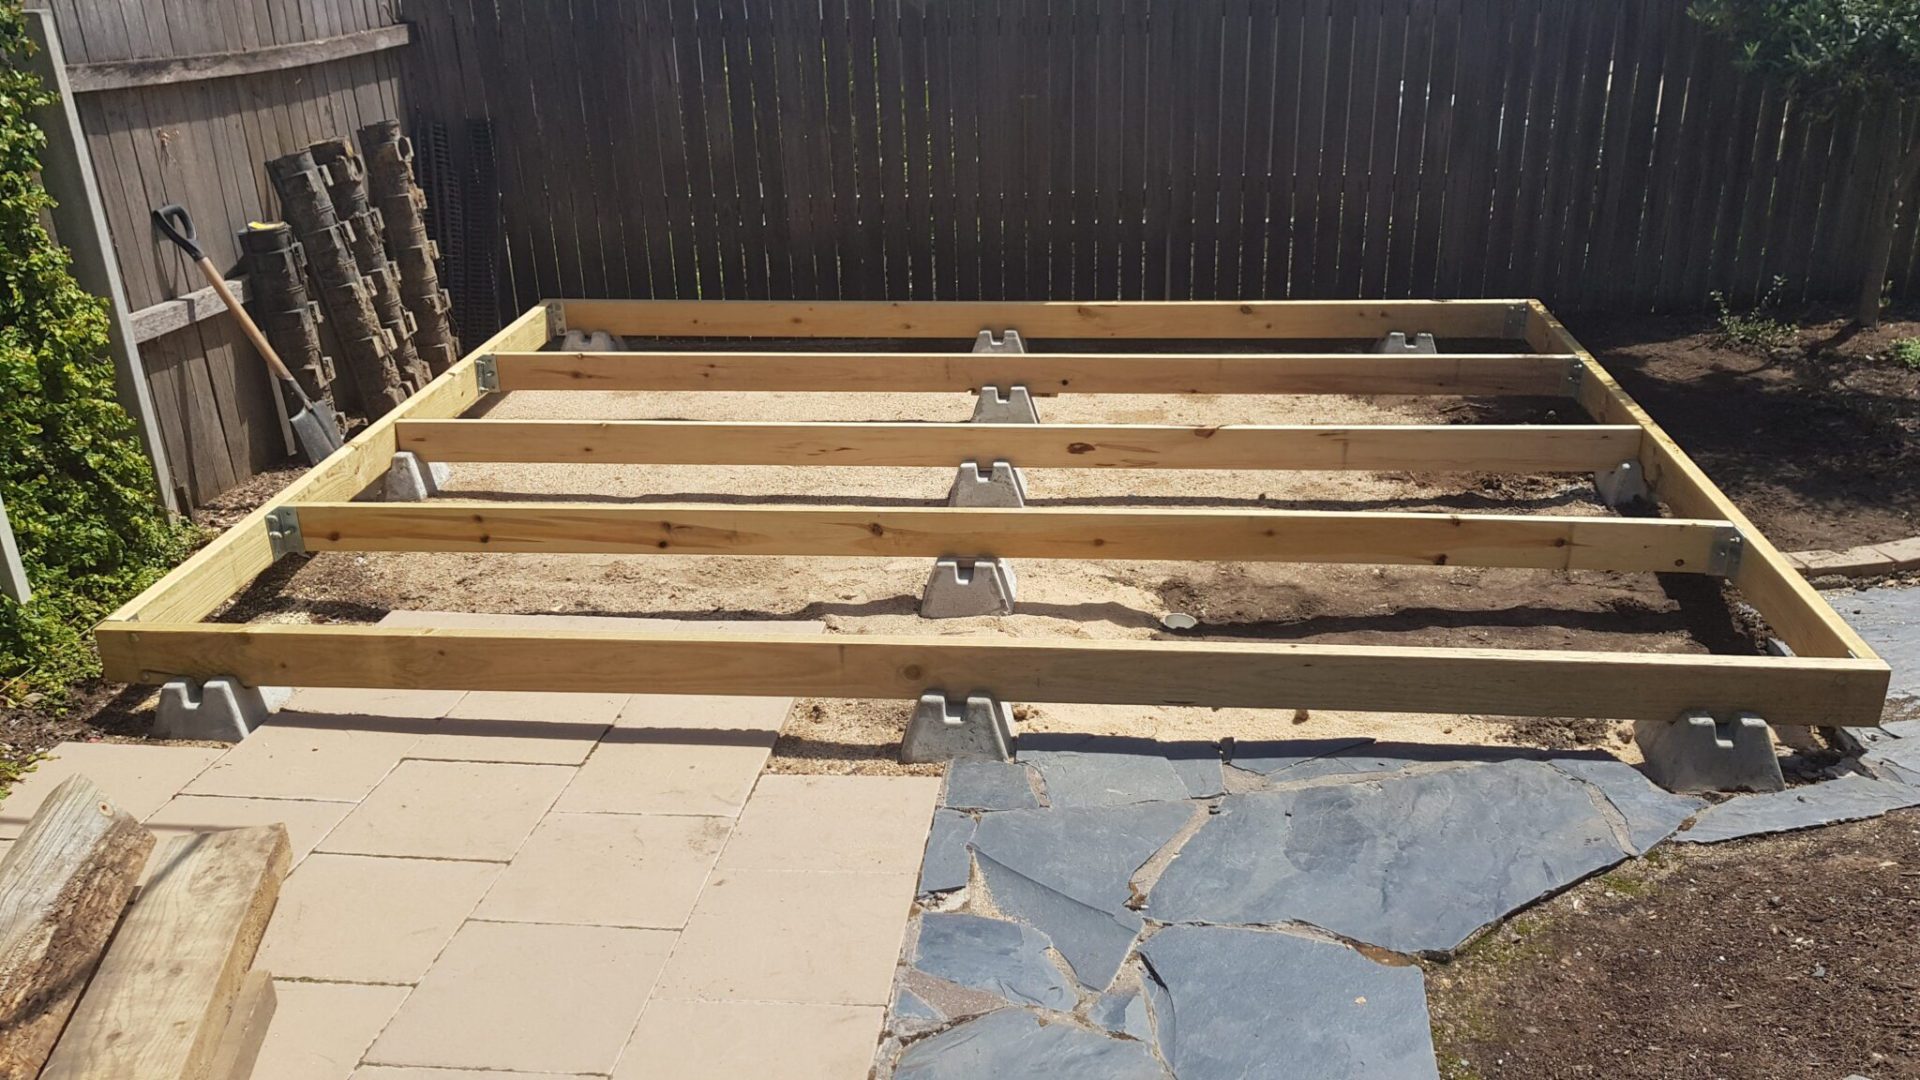
Another option that works well for both a flat or contoured site, is to sit your wooden shed on blocks or piles. These can be either floating (sitting on top of the ground for a flat site) or you could choose to concrete them in place if your site is not level (a more permanent option). This lifts your shed up off the ground and gives you the opportunity to create a level base with the bonus of being able to add a small deck or steps.
Make sure you have enough blocks/piles for the size of your shed as you want to make sure your timber bearers are not put under excessive strain.
If you choose to put in piles this will also provide a good solid anchorage point for those sheds that are in high wind zones.
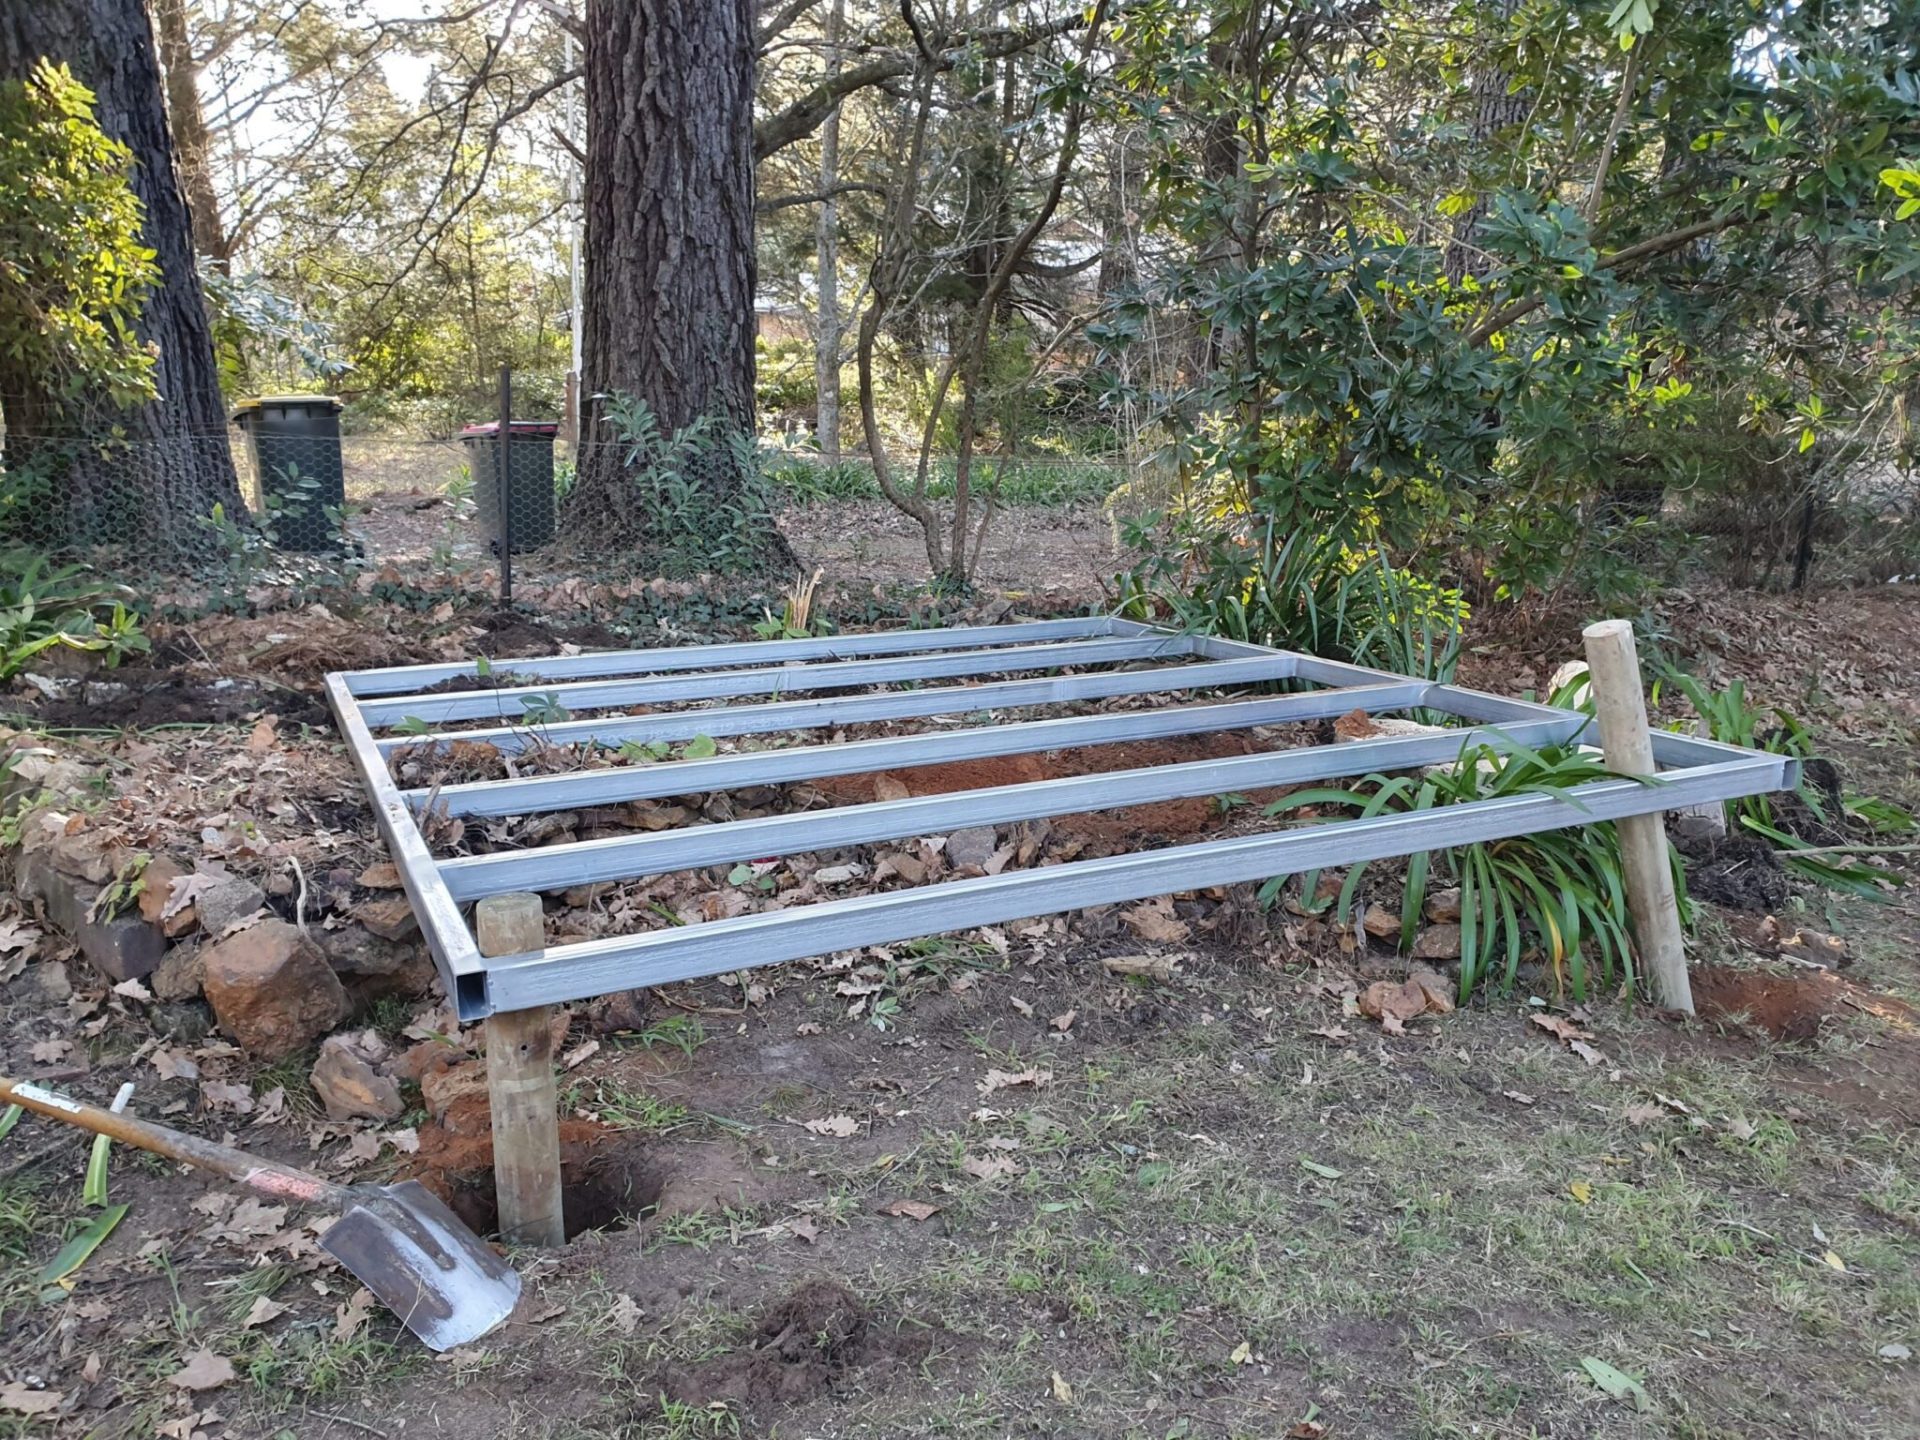
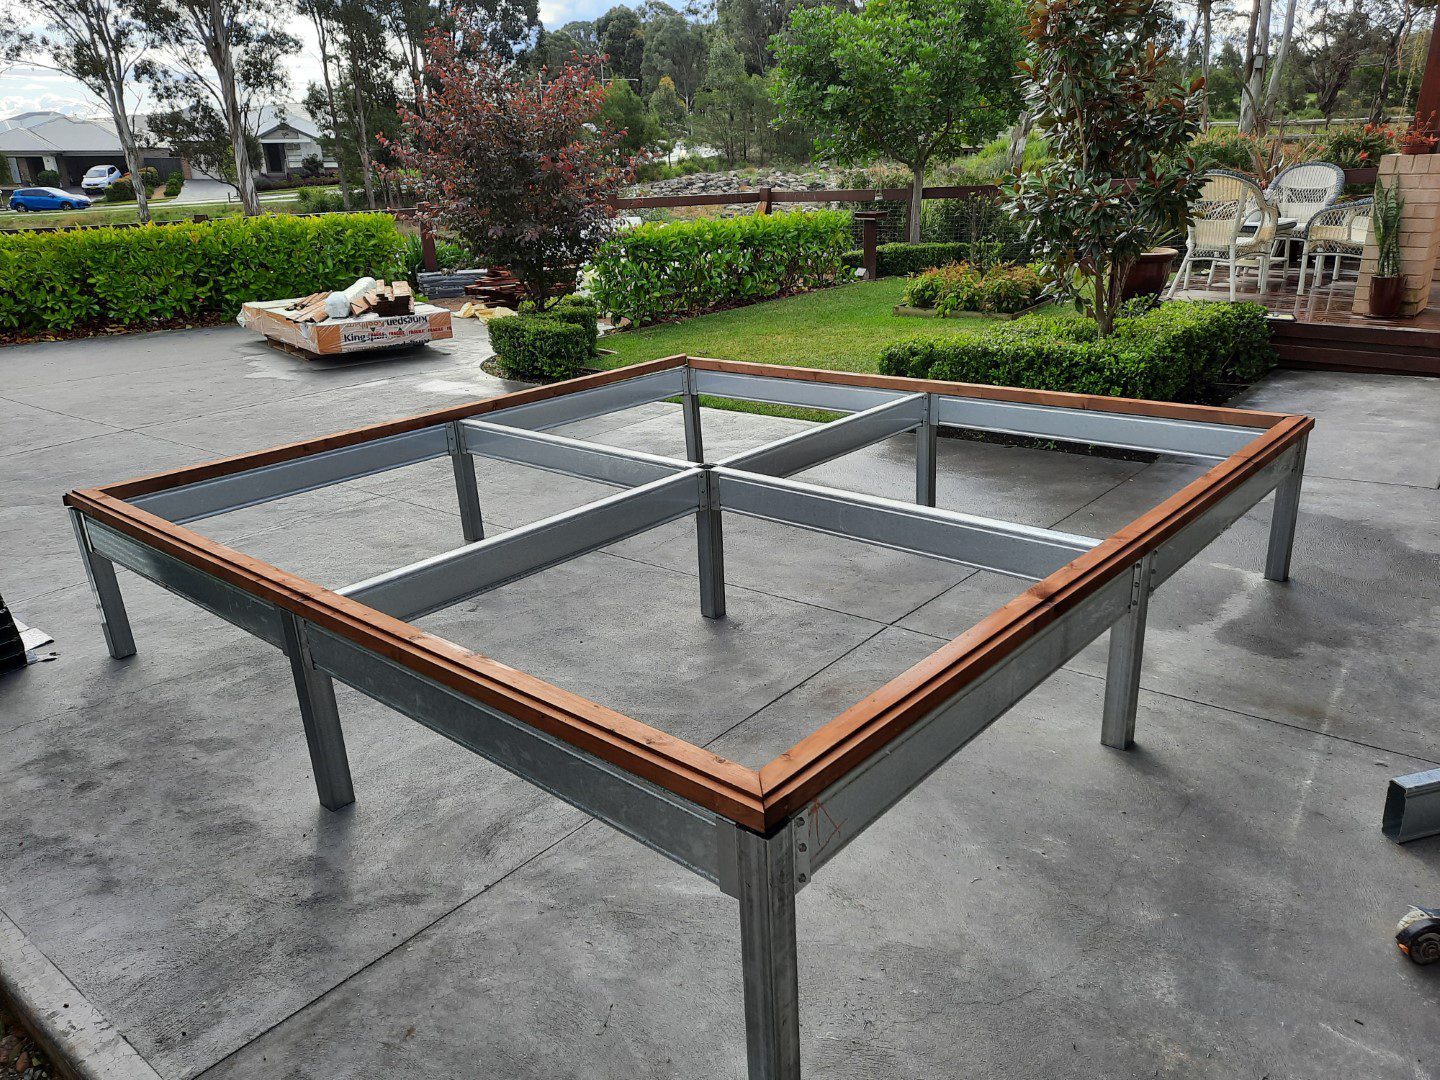
A steel frame is a good option if you wish to move the shed to a different location in the future, as transportation is easier with the steel frame attached to the shed.
The frame can then be bolted to steel or wooden piles, which can then either be concreted into the ground or bolted to another solid surface.
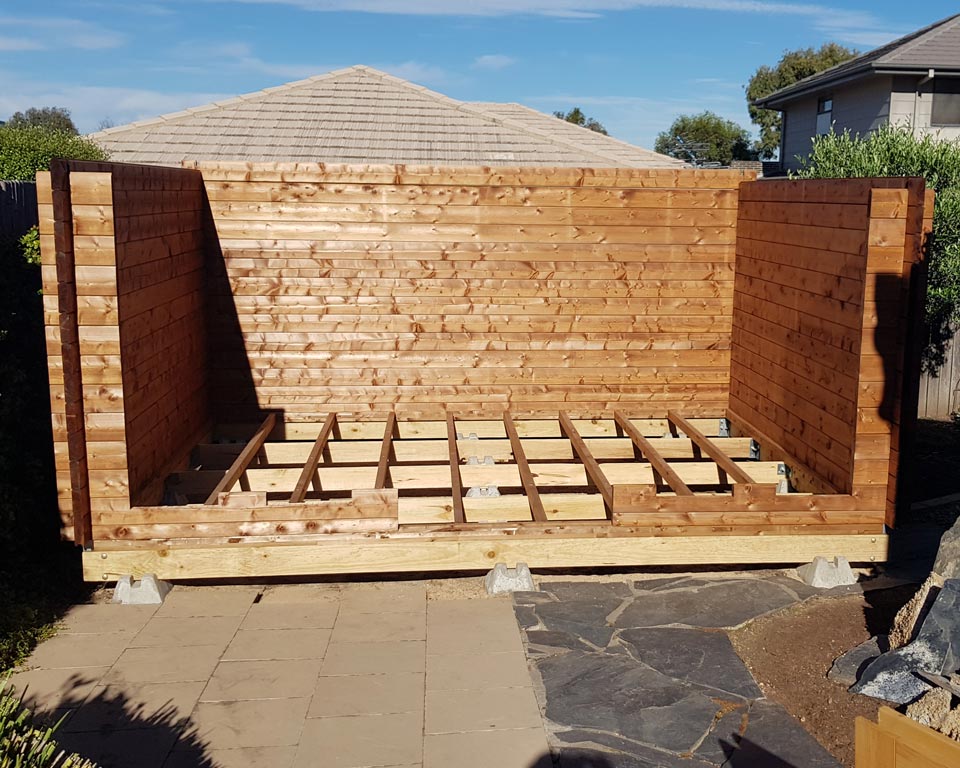
This Ranch has been built on DEKO concrete foundation blocks with treated pine bearers.
Whatever you think may work well for you and your site, remember it is always a good idea to put a little bit of research into what works best for your area. Always make sure your shed foundations are level and take into consideration the size of your shed, your site, what purpose you have for your kitset shed and weigh this up with the cost to make your project a positive experience.
Still have questions? Use the Contact button below to call and have a chat with one of our technical advisors.
2024
SheShed Australia & New Zealand. All rights reserved.